Surface Edit > Create CurvesOnSurface > Project
![]()
Creates curves-on-surface from existing curves and surfaces by projecting the curves onto the surfaces and subdivision objects.
Project Control options
Create
Curves-on-surface – The projection results in curves-on-surface.
Curves – The projection results in free curves.
Curve fit
This option is only available if Create is set to Curves.
If this option is checked, a fitting algorithm is used to fit a free curve to the projected curve-on-surface. You have explicit control on the degree and number of spans through the Degree and Spans sliders.
Match original
This option is only available if Create is set to Curves.
If this option is checked, the edit points from the original curves are projected on the surface(s), and the projected curves interpolate them, resulting in a similar number of spans.
Explicit Control Settings
These options are only available after the Curve fit option has been used to create a free curve.
Degree
Lets you control the degree of the projected curve in Curve fit mode.
Spans
Lets you control the number of spans of the projected curve in Curve fit mode.
Vector Options
X, Y, Z
Specifies a projection vector along that axis.
View
Specifies a vector normal to the current view. The vector is not drawn in the view windows.
If the current view is changed, click Refresh View Vector to update the vector.
Picked
Lets you specify the name of an existing vector in the Picked Vector field, or pick the vector in the view.
Normal
The projection is done along the surface normals instead of using a single vector direction.
Refresh View Vector
This button only appears if View is selected. Click it to update the vector if the view has been modified
Retain Vector
Click this button to create a vector construction object in the view windows. Otherwise, the tool uses the vector direction you specified, but you are not able to see and re-use the vector.
Create Vector
Click this button to create a projection vector.
Click in the view to place the start of the axis, or type the position and press  . Use the vector manipulator to position the vector and click Accept.
Limit Projection
![]()
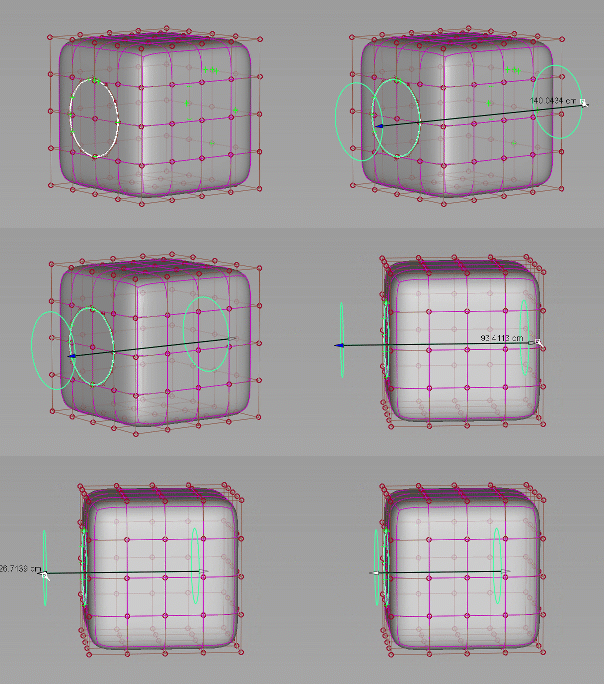
Use this option to limit the projection distance of curves along the specified projection vector (Vector Options) so that the curves do not automatically get projected through the target object.
Limit Projection is useful if you project a curve onto a closed object, and then plan to use the projection for trimming. For example, this allows you to control the distance from the surface or depth of the trim, rather than trimming through both walls of the target object.
Adjust the Positive Distance and the Negative Distance values to specify the projection distance from the current position of the projected curve. Use the in-canvas arrow manipulator or enter values for Positive Distance and Negative Distance in the set measurement units.

Control Options
Create History
Save the history of the projection for later editing. If you turn Create History on, you can modify the curves and surfaces that were used to create the projected curves, and the projected curves will update.
Subdiv Select
![]()
Turn this on when projecting curves onto the surface of subdivision objects. When on, the Project tool behaves the same way with subdivision objects as it does with NURBS surfaces.
Continuity Check
![]()
Adds a surface continuity locator to the aligned edge, giving a pass or fail indication on continuity and showing any discontinuities.
Continuity Check Type
![]()
When Continuity Check is on, you can choose to check for a specific level of continuity. Choose an option from the Continuity Check Type list, which includes G0 Position, G1 Tangent, or G2 Curvature.