Marking Menus
The Marking Menus allow you to speed up interaction by putting the tools you use most into pop-up palettes. These appear at your cursor location so that you reduce the 'mouse travel' needed to go to the menu or palette tools.
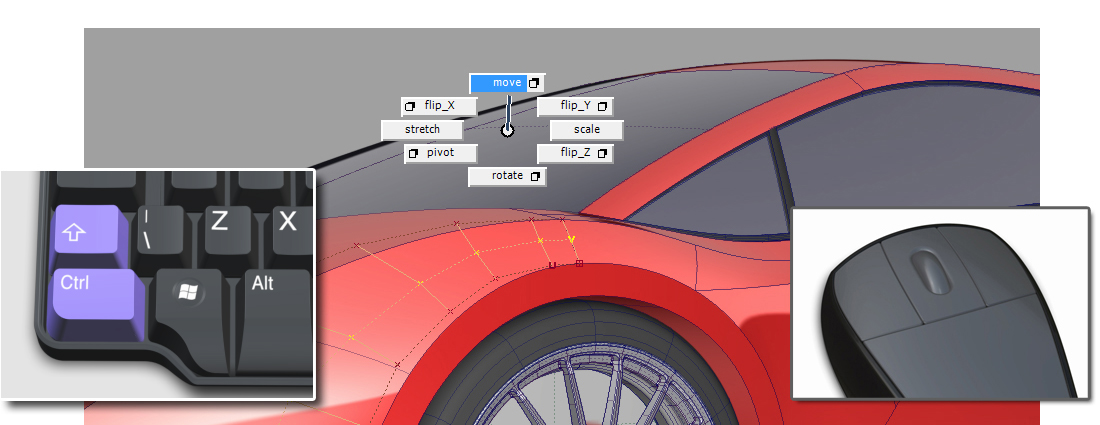
Use CTRL + SHIFT together, and the three mouse buttons to access the three Marking Menus.
Default Marking Menus
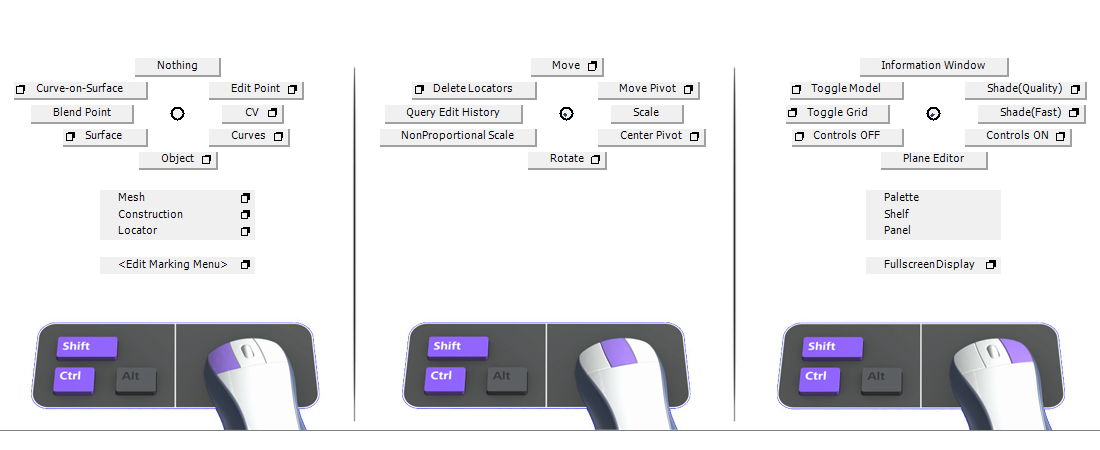
The default Marking Menus provided when you first start Alias provide a large range of tools, some of which you won't need as a beginner. These are offered as one example of how Marking Menus can be used, and most users modify these to customise them to their own settings (see below).
However, if these defaults have been adopted as a company standard, then you may choose to learn and use them.
Simplified Marking Menus
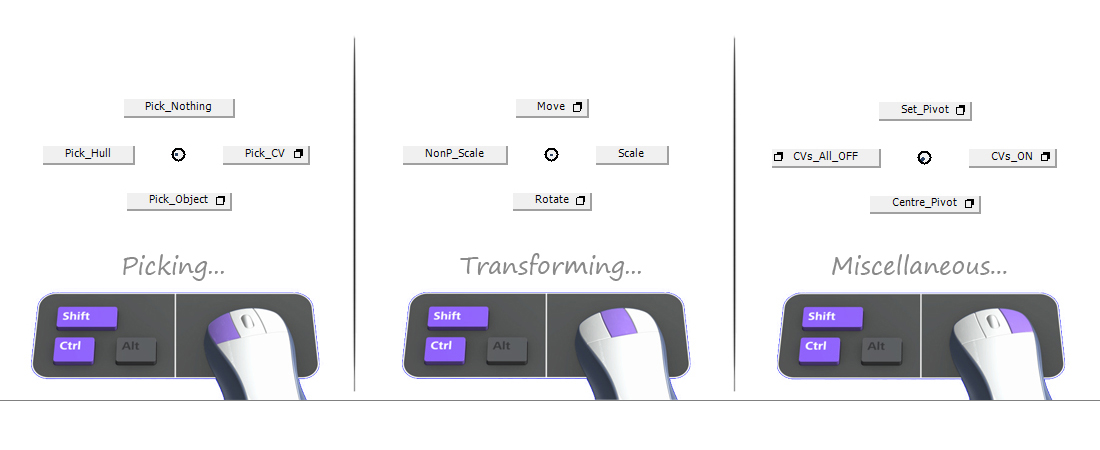
The default shelves can be too complex for beginners, so a smaller set has been provided with these tutorials.
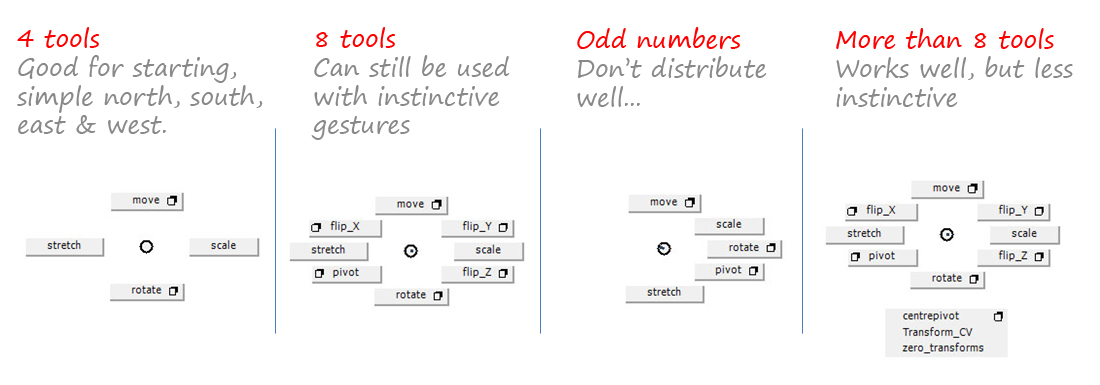
With only four tools on each menu, the mouse gestures are more instinctive (North, South, East and West) and are easier to learn. You are encouraged to modify and add to them gradually as your Alias skills and preferences develop.
Note that Pick > Object and Pick > Nothing (and other key tools) have been left in the same location as the Default Marking Menus. This is because usage becomes very instinctive, and it's difficult to change habits if you temporarily use another person's Marking Menus.
To switch to the simplified Marking Menus:
- Use
Preferences > Interface > Marking Menus to open the Marking Menu shelves.
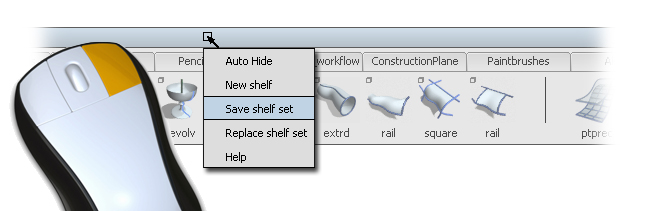
- Use the Right Mouse Button on the title bar to access the drop-down menu. Choose Save Shelf Set to save the default Marking Menus (just name them 'Default_MM' or similar). (You may wish to return to them later.)
-

- Use the drop-down menu again. Choose Replace Shelf Set and navigate to the Fundamentals 2 project. (Use the Go To Current Home option to quickly find the location)
- Select the simplified Marking Menu set from the directory within Fundamentals 2.
- Once these have loaded, choose Save Shelf Set again, and save the new set in the default location as 'Simple_MM' for example.
- Use Preferences > User Preferences > Save to keep both Marking Menu sets available every time you open Alias.
Customizing your own Marking Menus
Marking Menus become really powerful when you tune them to your own workflow by choosing your preferred tools. Each Marking Menu is a shelf (see Alias Quick Tip: Customizing Shelves for more information on shelves), and can be customized as follows:
- Use Preferences > Interface > Marking Menus to open the Marking Menu shelves.
- Middle mouse button to drag a tool from the Palette or the Menu onto the shelf.
- Middle mouse button to drag a tool into the Trash, or to reposition it on the shelf.
- Use CTRL double-click to rename a shelf tab, or a tool.
- Use Preferences > Interface > Shelf Extras to help design the Marking Menus layout. Use the middle mouse button to drag 'spacers' onto the Marking Menus shelf.
The Order of Tools on the Marking Menu

The Number of Tools on the Marking Menu
Saving Modifications to the Marking Menus
Once you have added tools and tabs to the Marking Menus, you must save them:
To save the Marking Menus as the default, AND all other changes to the interface:
- Right-click on the Marking Menus title bar to Save the shelf set and name it.
- Use Preferences > User Preferences > Save.
To save only the changes to the Marking Menus as the new defaults
- Right-click on the Marking Menus title bar to Save the shelf set and name it.
- Use Utilities > Tool Resets to return all other changes to their saved or default settings. Be careful NOTto reset the shelves.
- Use Preferences > User Preferences > Save.
OR...
- Right-click on the Marking Menus title bar to Save the shelf set and name it.
- Exit Alias without saving preferences.
- Start Alias, and load your saved shelf set into the shelves (use Replace Shelf Set from the Marking Menus menu)
- Use Preferences > User Preferences > Save straight away.