Use this procedure to change the default dimensions of a regular window or corner window style.
- Click
 .
. 
- Expand Architectural Objects, and expand Window Styles.
- Select the style you want to edit.
- Click the Dimensions tab.
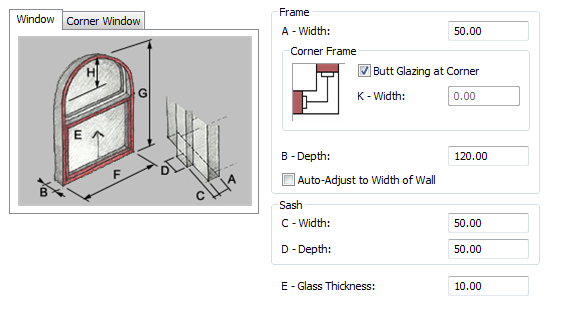
- Click the Window tab for a regular window or the Corner Window tab for a corner window.
- Change dimension values:
If you want to… Then… change the frame width and depth under Frame, enter values for Width and Depth. set the window corners to butt glazing under Frame, select Butt Glazing at Corner. set the window corners to frame and adjust the value of the inside corner frame width under Frame, unselect Butt Glazing at Corner. Specify inside corner frame width value. Only positive values are valid. set the frame width to the wall thickness under Frame, select Auto-Adjust to Width of Wall. change the sash dimensions under Sash, enter values for Width and Depth. change the window thickness enter a value for Glass Thickness. - Click OK. Note: For corner window with butt glazing on, only Picture, Glider, and Pass Through window types are supported. If you select any other window type, a picture window is created. If the corner window with butt glazing does not support a shape you have selected, a rectangular shape window is created by default.