Use these procedures to perform the following modifications for custom stairs:
- Edit the faces of treads and risers
- Match treads and risers to source components
- Convert a tread to a landing and back again
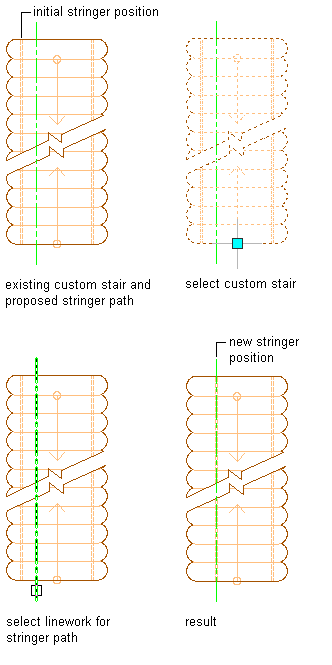
- Replace an existing stringer path with a new stringer path by selecting linework
Edit a Custom Stair Tread
-
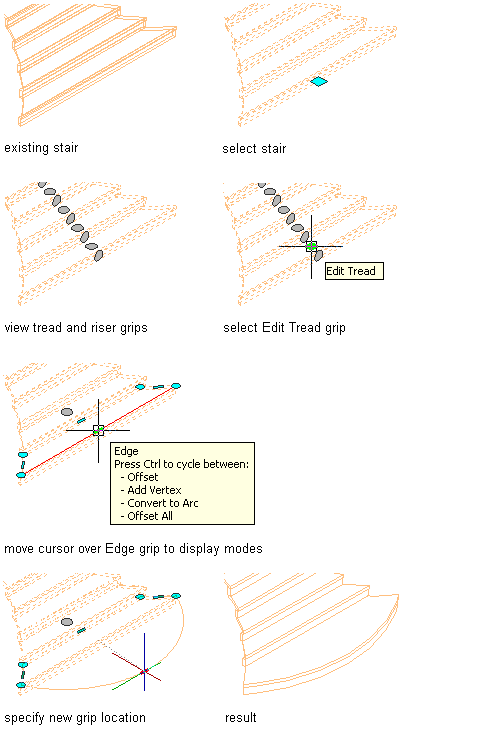
Use this procedure to convert the edge of a custom stair tread to an arc.
Select the custom stair that you want to change and click
 .
. 
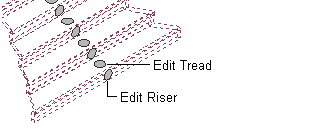
A grip appears at the midpoint of each tread and riser.
- Select the bottom Edit Tread grip.
You can select either edge or vertex grips to modify the face of the tread. The following grips are displayed for editing the face of a custom stair tread:

- Move the cursor over the front Edge grip.
A tooltip with the following options is displayed:
- Offset
- Add Vertex
- Convert to Arc
- Offset All
- Select the Edge grip, and press Ctrl twice to cycle to the Convert to Arc option.
- Specify a new location for the Edge grip.
Match Tread/Riser
-
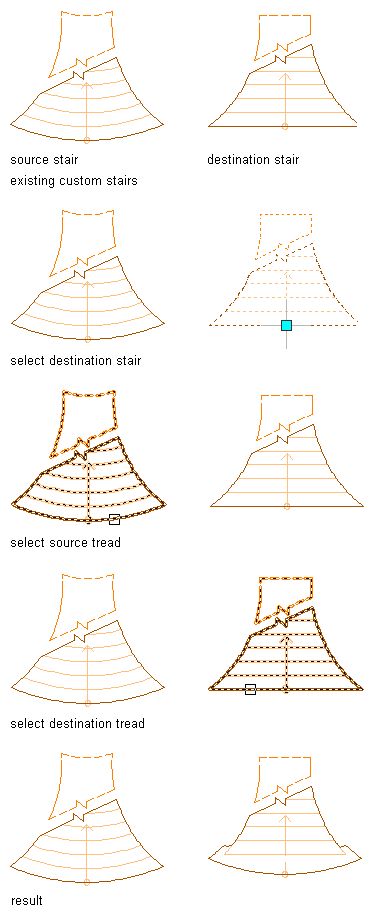
Use this procedure to modify a custom stair tread by matching an existing tread on another custom stair.
Create 2 custom stairs: one with a source tread to match, and one as the destination custom stair. - Select the custom stair that you want to change, and click

 .
. 
- Specify tread to match.
You have the option of matching a tread, a riser, or both.
- Select the tread to match on the source custom stair.
- Select the tread on the destination custom stair to replace.
Toggle Tread/Landing
-
Use this procedure to convert a custom stair tread to a landing, or convert a custom stair landing to a tread.
Select the custom stair that you want to change, and click
 .
. 
- Select the tread to convert to a landing.
When you use a stair style that has defined stringers, you can see that the stringer is parallel to the landing and sloping for the duration of the tread.
Note: This feature does not override the Terminate with option. If Terminate with Landing is specified, you cannot use this feature to convert the landing to a tread.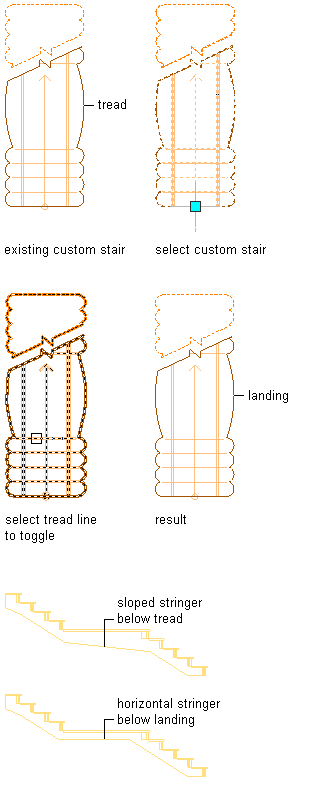
Replace Stringer Path
-
Use this procedure to replace an existing custom stair stringer path with a new stringer path by selecting linework. The linework must occur within the stair to be valid for selection as a replacement stringer path, and must follow the entire length of the stair.
Select the custom stair that you want to change, and click
 .
. 
- Specify the left, right, or center stringer path (depending on the custom stair configuration) to replace.
- Select the linework to represent the new stringer path.
