Use this procedure to publish data to MapGuide .
.
- Click

 Publish
  To Map Guide.
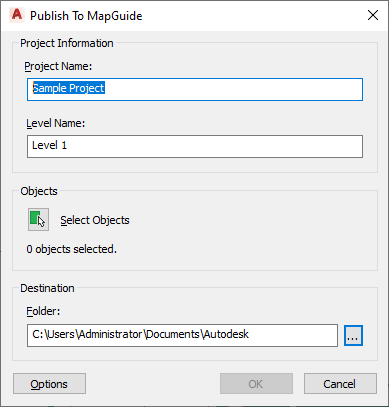
If the drawing from which you want to publish objects is part of a building project, the project name and level assignment of the drawing display in the Publish to MapGuide dialog box.
If the drawing is not part of a building project, the name of the drawing and “Level 1” display by default. You can change these entries.
Note: The project name that you enter here is not used as the name of the source MapGuide project folder and project files. The name of the project source folder and project files is created from the name of the drawing. - Under Objects, click
 .
. - Select the objects you want to publish, and press Enter.
- Under Folder, select the location for the project files.
- Click Options.

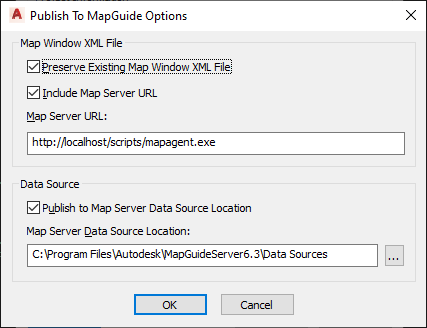
- Specify additional export options:
If you want to... Then... preserve the existing Map Window XML file select Preserve Existing Map Window XML file. This option will prevent an existing MWX file in this location from being overwritten. This will allow users to preserve any changes they made to the MWX file (secondary data source table selections, layer properties, or themes) when updating or re-publishing the underlying data or geometry. include an URL to a Map Server select Include a Map Server URL, and enter a server address. publish your data to a Map Server data location select Publish to Map Server Data Source Location, and browse for a location. - Click OK twice.
Depending on your selection set, the export may take extra time. A progress bar shows you the state of the export.