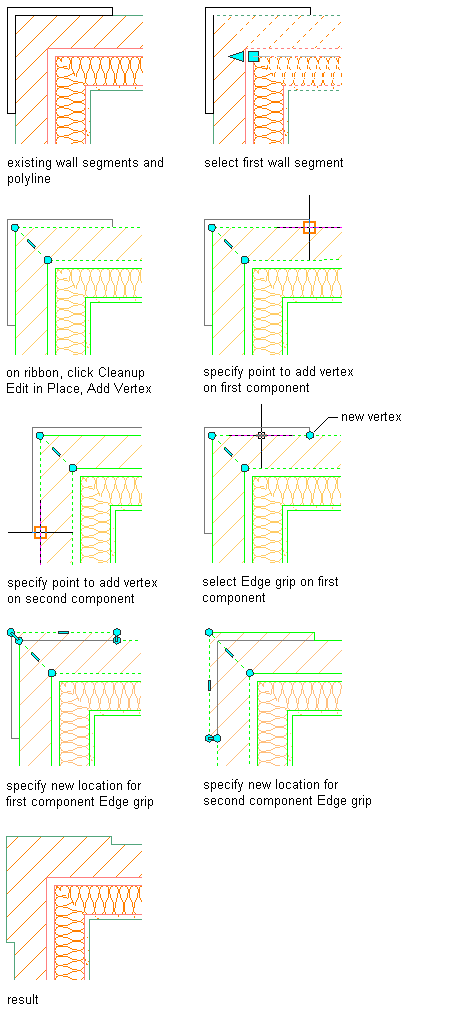
Use this procedure to modify a wall intersection by adding a vertex on or near to a component edge. By adding vertices to a component edge, you have more options for editing its shape.
- Select the wall segment with the wall intersection to modify.
- Click

 .
. 
Vertex and Edge grips display for the first wall component, based upon the wall style index.
- Select the component to which you want to add a vertex.
You can only add vertices to one component at a time. Press ESC to clear component selection.
- Click

 .
. 
- Specify a location on or near the selected component edge for the new vertex.
- Exit the edit-in-place session:
If you want to... Then... Discard any changes you made during the edit-in-place session click 

 .
. Save any changes you made during the edit-in-place session click 

 .
. In the following example, new vertices are added to components, then Edge grips are used to modify a brick veneer corner condition.
