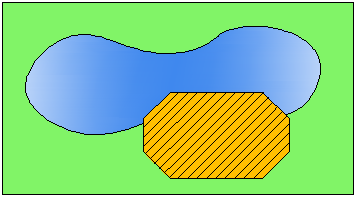
Choose from:
- Predefined hatch patterns. Choose from over 70 ANSI, ISO, and other industry-standard hatch patterns, or add hatch pattern libraries supplied by other companies.
- User-defined hatch patterns. Define your own hatch patterns based on the current linetype, with spacing, angle, color, and other properties you specify.
- Custom hatch patterns. Hatch patterns are defined in the acad.pat and acadiso.pat (acadlt.pat and acadltiso.pat for AutoCAD LT) files. You can add custom hatch pattern definitions to these files.
- Solid fill. Fill an area with a solid color.
- Gradient fill. Fill an enclosed area with a color gradient. A gradient fill can be displayed as a tint (a color mixed with white), a shade (a color mixed with black), or a smooth transition between two colors.

Gradients that mimic colors displayed on a cylinder, a sphere, or other shapes are available.
Hatch Boundaries and Associativity
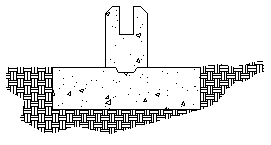
In the following illustration, the concrete hatches are bounded, while the earth hatches are unbounded.

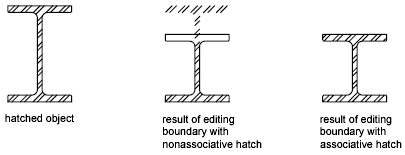
By default, bounded hatches are associative, which means that the hatch object is associated with the hatch boundary objects: changes to the boundary objects are automatically applied to the hatch.

Nonassociative hatches are not updated when their original boundary is changed.
Hatch associativity is turned on by default and is controlled by the HPASSOC system variable. You can change hatch associativity using the Associate button on the Options palette, the Properties palette, or the Hatch Edit dialog box.
Current Layer Override
By default, all new objects are created on the current layer. For new hatch objects, you can specify a default layer that's different than the current layer by specifying the layer with the HPLAYER system variable.