Keeping your drawings clean and tidy doesn't just make them more visually appealing, it can also keep the file size smaller and help you avoid mistakes.
AutoCAD has cleanup tools such as PURGE and OVERKILL that remove unused or duplicate items from a drawing and help keep your drawing file clean from clutter.
Purge
Purge removes unused items or named objects, such as block definitions and layers, from the drawing.
Purge is the term used to describe removing a definition of a non-graphical object rather than erasing a graphical object. For example, you might erase all the graphical objects in your drawing that use a dashed linetype, but that still leaves the linetype definition in the drawing. Similarly, erasing all block references of a fixture still leaves the block definition for that fixture block in the drawing.
Purging Unused Items
Let's try purging unused items. You may already have a drawing with purgeable items, but if not, you can easily create some unused layers.
- Click . Find
- In the Layer Properties manager, click New Layer several times to create a few new layers.

Since these layers don't have any objects on them, they are unused and can be purged.
To purge unused items:
- Click
.
Find
The Purge dialog box opens. There are two viewable lists:
- Purgeable Items. Includes all named items not used
- Find Non-Purgeable Items. Includes all named items in use
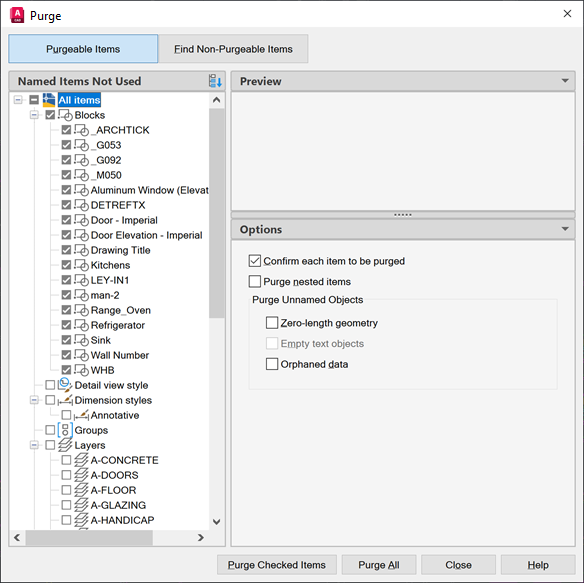 Note: If you're using AutoCAD or AutoCAD LT 2019 or earlier, the Purge dialog box has a different appearance, but the features and steps are similar. The main differences are the inclusion of a preview and details about a selected named object in later releases.
 - Browse the items in the Named Items Not Used list. When you select an item, you'll see a preview.
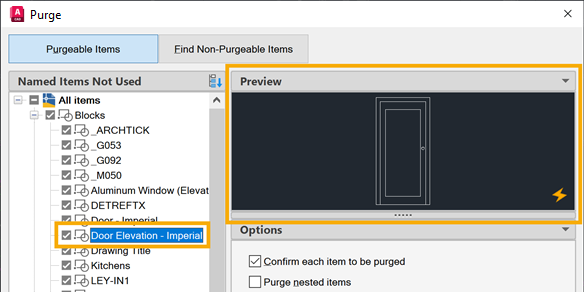
- Click the checkbox next to an item to add or remove it from the list of items you want to purge.
Note: Select or clear the item itself in earlier releases.
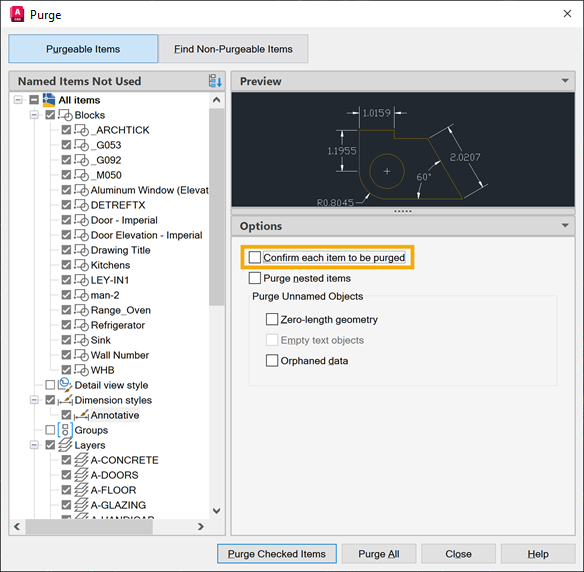
- Click Purge Checked Items.
You can also skip the process of selecting the items to purge by selecting Purge All, which purges all unused items.
If you have Confirm Each Item to be Purged selected, you are prompted to confirm each item that's being purged. Clear this option to skip the confirmation step.
Options
Purge Nested Items
Removes unused named objects from the drawing even if they are contained within or referenced by other unused named objects.
Purge Unnamed Objects
- Zero-length geometry. Deletes geometry of zero length, including lines, arcs, circles, and polylines.
- Empty text objects. Deletes text objects that are blank or contain only spaces without any text.
- Orphaned data. Performs a drawing scan and removes obsolete DGN linestyle data when you open the Purge dialog box.
Find Non-Purgeable Items
Maybe there's an item you would like to purge, but it's not showing up in the Named Items Not Used list. Use the Find Non-Purgeable Items list to view named items in use in the drawing.
- Click . Find
- Click Find Non-Purgeable Items.
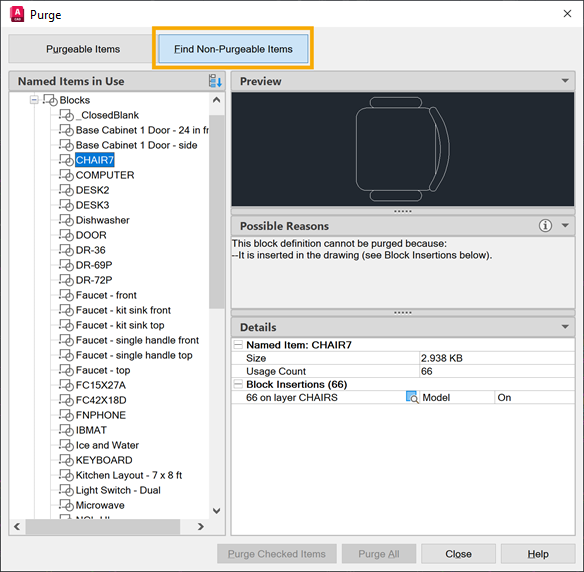
- Browse the items in the Named Items In Use list.
When you select an item, you'll see a preview and a list of possible reasons why the object can't be purged.

In Details, you can see the item size and the number of times it appears in the drawing. To select the items in the drawing, click the Select Objects icon next to the item you want to select in the drawing.

Clicking Select Objects closes the Purge dialog box and selects the objects in the drawing.

Overkill
When drafting in AutoCAD, it's quite easy to inadvertently create overlapping, duplicate objects in your drawing. These duplicate objects aren't just visually unappealing. They can increase file size, cause trouble when trying to select or modify objects, or might cause errors when exporting a drawing. Overlapping lines can even cause manufacturing machines to create improper cuts.
OVERKILL removes duplicate or overlapping lines, arcs, and polylines, and also combines those that are partially overlapping or contiguous.
The following changes can be made to geometric objects in a drawing:
- Duplicate copies of objects are deleted
- Arcs drawn over portions of circles are deleted
- Lines at the same angle that partially overlap are combined into a single line
- Duplicate line or arc segments are deleted
- Overlapping and zero-length polyline segments are deleted
Delete Duplicate Objects using Overkill
Let's try it out. Use one of your own drawings, or use the sample drawing, Floor Plan Sample.DWG, which is shown in the following sections.
- Click . Find
- Enter "all" at the Command prompt to add all objects in the drawing to the selection set.
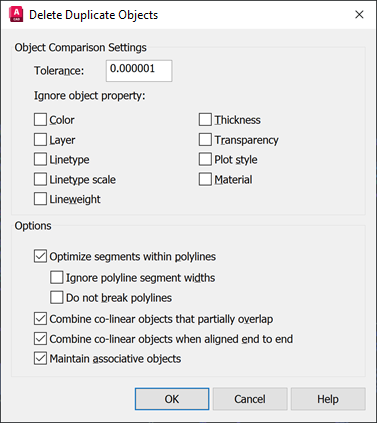
The Delete Duplicate Objects dialog box opens. For now, let's use the default options.
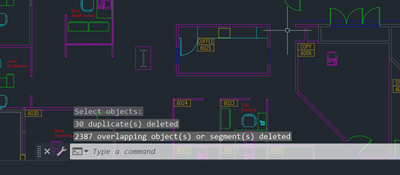
- Click OK.
This drawing looks the same as it did before. Even though none of the untidiness was visible, 30 duplicate objects and 2,387 overlapping objects and line segments were deleted.
Overkill Options and Settings
Let's try it again, but this time we'll use some of the options in the Delete Duplicate Objects dialog box.
Ignore Object Property
By default, OVERKILL doesn't act on objects that have differentiating properties. For example, if objects are identical but are on a different layer or have a different lineweight, those objects will not be treated as duplicate. However, you can change the settings to ignore certain properties.
In this example, there are three identical line segments, except they are each assigned a different color. Selecting the Color option will remove all duplicate objects.
The following object properties can be ignored during comparison:
- Color
- Layer
- Linetype
- Linetype scale
- Lineweight
- Thickness
- Transparency
- Plot style
- Material
Optimize Segments Within Polylines
In this example, a line is overlapping a polyline. If Optimize Segments within Polylines is selected, using OVERKILL on these objects deletes the line object.
Combine Co-linear Objects When Aligned End to End
With this option selected, line segments that are aligned end to end will be joined to create a single line.