Have you ever wanted to create a new drawing file in AutoCAD and have all your text styles, dimension styles, layers, units, and other drawing settings already setup and ready to go? We've heard some customers say the way they start a new drawing is to open an existing drawing, save the drawing with a new name, and delete the geometry. This is time-consuming and can lead to outdated or broken standards.
Using a drawing template with predefined drawing settings is an efficient way to start a new drawing and can help enforce drawing standards for your office.
What Can Be Saved in a Template
Most drawing settings and named style information that are used when you start a new drawing can be saved in a template. There might be drawings where you don't use all the linetypes or styles in the template, and that's ok, but the drawing template should include the standards you need to get started.
Here's some of drawing settings that can't be stored in a drawing template:
- User interface elements, such as the Quick Access toolbar or ribbon changes
- Custom hatch patterns
- Custom applications, action macros, scripts, AutoLISP programs
- Shape files
Using Existing Templates
Autodesk provides several templates that are installed with AutoCAD. These templates can be accessed from the Start tab on the Templates drop-down list.
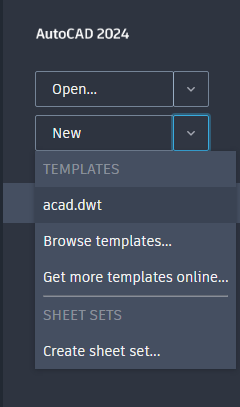
While these templates are a good place to start, chances are they're not going to have the settings you might need.
The templates installed with AutoCAD are located:
c:\Users\<user name>\AppData\Local\Autodesk\AutoCAD 2021\R24.0\enu\Template\
Opening and Saving a Template
To make a change to a template, you'll need to open it. Opening a template is like opening a drawing.
-
Choose Open from the Quick Access Toolbar.

Or at the Command prompt type, open.
- In the Files of type drop-down list, choose Drawing Template (*.dwt).
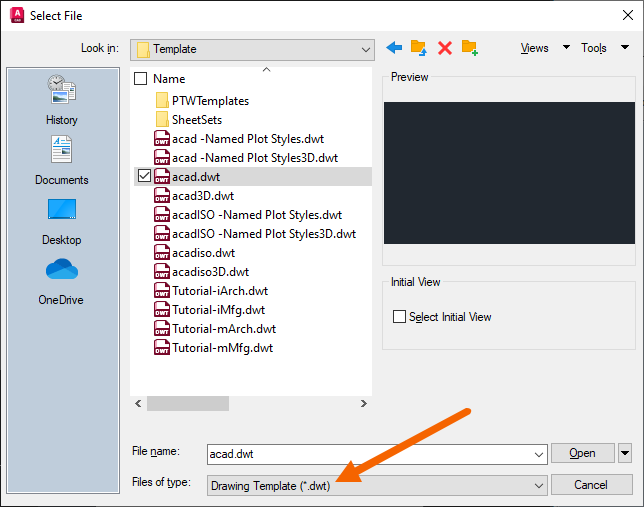
You should see the templates installed with AutoCAD.
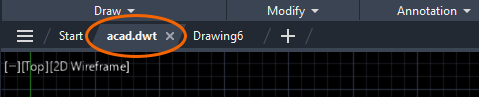
- Select a template and click Open. For this exercise, we'll select acad.dwt.
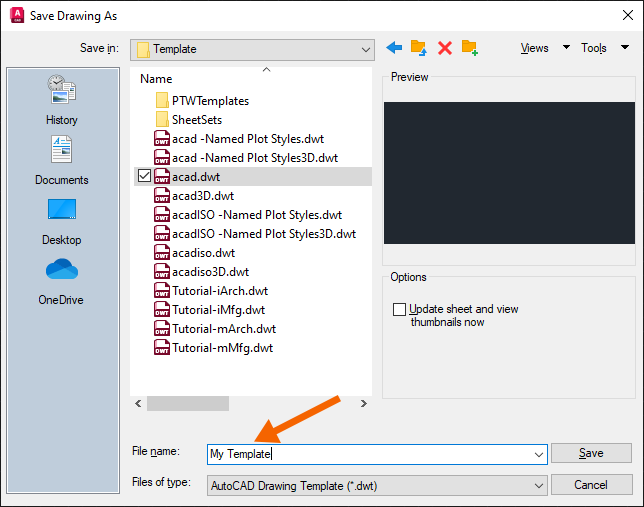
- For this exercise, I'll create a new template by clicking Save As and give the template a name,
MyTemplate, and click Save.
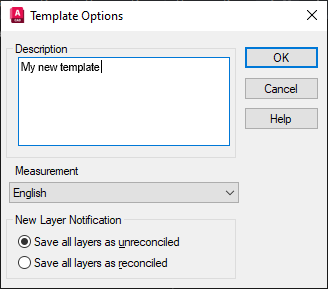
- In the Template Options dialog box, enter a description for the template and leave the rest of the defaults as they are and click OK.

Changing the Default Template for a New Drawing
Now that you have a template created and saved, let's start using it. By default, when you start a new drawing, AutoCAD creates the drawing from the template specified in the Default Template File Name for QNEW, in this case, acad.dwt. Let's change this setting to start a new drawing using the new template.
- In the drawing window, right-click and choose Options.
Or at the Command prompt type, options.
- Click the Files tab and expand .
- Select the file path and choose Browse.
Or double-click the file path to browse.
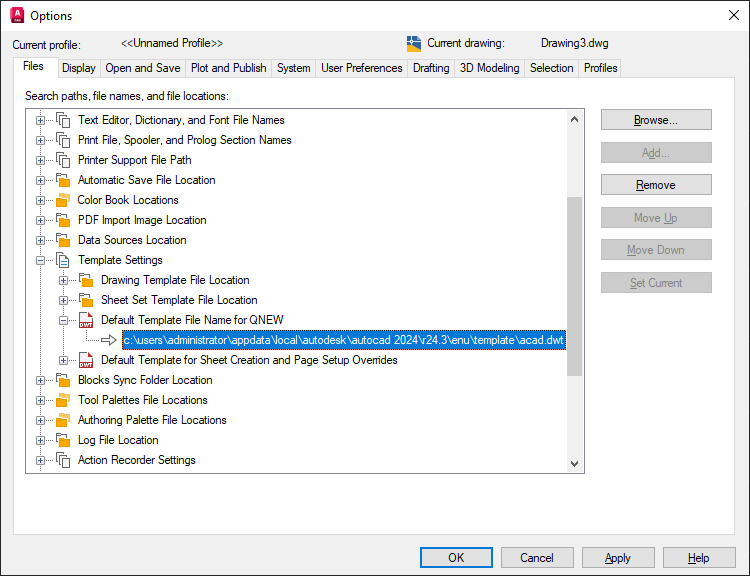 Note: None is the default option for Default Template File Name for QNEW. When it's set to None the QNEW command acts like the NEW command.
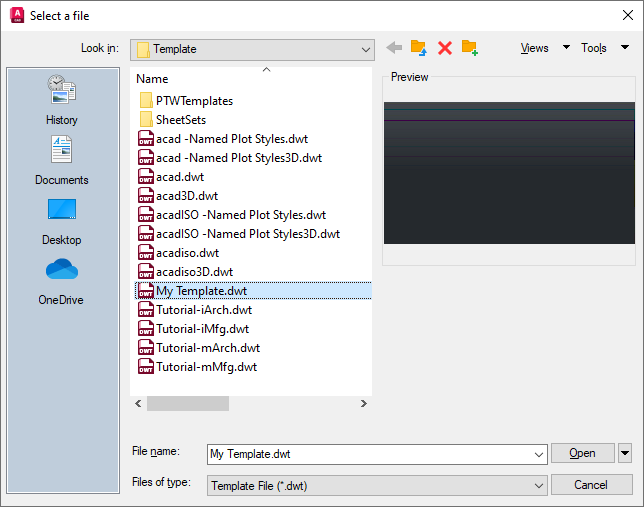
 - From the Select a file dialog box, browse to and select the template file you want AutoCAD to use as the default for a new drawing, in this case
MyTemplate, and click Open.
- Click OK to close the Options dialog box.
Now when you start a new drawing, AutoCAD will use MyTemplate.
Editing and Testing Template
So far, we talked about where the templates are stored, how AutoCAD uses a template when you open a new drawing, and how to create a new template from one of the provided sample templates.
Now let's get into editing a template. Editing a template is like editing a drawing. Follow the steps above to open MyTemplate.
Think about what you would like to have already setup when you create a new drawing and consider adding the drawing settings to MyTemplate.
Here are a few drawing settings that might be useful:
- Turning the grid display off
- Changing the drawing window color
- Adding standard layers
- Creating text and dimension styles
- Having a title block available to insert
- Setting drawing units
All of these are drawing settings that can be added to a template so the next time you create a new drawing it's ready to go.
An easy way to test the changes to the template is to first save it, then click the + on the drawing tabs to create a new drawing. Keeping the template open for testing makes changes to the template very quick.

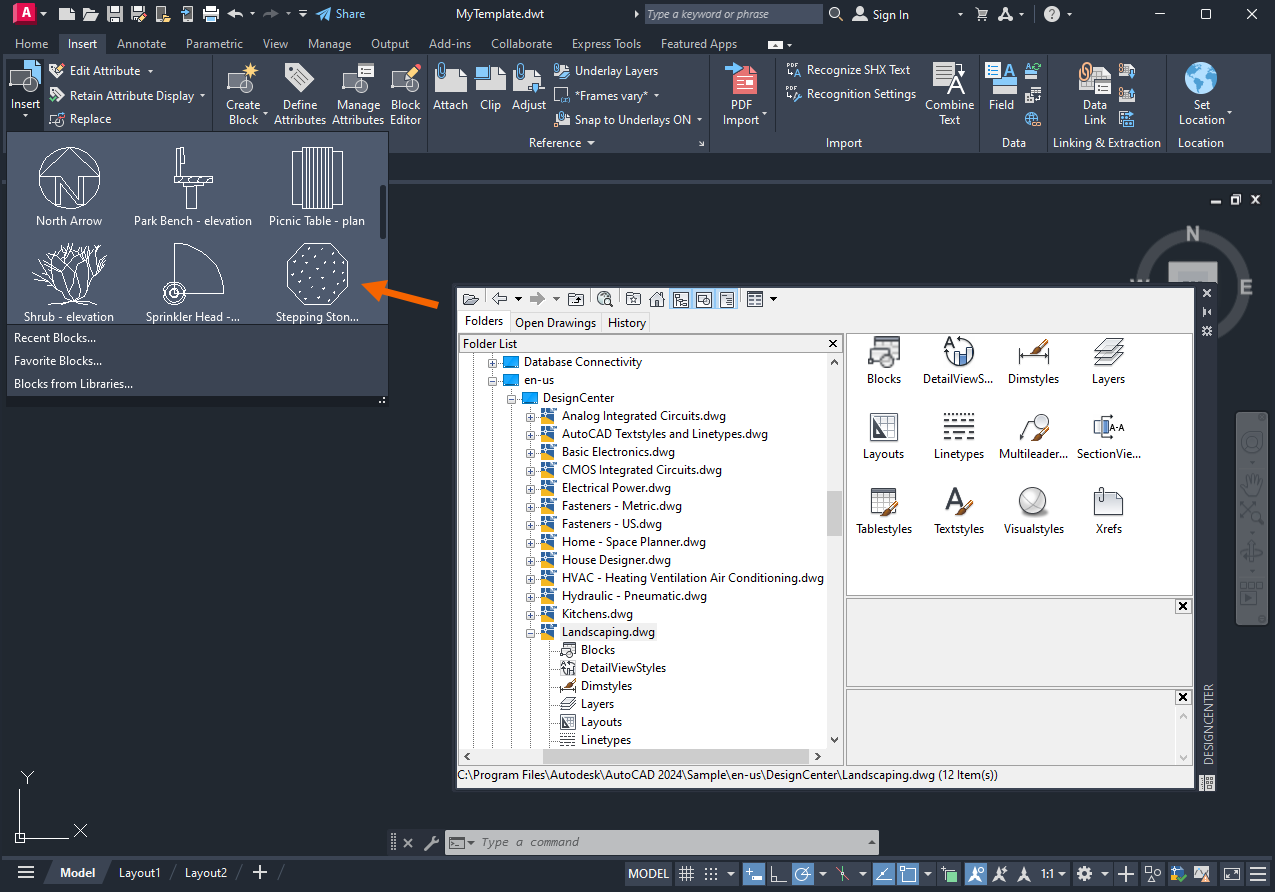
Import Styles and Layers from DesignCenter
DesignCenter can be used to add layers, named styles, and blocks, to a template.
- In this exercise, open MyTemplate.dwt.
- Click
Find
Or at the Command prompt, type adcenter.
- In DesignCenter, navigate to
Landscaping.dwg and drag the drawing into the drawing area of the template.
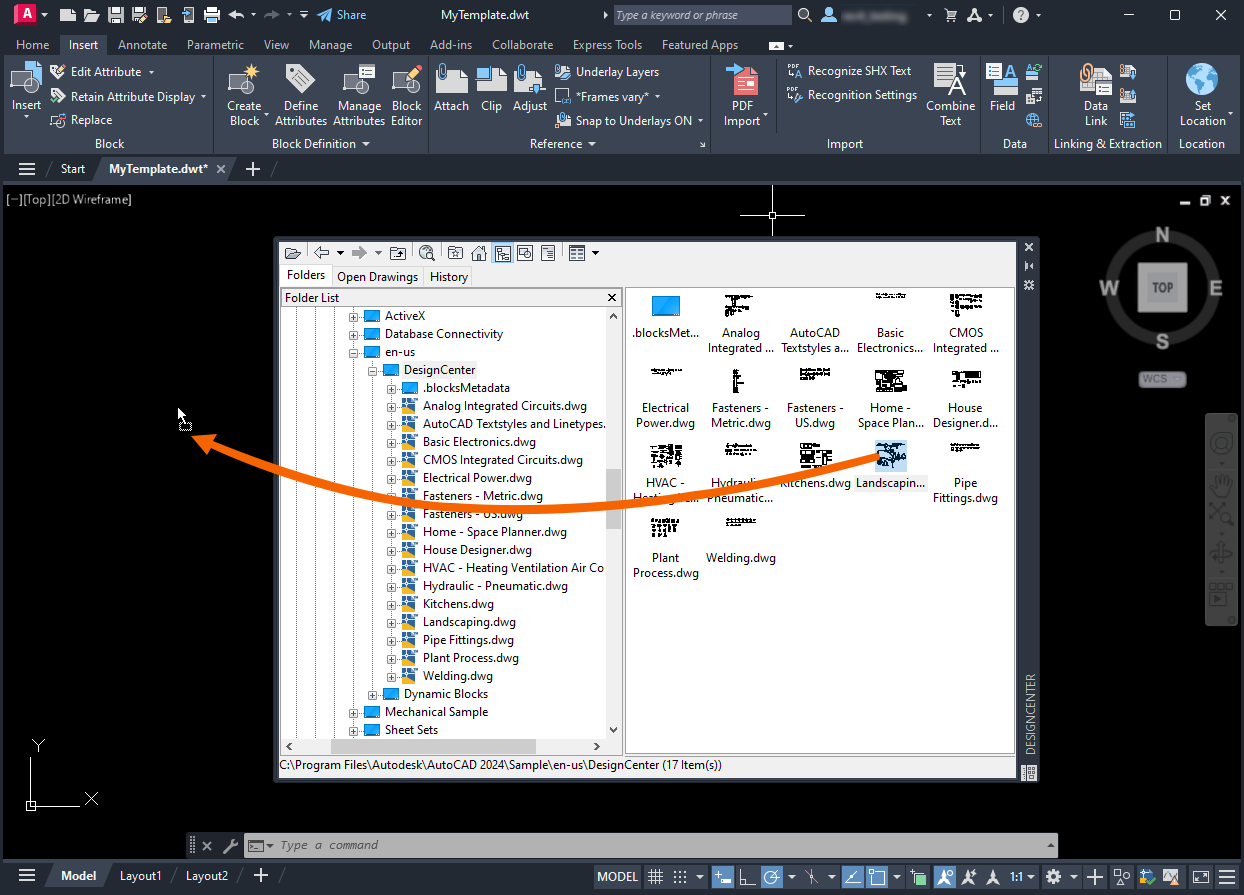
Add the layers, blocks, and styles from Landscaping.dwg to the template.
Now the named styles, blocks, and drawing settings that are defined in Landscaping.dwg are now available in MyTemplate.
Create a new drawing to test MyTemplate and verify the blocks are available in the new drawing.
What if you need to go from an updated template to an existing drawing? Let's say you want to import some named styles, blocks, and drawing settings from your updated company template. These styles were added to the template after you started your drawing, so they weren't brought in from the template.
In a previous Have You Tried, we talked about adding named styles from an updated template into an existing drawing. That information can be found in the Have You Tried: Import Styles under the Import Multiple Styles section.
Templates can be a powerful tool for enforcing standards in your office and a time-saver when creating new drawings. They are not difficult to setup and can be easily created, edited, and shared as office standards change.
Template Commands and System Variables
Here are the most commonly used commands and system variables related to templates.
| Commands | Description |
|---|---|
| ADCENTER | Manages and inserts content such as blocks, xrefs, and hatch patterns. |
| NEW | Creates a new drawing. |
| PURGE | Removes unused items, such as block definitions and layers, from the drawing. |
| QNEW | Starts a new drawing from a specified drawing template file. |
| UNITS | Controls the precision and display formats for coordinates, distances, and angles. |
| System Variable | Description | Default Value | Saved In |
|---|---|---|---|
| AUNITS | Sets units for angles. | 0 | Drawing |
| AUPREC | Sets the display precision for angular units and coordinates. | 0 | Drawing |
| LUNITS | Sets the linear units format for creating objects. | 2 | Drawing |
| LUPREC | Sets the display precision for linear units and coordinates. | 4 | Drawing |
| MEASUREMENT | Controls whether the current drawing uses imperial or metric hatch pattern and linetype files. | 0 (imperial) or 1 (metric) | Drawing |