Create basic geometric objects such as lines, circles, and hatched areas.
You can create a lot of different types of geometric objects in AutoCAD, but you only need to know a few of them for most 2D drawings.
Lines
The line is the most basic and common object in AutoCAD drawings. To draw a line, click the Line tool.
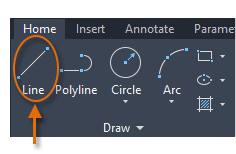
Alternatively, you can type LINE or just L in the Command window, and then press Enter or the Spacebar.
Notice the prompt in the Command window for a point location.

To specify the starting point for this line, you would type in the Cartesian coordinates 0,0. It's generally a good idea to locate one corner of your model at 0,0, which is called the origin point. To locate additional points, you could specify additional X,Y coordinate locations in the drawing area, however more efficient methods for specifying points are available, and will be presented in the Precision topic.
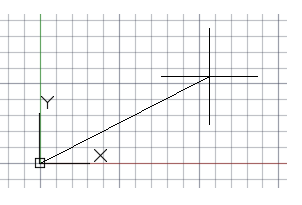
After you specify the next point, the LINE command automatically repeats itself, and it keeps prompting you for additional points. Press Enter or the Spacebar to end the sequence.
Grid Display
Some people like working with grid lines as a reference, while others prefer working in a blank area. To turn off the grid display, press F7. Even with the grid turned off, you can force your cursor to snap to grid increments by pressing F9.
Lines as Construction Aids
Lines can serve as reference and construction geometry such as
- Property line setbacks
- The mirror line of a symmetrical mechanical part
- Clearance lines to avoid interferences
- Traversal path lines
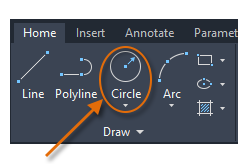
Circles
The default option of the CIRCLE command requires you to specify a center point and a radius.
Additional circle options are available from the drop-down:

Alternatively, you can enter CIRCLE or just C in the Command window and click to choose an option. If you do, you can specify a center point, or you can click one of the highlighted command options as shown below.

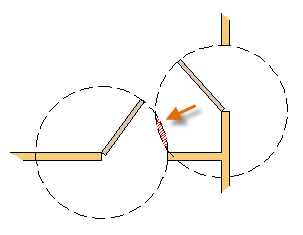
Circles can be useful as reference geometry. For example, you can see that the two doors in the illustration can interfere with each other.
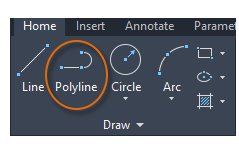
Polylines and Rectangles
A polyline is a connected sequence of line or arc segments that is created as a single object.
Use the PLINE command to create open or closed polylines for
- Geometry that needs to have fixed-width segments
- Continuous paths for which you need to know the total length
- Contour lines for topographic maps and isobaric data
- Wiring diagrams and traces on printed circuit boards
- Process and piping diagrams
Polylines can have a constant width or they can have different starting and ending widths. After you specify the first point of the polyline, you can use the Width option to specify the width of all subsequently created segments. You can change the width value at any time, even as you create new segments.

Here is an example of a printed circuit board in which the traces were created with wide polylines. The landing pads were created with the DONUT command.

Polylines can have different starting and ending widths for each segment as shown here:

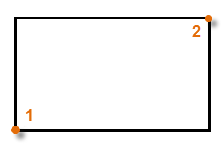
A fast way to create closed rectangular polylines is to use the RECTANG command (enter REC in the Command window).
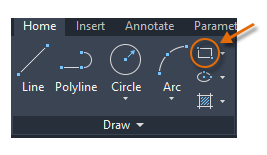
Simply click two diagonal points for the rectangle as illustrated. If you use this method, turn on grid snap (F9) for precision.
The User Coordinate System (Optional)
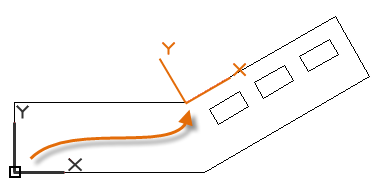
The user coordinate system (UCS) icon indicates the direction of the positive X and Y axis for any coordinates that you enter, and it also defines the horizontal and vertical directions in a drawing. In some 2D drawings, it can be convenient to click and place the UCS to change the origin point and the X or Y axis.
For example, by reorienting the UCS, you can create rectangles that are automatically aligned with the X axis as shown.
To restore the user coordinate system to its original location, enter UCS in the Command window and press Enter to specify the default <World> option.
Hatches and Fills
In AutoCAD, a hatch is a single, compound object that covers a specified area with a pattern of lines, dots, shapes, a solid fill color, or a gradient fill.

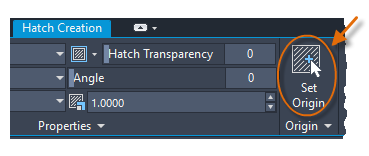
When you start the HATCH command, the ribbon temporarily displays the Hatch Creation tab. On this tab, you can choose from more than 70 industry-standard imperial and ISO hatch patterns, along with many specialized options.
The simplest procedure is to choose a hatch pattern and scale from the ribbon, and click within any area that is completely enclosed by objects. You need to specify the scale factor for the hatch to control its size and spacing.
After you create a hatch, you can move the bounding objects to adjust the hatch area, or you can delete one or more of the bounding objects to create partially bounded hatches:
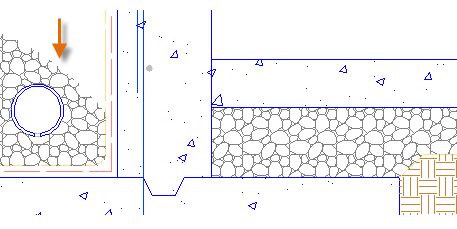
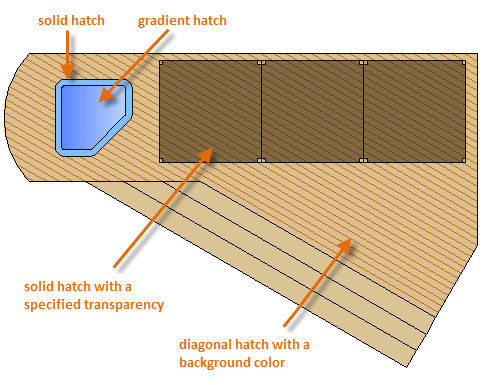
Here are some examples of how you can use solid-fill hatches:
For overlapping hatches, fills, wide polylines, and text objects, use the DRAWORDER command to determine which objects are on top or below the others. For example, you probably want the yellow highway to cross the blue river rather than the other way around.

You can access several draw order options from the Modify panel on the ribbon. Click to expand the Modify panel, and then click the down-arrow as shown below.
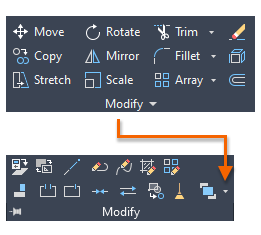
The drop-down list displays options for selected objects plus additional options that apply to all objects of a certain type, such as text.