Select a list of layouts to upload as PDFs to Autodesk Docs.
- Click
.
Find
Or enter PUSHTODOCSOPEN at the command prompt.
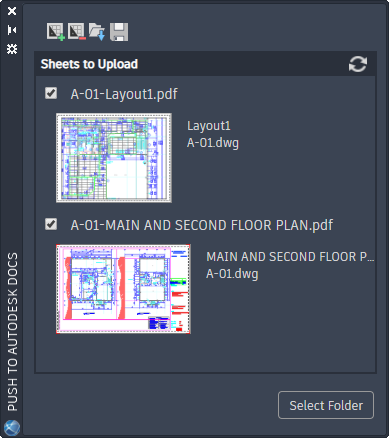
The Push to Autodesk Docs palette opens. By default, all layouts for the current drawing are added to the palette and are selected.
- Create a list of sheets available to upload to Autodesk Docs using these icons:
 - select a drawing to add the layouts to the list of available sheets
 - remove the selected layouts from the list of sheets
 - load a previously saved list of sheets
 - save the current list of sheets to a file for easy retrieval
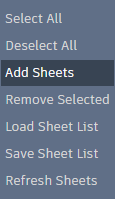
Note: Right-click for a shortcut menu.
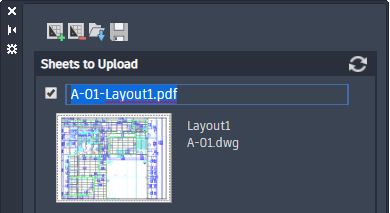
- Edit the PDF file names as needed. By default the PDF file name is
<drawing name>-<layout name>.PDF.

- Select or clear the check boxes to define which sheets you want to upload as PDFs to Autodesk Docs.
- Click Select Folder.

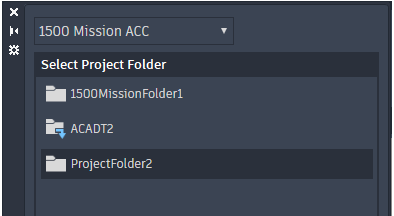
- Select the project from the drop-down menu that you want to upload the AutoCAD drawings as PDFs to.
- Navigate to and select the folder within project.
-
 Single click a folder name to select a folder for upload.
Note: Do not double-click a folder to select it as the upload location.
 -
 Indicates the folder contains sub-folders. Double-click to see a list of its sub-folders.
-
 Double-click to go back one folder level.
-
- Click OK.
PDFs are created for the selected layouts and uploaded to the selected project and folder. Click the link on the Push to Autodesk Docs palette to open a browser at the cloud location.
Note: PDFs are published and uploaded in the background so may not be immediately available in the cloud.