Use this procedure to add property set information to a block-based MvPart. Property set information is optional. Therefore, you can click Finish to complete the creation of your part without adding property set information. For more information, see Part Sizes of a Block-Based Part.
- In the MvPart Builder dialog box, select the part family or an individual part size, and click Edit Properties.
The Property Editor dialog box is displayed. Parameters for CEL (connection engagement length) and AoD (angle of deflection) appear in the Block-Based Parameter Configuration, allowing a change to the Data Storage and Visibility values under Attribute.
Note: CEL and AoD only appear for pipe connectors, not for connectors in other domains.
Property Editor dialog box
- To add custom data, on the toolbar in the Property Editor dialog box, select Parameter Configuration from the list, and click
 (New).
 The New Parameter dialog box is displayed.
- Select a new parameter, or select Custom Data 1 and enter a name, and then click OK.
A new parameter column is added as the last column. You may need to scroll over to view the added column.
- To specify the parameter attributes, click the appropriate cell, and select or enter a new value.
You can change the data storage, data type, units, visibility, and description. For more information, see Understanding Part Sizes.
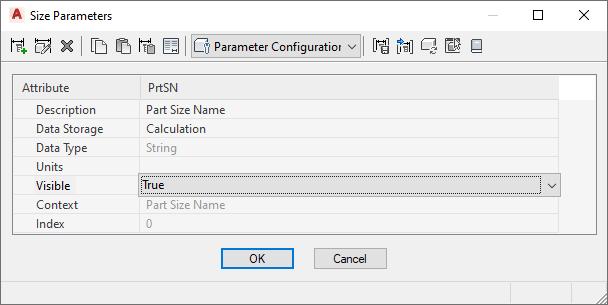
Note: The default data storage type for the PrtSN (Part Size Name) attribute is Table; however, you can change the data storage type to Calculation. Defining the PrtSN attribute as a calculated value enables you to define the name of each part size based on the values of other attributes, such as height and width, and provides additional options in the Blocks & Names section of the block-based building environment. - To add a list of values, do the following:
- Select List for Data Storage, and then select Values on the toolbar.
- Click the custom data value cell, and click
 on the toolbar. The Edit Values dialog box is displayed.
 - Click Add and enter a new value.
- When you finish adding values, click OK.
- To add a constant value, do the following:
- Select Constant for Data Storage, and then select Values on the toolbar.
- Double-click the custom data value cell, and enter a value.
- To add a calculated value, do the following:
- Select Calculation for Data Storage, and then select Calculations on the toolbar.
- Double-click the custom data value cell and, in Calculation Assistant, enter an equation to be used to calculate the value.
- To add a table of values, do the following:
- Select Table for Data Storage, and then select Values on the toolbar.
- Double-click the custom data cell value for each part size row, and enter a unique table value.
- When you are finished editing properties of the part sizes, click OK. Note: You can also edit the values of custom data attributes on the Properties page of MvPart Builder. Select a part size in the tree view, click Value and enter a new attribute value.
- Click Finish.
The part is saved and added to the catalog in the specified location.