Use this procedure to model the branch of the tee fitting based on the center of the trunk. You add the circular geometry, create the profile, and apply an extrusion modifier.
- To create the transitional branch of the tee, change the work plane. Right-click YZ Plane and click Visible; then right-click ZX Plane and click Visible.
The YZ plane is turned off. Its icon is unavailable (shaded) in the part browser. The ZX plane is the visible work plane in the modeling area.
- In the part browser, right-click ZX Plane and click Add Profile
 Circular.
 The circular profile defines the diameter of a fitting, such as an elbow, and the connectors. You can add more geometry lines and circular profiles for more complex graphics.
- Using object snaps with center mode enabled, select the center of the circular profile of the trunk, and enter 6" (152 mm) for the radius.
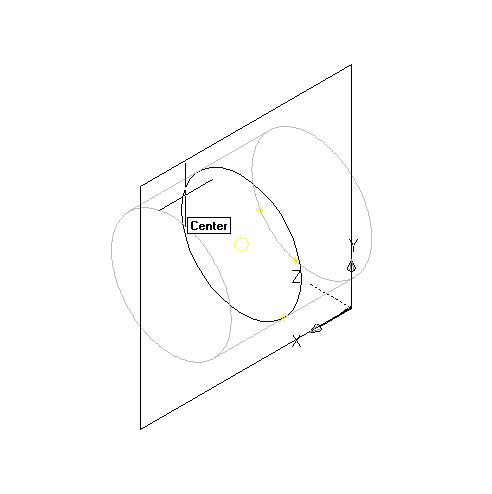
A circular profile is created and is added to ZX Plane in the part browser.

- In the part browser, right-click Modifiers and click Add Extrusion.
- Select the circular profile for the branch in the modeling area.
The Extrusion Modifier dialog box is displayed.
- Under Termination, select Blind for Type, and enter 10" (254 mm) for Distance. Click OK.
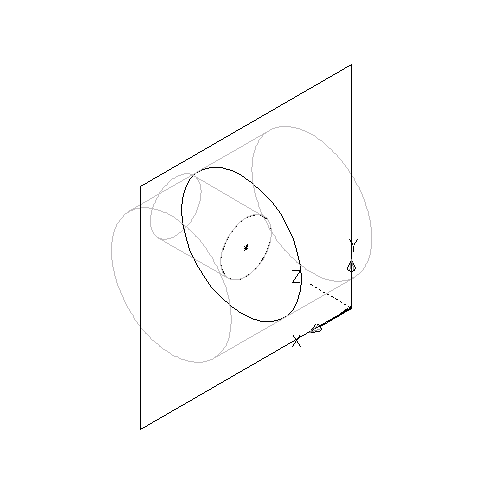
A cylinder is created to represent the branch of the transitional tee and a second extrusion modifier is added to Modifiers in the part browser.
- To flip the branch to the other side of the trunk, expand Modifiers in the part browser, right-click the second (branch) extrusion modifier and click Edit.
The Extrusion Modifier dialog box appears.
- Under Termination, select Flip and click OK.
The branch is flipped to the other side of the trunk.
 Tip: To verify which extrusion modifier is associated with a particular feature, click a modifier in the part browser to have the associated feature highlighted in the modeling area. For complex models, you can right-click the modifier in the part browser, and then click Rename to enter a logical name for easy identification, such as “Extruded Branch Modifier.”