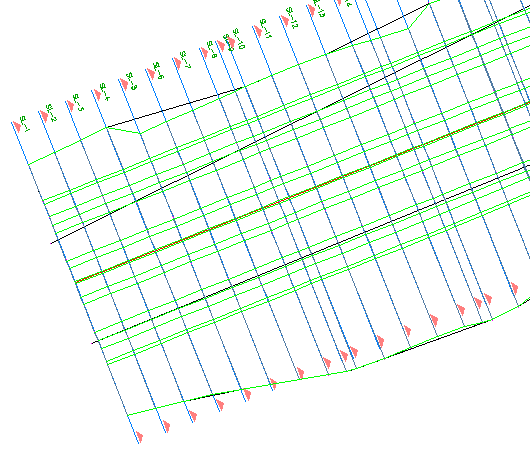
In this exercise, you will create a set of sample lines along the alignment.
The sample lines define the stations at which the cross sections are cut, and also the width of the sections to the left and right of the alignment. A set of sample lines is stored in a Sample Line Group for the alignment. Each sample line group has a unique name. Each line within the group also has a unique name.
Create sample lines
- Open Sections-Sample-Lines-Create.dwg, which is located in the tutorials drawings folder.
- Click tab
 panel
panel  Find.
Find. - At the Select An Alignment prompt, press Enter.
- In the Select Alignment dialog box, select Centerline (1). Click OK.
The Create Sample Line Group dialog box is displayed. This dialog box defines the characteristics of the sample line group. The templates shipped with Autodesk Civil 3D contain pre-defined line styles and line label styles for the sample lines.
- In the top portion of the Create Sample Line Group dialog box, specify the following parameters:
- Sample Line Style: Road Sample Lines
- Sample Line Label Style: Name & Section Marks
- Under Select Data Sources To Sample, verify that the Sample check boxes are selected for all entries in the table.
Data sources may include surfaces, corridor models, and corridor surfaces. Each surface and corridor surface results in a single cross-sectional string. Using the corridor model as a source includes all of the points, links, and shapes in the model.
- Set the Section Styles to the following: Note:
You can double-click a Style cell in the table to select the Section Style.
- EG: Existing Ground
- Corridor - (1): All Codes
- Corridor - (1) Top: Finished Grade
- Corridor - (1) Datum: Finished Grade
- Click OK.
The Sample Line Tools toolbar is displayed. A Specify Station prompt is displayed on the command line.
- On the toolbar, click the arrow next to the
 Sample Line Creation Methods button. Click
  From Corridor Stations.
 This option creates a sample line at each station found in the corridor model.
- In the Create Sample Lines - From Corridor Stations dialog box, specify the following parameters:
- Left Swath Width: 150
- Right Swath Width: 150
- Click OK.
The sample lines are created, and the Sample Line Tools toolbar is available for defining additional lines, if desired.

- Close the Sample Lines Tools toolbar.
To continue this tutorial, go to Exercise 2: Creating Section Views.