This shows you how to engrave the part by:
- Select Home tab > Create > Chaining > Pick Pieces.
- Creating the engraving text.
- Creating a Groove feature.
- Create a curve.
- Select Home tab > Create > Chaining > Pick Pieces.
- In the
Curve wizard:
Select Other methods as the construction method.
Select Text as the constructor.
Click Next.
- On the
Engraving Text page, configure the text properties.
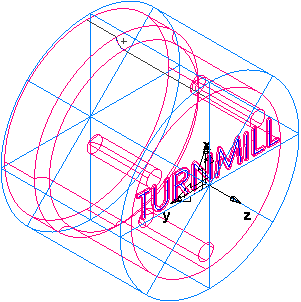
Enter a Text of TURNMILL.
Select a Path type of Linear.
Enter a location of X 0.0, Y -0.045, Z 0.0.
Enter an Angle of -90.
From the Justification list, select Center.
Enter a Scaling of X 0.4, Y 0.4.
Click the Font button to display the Font dialog.
From the Font list, select Machine Tool Gothic.
Enter a Size of 72.
Click OK to close the dialog.
- Click Finish to close the wizard.
- Create a Groove feature.
- Select the TURNMILL text (curve1) in the graphics window.
- In the New Feature wizard, select the Turn/Mill option, and click Next.
- In the From Curve field, select Groove, and click Next.
- On the Curve page, click Next (as you have selected the text in step 2a).
- On the Location page, click Next.
- On the
Dimensions page:
Enter a Width of 0.0625.
Enter a Depth of 0.02.
Select Face.
Select Simple (Engrave).
- Click
Finish.
Select Home tab > Part Program panel > Features.