Surface projection enables you to extract curves from vertical surfaces. You can use these curves to create 2.5D features from surface or solid models.
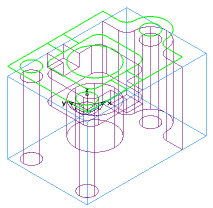
This method is a wizard that creates geometry by projecting straight-walled surfaces, for example:
The method performs these steps:
- Identify straight vertical surfaces from the selected set or from all surfaces (depending on the option selected).
- Project these surfaces on to the current UCS.
- Convert the curves into lines and arcs.
To create a curve using surface projection:
- Select Construct tab > Curves panel > From Surfaces > Surface Projection to open the Surface Projection wizard.
The Surface Projection wizard opens on the first page.
- If you are not extracting curves from drafted features, set both the Wall angle and Elevation to 0 and click Next.
- If you want to extract curves from drafted surfaces, enter a Wall angle, or click the blue Wall angle label and click two points on the same vertical isoline in the graphics window.
- For the Elevation enter the Z coordinate of the top of the feature or click the Elevation label and click the top of a wall of the drafted surface in the graphics window.
- Click Next.
- Select from:
- All surfaces - to extract curves from all surfaces.
- Only selected - to extract curves from only the surfaces you have selected.
- If you are working with a solid model, you have the option to Remove hidden lines on solids. It is generally a good idea to select this option. It prevents the creation of curves from blind features that are on the bottom of the part.
- Click Next.
- After you click the
Finish button in this dialog, you must chain the geometry into curves. Select what to do with the geometry after chaining:
- Remove after chaining - if you want the geometry you created to be removed when you have finished chaining.
- Keep all geometry - if you want to permanently keep the geometry after chaining.
- Click the Finish button.