You can program and simulate steady rests and tailstocks and check for collisions.
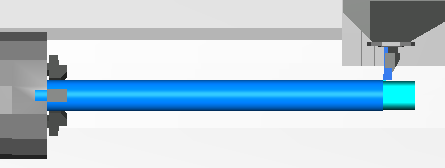
This example part is 1.5 m long:

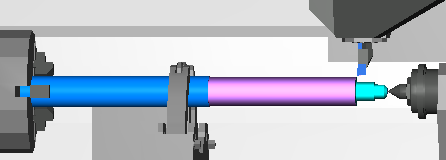
Looking at a machine simulation, you can see that there is a long length of the part sticking out of the jaws:
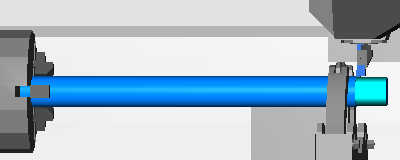
You can use a steady rest to support the part as you machine each feature. To use a steady rest, you create a Part Handling feature with a type of Part support on and a Support type of Steadyrest.
In the example, the steady rest is turned on before the features at the end of the part are created.
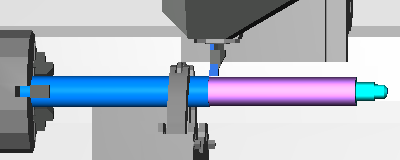
You can move the steady rest by creating an additional Part support on feature.
In the example, the steady rest is moved further down the part to support the Turn operation:
An additional Part support on feature is created to move the steady rest back to the original position, to cut the other Turn feature and the Groove features:
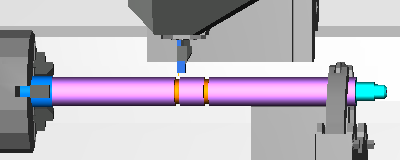
You can use a tailstock in a similar way. You create a Part Handling feature with a type of Part support on and a Support type of Tailstock.
In the example, the tailstock is used to support the end of the part while the steady rest is supporting the middle:
To send the steady rest or tailstock home, you create a Part Handling feature with a type of Part support off.
To enable a steady rest:
- In the turning New Feature wizard, select the Part Handling feature and click Next.
- Select Part Support On and enter a value for the Grab distance. This is the distance in Z where you want to use the steady rest.
- Click Next.
- For the Support type, select Steadyrest.
- If your machine has multiple tool posts, select the correct Transfer tool post.
- If your steady rest is fitted to a tool post, click the Tool post control button and set the correct Index position.
- Click
Finish.
A part_support_on feature is added to the Part View. You may need to drag the feature to a different position in the Part View and set a Base priority for the feature to set the correct order of features.
To disable a steady rest:
- In the turning New Feature wizard, select the Part Handling feature and click Next.
- Select Part Support Off and enter a value for the Grab distance. This is the distance in Z where you want to use the steady rest.
- Click Next.
- For the Support type, select Steadyrest.
- If your machine has multiple tool posts, select the correct Transfer tool post.
- If your steady rest is fitted to a tool post, click the Tool post control button and set the correct Location and Index position.
- Click
Finish.
A part_support_off feature is added to the Part View. You may need to drag the feature to a different position in the Part View and set a Base priority for the feature to set the correct order of features.
To enable a tailstock:
- In the turning New Feature wizard, select the Part Handling feature and click Next.
- Select Part Support On and enter a value for the Grab distance. This is the distance in Z where you want to use the tailstock
- Click Next.
- For the Support type, select Tailstock.
- If your machine has multiple tool posts, select the correct Transfer tool post.
- If your tailstock is fitted to a tool post, click the Tool post control button and set the correct Index position.
- Click
Finish.
A part_support_on feature is added to the Part View. You may need to drag the feature to a different position in the Part View and set a Base priority for the feature to set the correct order of features.
To disable a tailstock:
- In the turning New Feature wizard, select the Part Handling feature and click Next.
- Select Part Support Off and enter a value for the Grab distance. This is the distance in Z where you want to use the tailstock.
- Click Next.
- For the Support type, select Tailstock.
- If your machine has multiple tool posts, select the correct Transfer tool post.
- If your tailstock is fitted to a tool post, click the Tool post control button and set the correct Location and Index position.
- Click
Finish.
A part_support_off feature is added to the Part View. You may need to drag the feature to a different position in the Part View and set a Base priority for the feature to set the correct order of features.