Stitching converts well-trimmed surface models with shared edges and shared boundaries into solid models. When the surfaces have been stitched together into a solid, you can perform any solid modeling operation on the solid.
Warning: The surfaces must not overlap or have gaps between them.
The surfaces in this example will not stitch because they overlap.
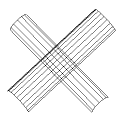
The surfaces in this example will stitch because the overlap has been trimmed away.

Types of models that are good candidates for stitching are:
- IGES files containing trimmed surfaces from solid modeling packages
- Surfaces that you model and trim using FeatureCAM surfacing tools
To stitch surfaces into solids:
- Select Construct tab > Solids panel > From Surfaces > Stitch to display the Stitching dialog.
- Optionally enter a Name for the solid, or leave the default name.
- Optionally select Log all errors and enter a file name and location.
- If the surfaces form a sheet instead of a solid, select the Non-solid Results OK option. If you do not select this box, you are given an error if the surfaces do not form a complete solid. See Overview of solids for further information.
- Select the surface in the
Surface list and click the
Add
 button, or click the
Pick Surface
button, or click the
Pick Surface
 button and pick the surfaces in the graphics window. Each surface you pick will be entered in the surface list.
- Optionally, click the Preview button to confirm that the surface is correct.
- Click OK.
- If the surfaces form a solid, a new solid is listed in the
Part View.
If the surfaces do not form a solid or a sheet, an error message is displayed.
Tip: If you have already selected the surfaces before opening the dialog, they are listed in the
Surface list.
Troubleshooting
- Ensure that no duplicate surfaces are displayed.
- Ensure that the surfaces do not overlap. In this case, you must trim the surfaces before stitching.