Sub-spindles can be used to support the part from both ends of the stock
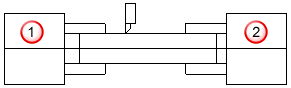
 Main spindle
 Sub-spindle
or to change which spindle is used to hold the stock:
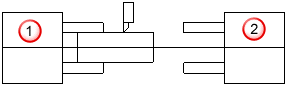
|
Stock held by main spindle |
Stock held by sub-spindle |
|
|
|
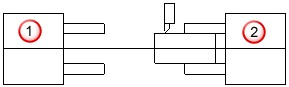
Main spindle
Sub-spindle
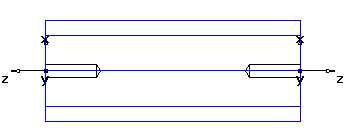
To cut features on two different ends of your stock, you must first create setups at each end of your part with the Z directions pointing out from the stock, as shown below. (If your machine requires that the Zs of each setup point in the same direction, this can be changed in the post.)
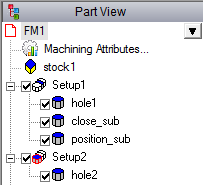
The features must be included in the proper Setups. The sub-spindle commands can be located at the end of the main Setup or the beginning of the sub-spindle Setup. The Part View, shown below, has the sub-spindle commands at the end of the first Setup.
If you are using the sub-spindle to support the end of the stock, order the sub-spindle features so that they occur when you need the extra support.
Sub-spindle feature examples
You can control the individual sub-spindle functions.
To switch from the main spindle to the sub-spindle:
- Sub-spindle position
- Sub-spindle close
- Main spindle open
- Sub-spindle position
To switch from the main spindle to the sub-spindle using a Cutoff feature to cut the stock from the bar:
- Sub-spindle position
- Sub-spindle close
- Cutoff feature
- Sub-spindle position