Use the Holder tab of the Milling Tool Properties dialog to change or edit the Tool Holder for the selected tool.
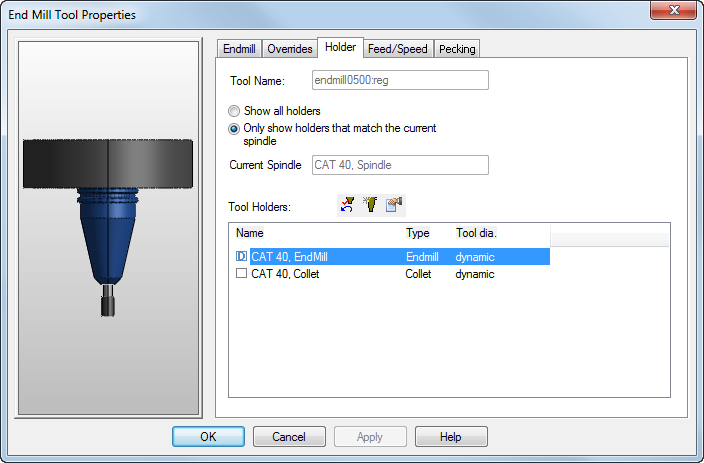
The Holder tab enables you see the tool holder that has been automatically selected for the tool and to permanently assign a holder to the tool.
Click the tool preview image to pan and zoom it. The orientation of the preview is determined by the settings on the Options > View > Machine page. Right-click the image to access a context menu.
Tool name — This displays the name of the tool.
Current spindle — This displays the spindle type that matches the current holder.
Tool holders are shown in the table at the bottom of the dialog.
Select Only show holders that match the current spindle to hide holders that do not fit in the current spindle. Select Show all holders to show them all.
The holder that was selected automatically for the tool is shown with a
D in the check box. To explicitly select a holder to use with this tool any time the tool is used, select the check-box next to the tool name. To remove an association of the tool with a holder, click the
Undo holder override
 button.
 Create new toolholder — Click this button to open the
Tool Holder Properties dialog, where you can create a new tool holder for the current spindle. The dimensions of the current tool holder are used as initial dimensions.
Create new toolholder — Click this button to open the
Tool Holder Properties dialog, where you can create a new tool holder for the current spindle. The dimensions of the current tool holder are used as initial dimensions.
 Edit toolholder definition — Click this button to open the
Tool Holder Properties dialog, where you can edit the properties of the selected toolholder.
Edit toolholder definition — Click this button to open the
Tool Holder Properties dialog, where you can edit the properties of the selected toolholder.