Tracking Tab
Common Settings
- Tracking Mode box
- Select the tracking mode.
- Enter Tracker button
- Click to open the Tracker menu to apply tracking data for the selected tracking mode.
- Rotation button
- Enable to apply rotation data to the track.
- Skew button
- Enable to apply skew data to the track.
- Scale button
- Enable to apply scale data to the track.
- Perspective button
- Enable to apply perspective data to the track.
- Camera box
- Specify which camera to take into account when tracking or viewing in Action Object view (F8).
- Use Media field
- Displays the number of the media associated with the analysis. To track the Back media, select 0.
- Tracking View box
- When the media associated to the analysis is a Source node, select to track the media in the Source Front, Source Matte, or Source Result view.
- Media FX button
- Enable to take into account blur and colour correct settings from the Action Media list in the analysis.
Planar Tracking Settings
- Analyze button
- Click to start the planar tracking analysis.
- Direction box
- Select whether to track forward or backward.
- Go to Reference button
- Click to move to the frame of the last Snap operation, or press Ctrl and click to go to the last analyzed frame.
- Step button
- Click to advance to the next frame and analyze.
- Set button
- Click to analyze the current frame, based on the reference frame, to realign the shape used for tracking. Press Ctrl and click Set to add a keyframe on the track without doing any analysis.
- Skip button
- Click to advance to the next frame and delete the selected point on the tracking path (performs a combination of the Step and Delete buttons).
- Delete button
- Click to delete the selected point on the tracking path. You can also use the Backspace key to delete the current keyframe, and move to the previous keyframe.
- Auto Update Reference button
- Enable to update the tracking reference at the current frame after each analysis. Disable to track the movement of the reference point specified in the reference frame.
- Snap button
- Click to redefine the tracking reference at the selected frame.
- GMask Inclusive box
- Select whether to use the union of parented GMasks or GMask softness as the tracking reference. Select None to use the whole image (Axis), or the four corner region (Perspective Grid).
- GMask Exclusive box
- Select whether to exclude GMasks in the tracking analysis.
- Tracking Algorithm box
- Select which planar tracking algorithm to use. Select Region Warping to use all the pixels defined within the reference, or Multi Feature Detection to use some points defined within the reference. Different settings appear below based on the algorithm chosen.
- Sampling field
- Displays the size of the reference for Region Warping. A smaller reference increases performance at the expense of the quality of its results. Editable.
- Lighting button
- Enable to estimate local lightning variations of the tracked surface.
- Occlusions button
- Enable to automatically exclude parts of the reference to be analyzed based on their likelihood to be occluded.
- Analyze RGB Channels button
- Enable to include all colour channels in the tracking analysis. Disable to only track luminance.
- Average field
- Displays the blending factor to apply to the tracking analysis, based on the neighbouring frames. Use to remove jitter, for example. Note that this operation is destructive, and once applied, the value returns to 0 (you can use Undo to revert, if needed). Editable.
- Size field
- Displays the area in pixels of each tracker. Editable.
- Min Number field
- Displays the minimum number of trackers to use in the analysis. Editable.
- Tolerance field
- Displays the level of acceptable changes in the pixel environment. For example, a low tolerance value ensures that the motion of an external object passing in front of the tracked object does not get tracked through the analysis. Editable.
Motion Warp Settings
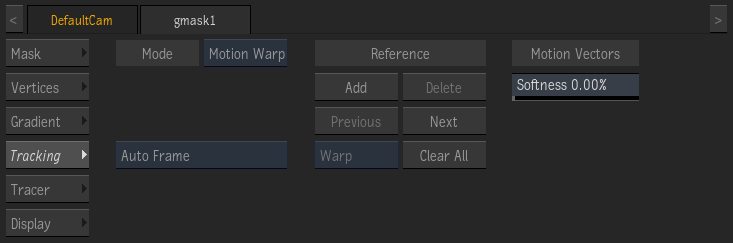
- Add Reference button
- Adds a Reference UV frame for motion warping. If this is not the first Reference, motion warping is interpolated between consecutive UV References. Note that motion is only computed for frames within the Tracking interval defined in the parented Motion Vectors map, as defined in the Motion Vectors Analysis tab.
- Delete Reference button
- Deletes the UV Reference at the current frame.
- Go to Previous Reference Frame button
- Move the Positioner to the previous UV Reference frame.
- Go to Next Reference Frame button
- Move the Positioner to the next UV Reference frame.
- Mode box
- Warp to distort the surface before and after the UV Reference. Freeze and Hold allow you to keep the current warp result at the current UV Reference frame. Use either Freeze or Hold to troubleshoot UV warping.
- Clear All Reference Frames button
- Deletes every UV References.
- Motion Vector Softness field
- Blurs the motion vectors to smooth out any apparent jerkiness in the motion.