
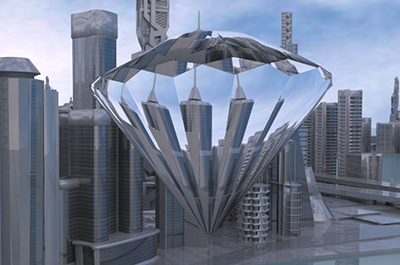
To create a glass diamond like the one above:
- In Action, first make sure you have a background image.
Refraction affects whatever is behind the refracting object, so you need something in the back to see the effect.
- In Action, right-click the Schematic and select Import...
- From the import window, select PBS_Diamond and click Load.
- In the Action schematic, double-click the Geom node named PBS_Diamond to display its menu.
- In the PBS_Diamond menu, display the
Geometry menu, and set
Sort Box to
Sort Transp.
This ensures the polygons are properly sorted in 3D space, taking transparency into account when z-sorting its polygons.
- Back in the Action schematic, select the Material node named Cube and attached to PBS_Diamond.
- In the Cube menu, display the Blending menu and set Transparency to 100%.
- In the Refraction section, set
IOR to that of the diamond,
2.418.
You now have a glass cube that refracts its background. Rotate the cube to see its effect on the background.
To enable refraction on a 3D shape, you need a Material node with Transparency set to something other than 0%, and an index of refraction (IOR) set to something other than 1.0.
Index of refraction for some popular materials
- Glass = 1.500
- Water = 1.333
- Plastic = 1.460
- Ice = 1.309
- Crystal = 2.0
- Diamond = 2.418
- Emerald = 1.560
Additional Refraction options control how the Material node distorts the background of the geometry.
- Intensity
- Use Intensity for artistic reasons or to recreate the effect where the background becomes inverted like we can see on glass containing liquid refraction.
- Minimal Thickness
- Defines the minimal thickness of the object. It ensures that geometries without depth, such as flat 3D shapes, have a default thickness value and can still refract the background.
- Roughness
- Smooths out the refraction result. The higher the Roughness, the blurrier the refraction. There is also an associated PBS Map option called Refraction Roughness. Use this map to control the Roughness attribute per pixel.
- Transmittance
- Mixes in the refraction the Deep and Shallow colours, based on the depth of the 3D object. Transmittance is ideal to create coloured glass objects. Deep controls transmittance within deeper areas of the object. Shallow controls transmittance in the thinner areas.
- Dispersion
- The Dispersion section determines the divergence of the Red, Green, and Blue channels of the background. It essentially recreates chromatic aberration. The Hue Shift field shifts the aberration colours. The Samples field controls the coarseness of the aberration: the greater the amount of samples, the "smoother" the aberration.
Trying Out Refraction
The following geometries were created for you to experiment with refraction.
- PBS_BeerBottle
- PBS_Coin
- PBS_CoinRound
- PBS_Diamond
- PBS_Gem
- PBS_Glass
- PBS_GlassShards
- PBS_WaterGlass
- PBS_WhiskyBottle
- PBS_WineBottleHigh
- PBS_WineBottleLow
- PBS_WineGlass
PBS Refraction Maps
You can attach a Refraction map to the Material node to control the refraction index per pixel, instead using a global refraction index for the object.
There are three refraction maps. Each controls a different aspect of the refraction:
- Refraction for the IOR
- Refraction Transmittance for the Transmittance (Deep)
- Refraction Roughness for the Roughness
All three maps can be parented to a Material node and overrides their matching parameter in that node. The maps can be grayscale. If you provide a colour map, only the red channel is used.
To add a Refraction map to a Material node:
- Create a Refraction map in Batch Paint and attach it to an Action Input node.
A Refraction map is a grayscale texture, where white is no refraction (IOR = 1) and black is maximum refraction.
- In Action, select the grayscale image in the Media List.
- Right-click the Material node and select .
- Select the material map and display the Controls menu.
- From the Material box, select Refraction.
The geometry now refracts its background using an index of refraction determined by the Refraction map.
Substance PBR Inverted IOR.
You can attach a Substance PBR asset with an inverted IOR to a Material node. If you do, you control the refraction from the Substance PBR map instead of the Material node.
To control a refraction generated by a Substance PBR material:
- Display the Substance PBR menu.
- In the Globals menu, edit the Inverted IOR field.
Note: Only the Inverted IOR option is currently supported.
The following translucent assets are available in the Translucent folder when you load the Substance PBR node:
- glass_chords
- glass_clear
- glass_rain
- glass_spectrum_ice
- glass_waterfall