- Regen button
- Enable to dynamically refresh the image as changes are made to the menu settings.
The Hardware Displacement menu is divided into two tabbed sections: Controls and Texture.
Controls Tab

- Displacement Type box
- Select whether to use hardware (GPU) or software (CPU) displacement mapping.
- Channel box
- Select a colour channel to calculate the displacement map.
- Softness X field
- Displays the amount of X-axis blur applied to the map. Editable.
- Softness Y field
- Displays the amount of Y-axis blur applied to the map. Editable.
- Displace Direction box
- Select the direction in which a displace occurs when a displacement map is attached to a surface. Geometries parented to a displacement map always use Normal Displace as the direction.
Select: To Displace: Flat Displace In the X, Y, and Z directions. Normal Displace Bilinear and bicubic surfaces according to their normals. Camera Displace In the direction of the camera selected in the Displace Camera box.
- Bias field
- Displays the distance between the real surface of the object and the perceptual ground (zero level) of the texture. Editable.
- Attenuate field
- Displays the level of amplitude of the effect caused by the displacement map texture. Editable.
- Displace Camera box
- Active only when Camera Displace is selected in the Displace Direction box. Select which camera to take into account when using camera displacement.
- Displace Camera field
- Displays the active displace camera number. Non-editable.
- Displacement X field
- Displays the amount of displacement in pixel units along the X axis. Editable.
- Displacement Y field
- Displays the amount of displacement in pixel units along the Y axis. Editable.
- Displacement Z field
- Displays the amount of displacement in pixel units along the Z axis. Editable.
- Bump Normals button
- Enable to allow the map to create a normal map for enhanced lighting effects. Used only if no normal map exists for the object using the displacement texture. The availability of this setting is dependant on your graphics card.
- Depth field
- Displays the amount of Z scale applied to the generated normals. Higher values attenuate the effect toward the normals of the parent surface. Editable.
Texture Tab
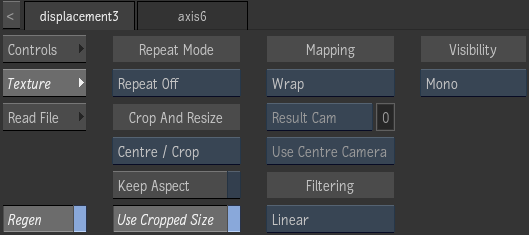
- Repeat mode box
- Select how the map pattern is repeated on the surface.
- Fit Method box
- Select a fit method option to be applied to the map.
- Keep Aspect button
- Enable to preserve the aspect ratio of non-square pixels (not available for the Fill fit method).
- Use Cropped Size button
- Enable to replace the map with the cropped size of the media. Disable to use the cropped media as is.
- Mapping box
- Select the type of texture mapping.
Wrap Wrap mapping completely envelops the 3D model with the texture map according to the object’s texture coordinates. To use this option, you must import a model that has its own texture coordinates. When using Wrap mode, you can also apply UV mapping settings from the Geometry menu. Plane Planar mapping applies the map without distorting the front plane of the 3D model, similar to a movie projector casting an image onto a screen. All 3D coordinates of the geometry are mapped to this plane to generate the texture values. Planar mapping positions the lower-left corner of the map on the 3D model’s axis. When you apply planar mapping, any surfaces on the 3D model perpendicular to the front plane cause the pixels at the edge of the texture to project along the “sides” of the object. Tri-Planar Similar to plane mapping, except that it applies the map from all 3 axes, blending using the normals orientation with respect to the axis of projection. Perspective Perspective mapping is similar to planar mapping, except that it performs a perspective transformation of the map based on the selected camera’s field of view (FOV). When you select Perspective as the mapping type, the Perspective Camera box becomes active, allowing you to specify the active camera. The FOV of the camera has an impact on the resulting effect of any transform applied to the parent axis of the texture. On stereo cameras, the interaxial distance between left and right cameras also has an effect on the resulting perspective transform. Tri-Perspective Similar to perspective mapping, except that it applies the map from all 3 axes, blending using the normals orientation with respect to the axis of perspective. Projection The texture behaves as if it is projected by the selected camera. Projection mapping is useful as an alternative to projecting textures using the Projector node, especially when it is necessary to project while preserving a specific camera POV.
- Camera box
- Specify which camera's FOV to take into account when using perspective or projection mapping.
- Camera field
- Displays the active perspective or projection camera number.
- Stereo Camera Projection box
- Select whether to use the centre, left, or right camera from a stereo camera rig when projection mapping.
- Filter box
- Select the type of filtering to apply to the map.
- Camera Type box
- Select the camera type visibility for the map.