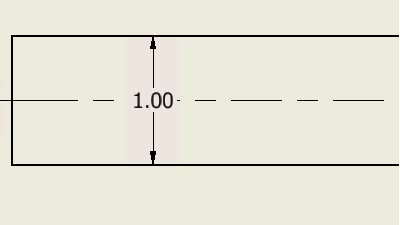
Add these automatically or manually to holes, arcs, and other features; set styles for these marks, and add the center of gravity mark for a model.
What's New: 2022

You can select multiple center marks in a drawing and align them to a selected edge or geometry.
Automated centerlines
You can add automated centerlines and center marks to circles, arcs, ellipses, and patterns, including models with holes and extruded cuts (except mid-plane extrusions). iFeatures and iParts can also have automated centerlines and center marks.
When you set up a drawing or drawing template, use options in Document Settings to define the defaults for adding automated centerlines. The settings include types of features to receive centerlines and center marks and if the geometry is normal or parallel projection. You can set thresholds to exclude circular features smaller or larger than the specified radius and smaller than a minimum angle.
The format of a centerline or center mark is specified in the Center Mark Style.
Manual centerlines
You can manually apply four types of centerlines and center marks to individual features or parts in a drawing view.
- Center Mark to annotate the center of holes, circular edges, and cylindrical geometry
- Centerline to annotate the center of holes, circular edges, and cylindrical geometry
- Centerline Bisector to create a centerline that bisects two lines
- Centered Pattern to create a centerline on designs that have a consistent feature pattern
Note: If the pattern is circular, the center mark is placed automatically after you select all members.
Setting style for centerlines and center marks
Use the default style associated with the active standard or modify the mark, gap, extension, and other attributes in the style before you place centerlines and center marks in a drawing. The active center mark style controls the appearance for both automated and manual center marks and centerlines. Changes to the style are in effect only for the current document unless you save changes to the style library.
You can change the line type of center marks and centerlines in the Layers section of Style and Standard Editor. The appearance of center marks and centerlines in the drawing is then changed to respect the selected line type.
Tips for working with automated centerlines and center marks
- Dependent views inherit the centerline settings from the base view. You can change the settings for a dependent view after placing it.
- If you reapply automated centerlines after deleting individual centerlines or center marks, the deleted centerlines or center marks are reapplied as well.
- If you reapply automated centerlines after hiding individual centerlines or center marks, hidden centerlines or center marks are not reapplied.
- When features share a common center, automated centerlines places only one centerline or center mark.
- If a centerline for a pattern overlaps another centerline for the same pattern, you can choose which centerline to keep, or delete them both and manually create one that incorporates both.
- Automated centerlines are not applied to features for which the visibility is turned off in the model or view.
- If you create a pattern in a sketch that is consumed by a feature (for example, the sketch is extruded), only center marks are created.
- When you change or add features to the model, reapply automated centerlines or manually place them on the new feature.
- When applying centerlines and center marks to a pattern, each element is marked, including the centerlines and center marks of nested patterns.
Center of Gravity in drawings
You can calculate the center of gravity of a model for every view. In the browser, select the top level of the model, right-click and select Center of Gravity. The command calculates the center of gravity of the model and produces a center mark on the drawing view at the relative position of the center of gravity.
The center of gravity position on the drawing view is calculated for the model referenced in the drawing view. The center of gravity calculation takes into account the following items:
-
Positional representation referenced in a view and Design View representations do not affect center of gravity. The center of gravity refers to the active assembly model state. The substitution of the model does not affect the location of the center of gravity.
-
Weldment state (preparation, weldment, machining view). Component-isolated preparation views cannot have the center of gravity displayed.
-
iPart or iAssembly member view.
-
Sheet metal flat pattern versus folded model.
When you change the model, the Center of Gravity position on the drawing view updates automatically.
Only one center of gravity representation is displayed for one view except for overlay views. They can display one center of gravity per overlaid positional representation as well as the base representation.
The center of gravity is not supported for draft views and views of presentation files.
The center of gravity is not supported for draft views.
For cut operations, such as detail views and crop views, the center of gravity calculation is performed on the original component, not the cropped or detail model.
The center mark is formatted by the current center mark style.
You cannot use the drag method to move the center of gravity center mark.
