Composing a scene consists of selecting component appearances, lighting style, and camera positions.
Create and edit a camera
![]() Create and edit a camera in the active document to define a view for a rendering. Parameters that create a graphic representation that you can view or hide define a camera.
Create and edit a camera in the active document to define a view for a rendering. Parameters that create a graphic representation that you can view or hide define a camera.
You can define multiple cameras, but use one at a time for rendering.
-
 On the ribbon, click
Render tab
On the ribbon, click
Render tab  Scene panel
Camera .
Scene panel
Camera .
-
 In the Camera dialog box, click Target.
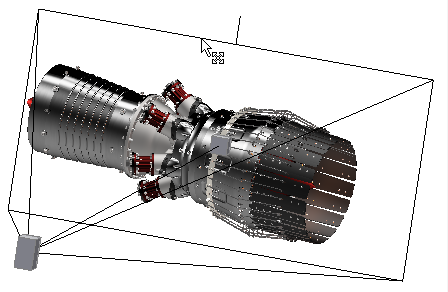
- In the graphics area, click any face on the model to define the camera target.
A small cube is placed at the target point of the camera. A black direction line displays, normal to the selected face, from the target point to the position point.
- Click a point along the camera direction line, or click any face on the model, to set the position of the camera.
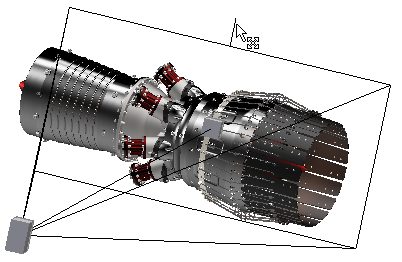
A wireframe representation of the view volume of the camera displays as a black square centered over the target point, facing the target position.
- With the camera graphics displayed, you can:
- Drag the target or position to move it in the view plane at the same view distance as the target or position.
- Move the camera. Click the target or position once to activate a 3D Move/Rotate triad. Use the triad to move the target or position. Changing the triad rotation does not affect the target or position. Click the direction line to move the camera and maintain the relative position and target location.
- Zoom to change the field of view angle. Click-drag the view volume boundary to adjust the size of the view volume with a constrained aspect ratio. Release the mouse button to set the new size.
- Change the roll angle. Click-drag the camera view volume boundary handle to rotate the camera graphics around the position-target axis.
- If appropriate, select Link to view to update the active view to match the camera properties and hide the camera graphics.
- In Projection, set the camera view mode to orthographic or perspective.
Projection is disabled in the animate camera operation.
Note: Use the orthographic camera for traditional illustrative views and the perspective camera for more realistic views. - If necessary, in Roll Angle, specify the angle of rotation around the direction axis of the camera, if different from the default. You can use the manipulators as described previously.
- (Optional) During definition or editing of the camera, check Link to View to sync the camera with the display.
Note: During camera animation Link to View updates the display to the camera settings.
- If necessary, in Zoom, specify the camera zoom angle to define the horizontal field of view, if different from the default. You can use the manipulators as described previously.
- Click OK.
Depth of Field
You can use depth of field with any camera you establish. To use depth of field, do the following:
- In the camera definition dialog box, in the Depth of field section, check Enable. The depth of field controls are enabled.
- Choose Focus Limits, where you provide near and far focus plane positions, or f-Stop, where you specify a camera stop value and focus plane position.
- Specify the depth of field parameters for the appropriate method. For Focus Limits, you specify near and far focus plane positions. For f-Stop, you provide the f-Stop setting and the focus plane position.
- Optionally, you can check the Link focus plane to camera target, which has two advantages:
- The focus planes stay positioned in relation to the target. If you edit the camera target the camera stays in focus in relation to it.
- You can animate the camera target. The result is a moving depth of field, which provides a nice effect in an animation.