Use Constrain to place Angle constraints
- Use the Constrain command or Assemble command to place an Angle constraint between two assembly components. An Angle constraint controls the angle between edges or planar faces.
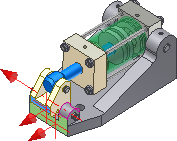
- To begin, place the components to constrain in an assembly file.
- On the ribbon, select
Assemble tab
 Relationships panel
Constrain
Relationships panel
Constrain
 .
.
- On the Assembly tab, in the Type box, select Angle.
- Select the Predict Offset and Orientation check box if the components are close to the desired position. The current angle between the selections is automatically entered in the Angle field.
- Select the first face or edge. If necessary, click First Selection to enable the selection.
- Select the second face or edge to constrain to the first selection. If necessary, click Second Selection to enable the selection.
- When using the Explicit Reference Vector option, a third selection command is available. Select a face, linear edge, workplane, or work axis. This selection indicates the direction of the cross product (Z axis) of the vectors from the first two selections. If necessary, click Third Selection to enable the selection.
Note: For best results, make the third selection on a stationary component.
- In the Solutions box, select the appropriate solution:
- Select Directed Angle to apply the right-hand rule in all cases. Some cases, such as zero or 180°, can flip in the opposite direction. Infers the Z axis or vector product.
- Select Undirected Angle to apply either. If the solved position more closely resembles the last-calculated position, the default behavior is to apply the left-hand rule. Infers the Z axis or vector product.
- Select Explicit Reference Vector to define by selection the Z axis or cross product of the first two selections.
- In the Angle field, enter a different angle value, as needed.
Change name of constraint or set limits
The following rules apply to limits:
- If the combined total does not to exceed 180 degrees, undirected Angle limits of -180 to 180 degrees are supported.
- If the combined total does not exceed 360 degrees, explicit Reference Vector limits of -360 to 360 degrees are supported.
- Limits are not available for Directed Angle.
- Select More.
- In the Name box, enter a constraint name, or leave blank and a default name is created.
- Check Maximum and enter a value to specify the maximum limit position.
- Check Minimum and enter a value to specify the minimum limit position.
- Check Use Offset As Resting Position and enter the required value in the Offset value box to specify the resting position.
- Clear the check box to remove limits. Values are retained in an inactive state.
- If Show Preview is selected, observe the effects of the applied constraint. If either component is adaptive, constraints are not previewed.
- Click Apply to continue to place constraints, or click OK to create the constraint and close the dialog box.
Use Assemble to place Directed Angle constraints
- On the ribbon, select the
Assemble tab
Relationships panel
Assemble
 .
.
- Select a face or an edge on the component that changes position.
- Select a face or an edge on the component that remains in position.
- Select Angle-Directed from the Solution Type list.
- Enter an angle value.
- Choose one of the following:
- Click Apply and continue to define constraints.
- Click OK to create the constraints and exit the Assemble command.
- Click Undo to delete the selections and continue to define constraints.
- If other components obscure the selection, do one of the following:
- Temporarily turn off visibility before placing a constraint. Click to select a component, right-click, and select Visibility.
- To restrict selectable geometry to a specific part, select Pick Part First in the dialog box, and click the component to constrain. Clear the check box to restore selection mode.