This section demonstrates some of the basic Intent workflows in Inventor. It does not show anything related to dynamic rule reactors, but you probably should look through it in order to be familiar with the parts that it uses.
Create & Adopt the Link
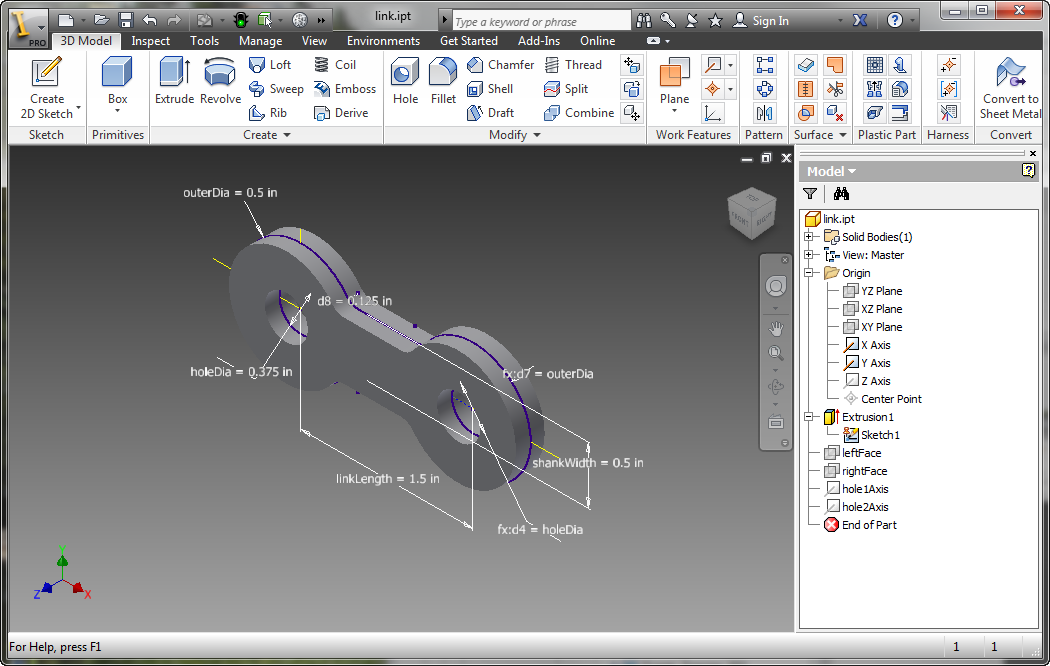
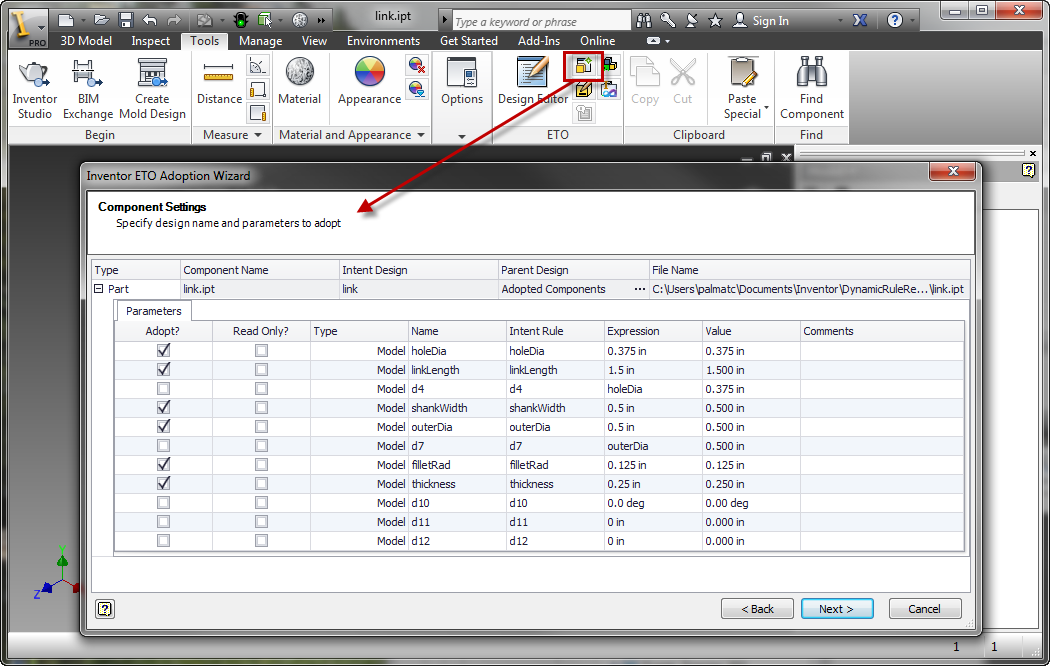
Save the part, then adopt it:
Create the Chain Assembly
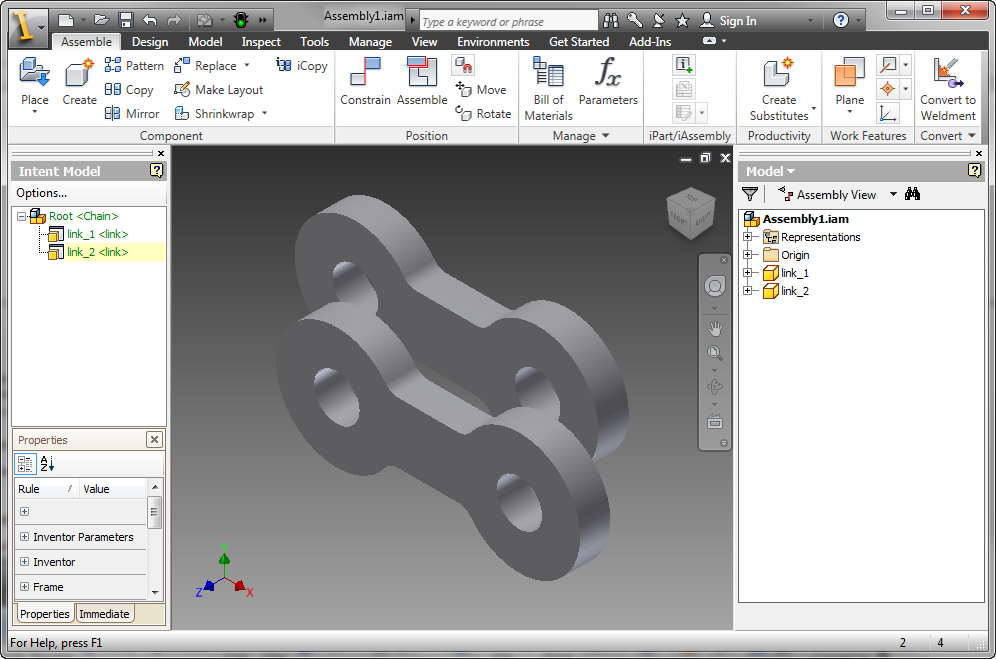
Now we'll use the adopted link and cylinder primitive to assemble a chain. Start by creating new Intent assembly with a new root design.
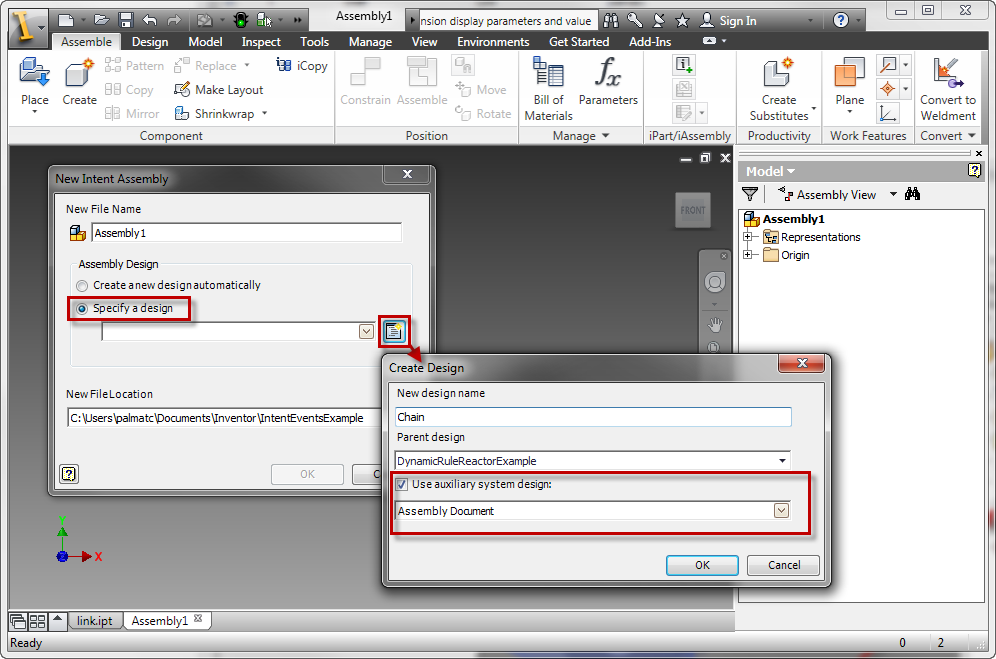
Design Chain : DynamicRuleReactorExampleRoot IvAssemblyDocument

   	Parameter Rule linkHoleDia As Number = 0.375

	   Parameter Rule linkThickness As Number = 0.250
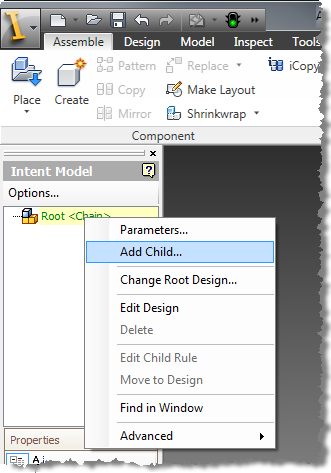
Save the design, then add a link to the assembly in Inventor.
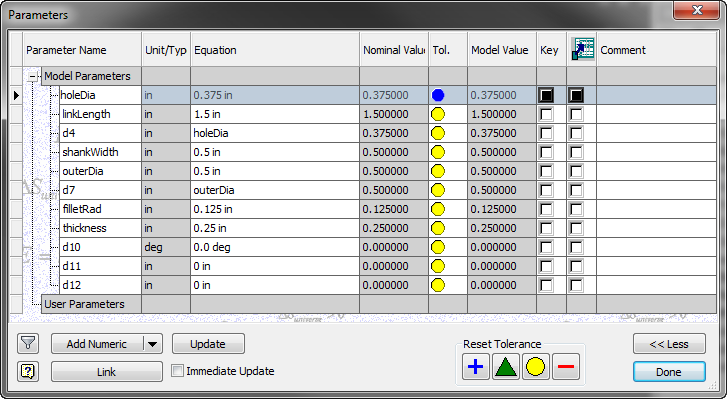
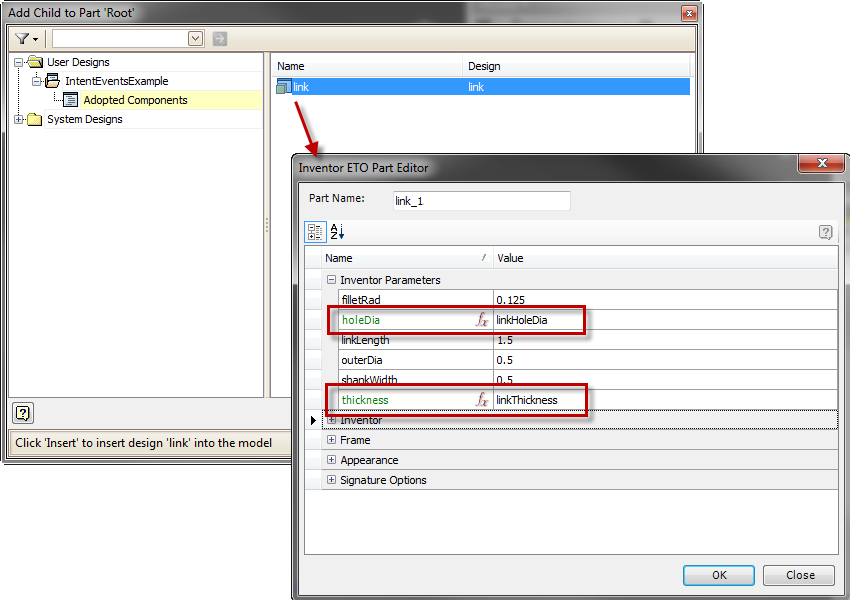
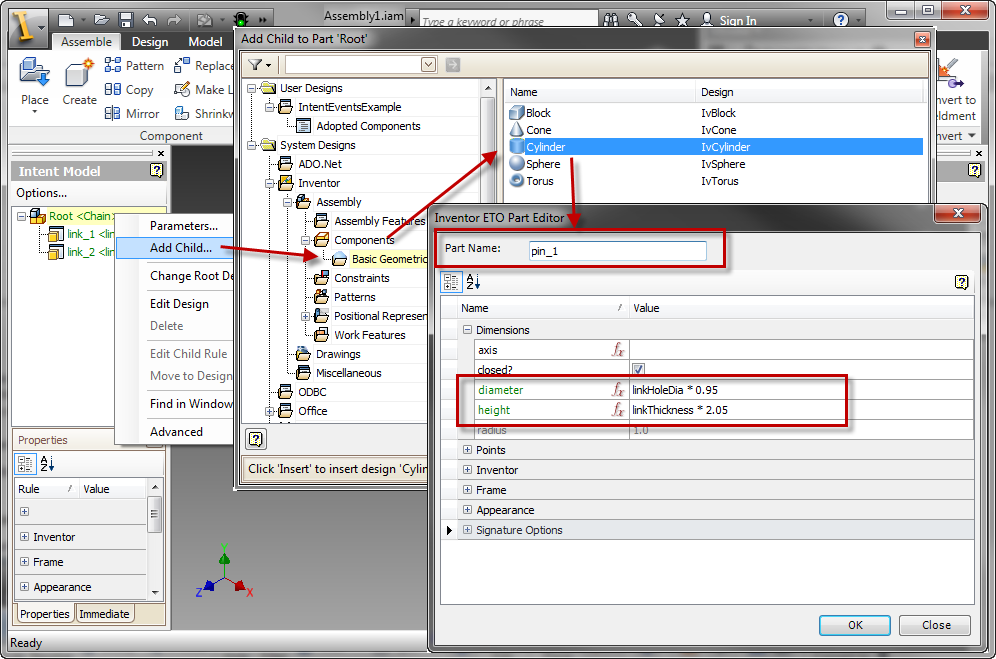
Set holeDia and thickness to the two assembly parameters you added above.
Repeat the process to add a second link.
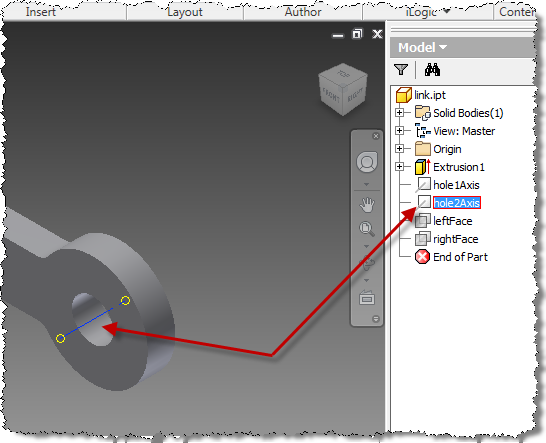
Now add a cylinder child to use for the pin. Set the diameter to something less than linkHoleDia and the height to something larger than twice linkThickness.
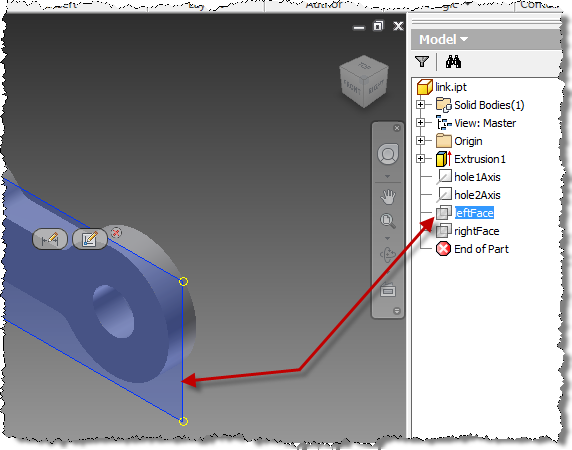
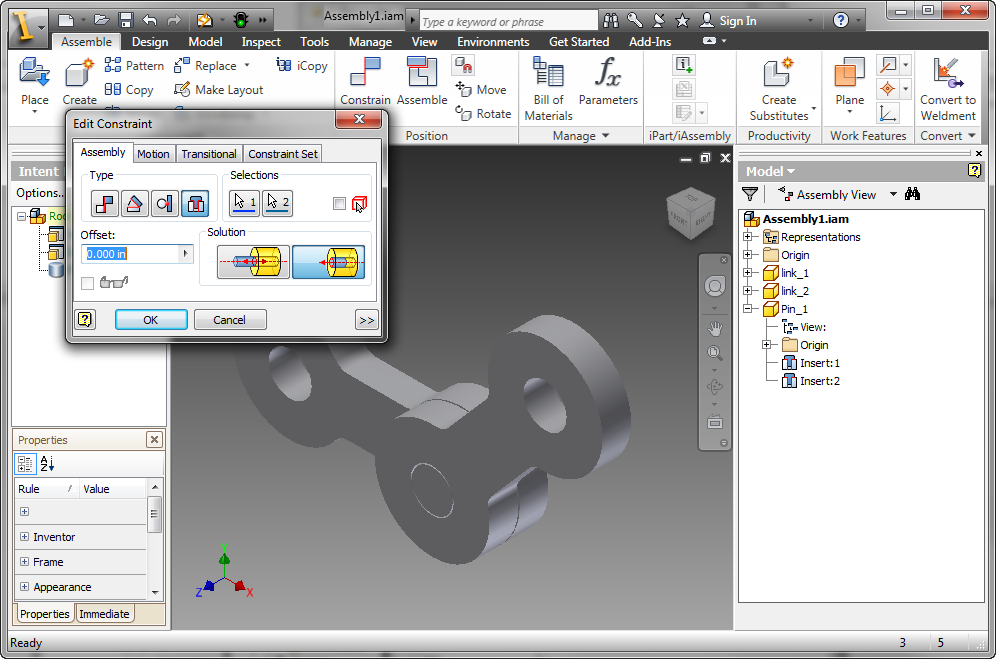
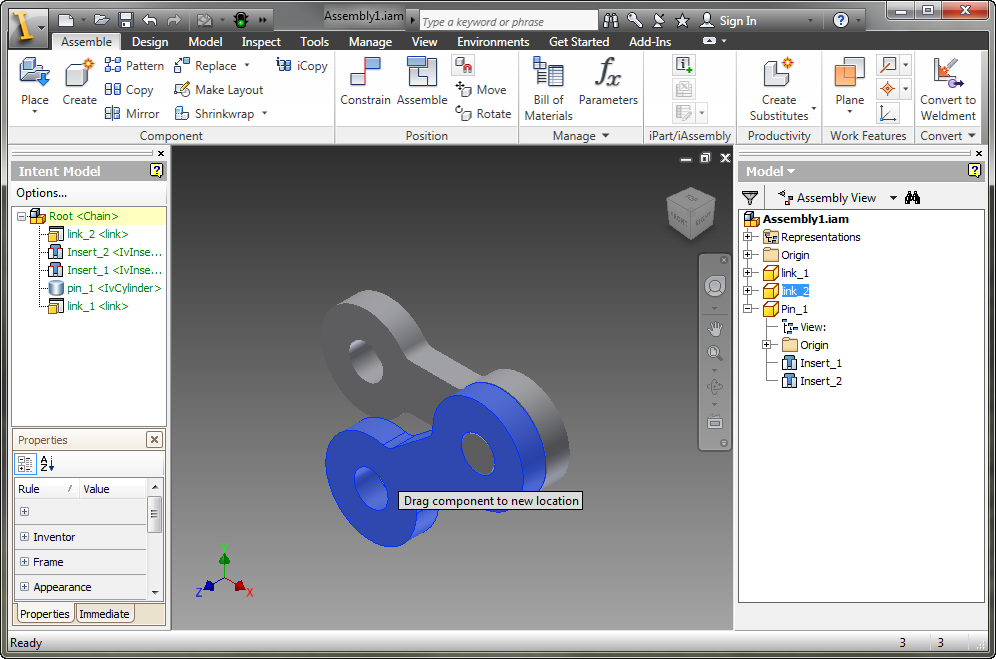
With the pin and two links in the model, constrain pin and the links with two Insert constraints in Inventor.
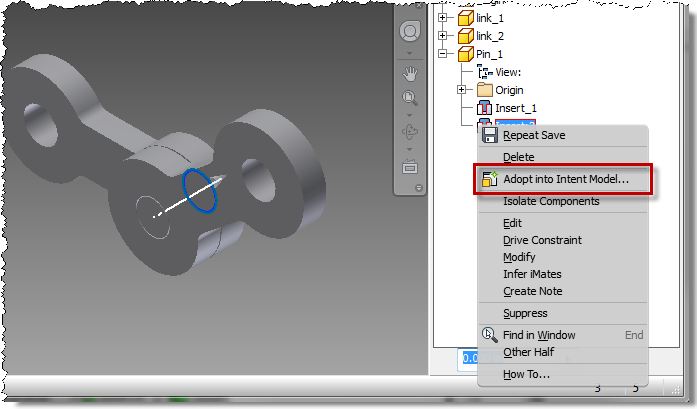
Finally, incrementally adopt the constraints. Don't forget to save the model after the first adoption.
Once complete, you can drag the links to demonstrate the constraints.
Next: Using a Simple Reactor.