The Inventor ETO UI Tools enable developing Web applications that use a lightweight graphics mode for faster interactions before updating the actual CAD models/drawings. This template creates a Web application that utilizes the UI Tools Web service, and a Web application to host it.
- To get started, launch Visual Studio and click File
 New Project. The New Project dialog box displays.
 - In Visual C# or Visual Basic, click the ETO Web application template and give the project a name.

- When you are satisfied with your selections, click OK to create the project. A Visual Studio solution is created with a Web project.
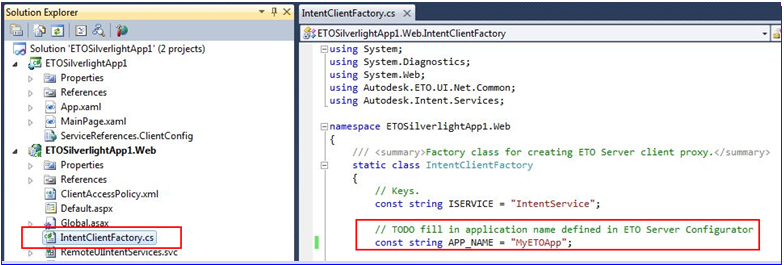
- The project in the solution is a Web Application project. The project comes with code that helps manage the connection from the ASP.NET session to the session on ETO Server. This code works out of the box with only one requirement. The IntentClientFactory class requires that you enter the name of the application defined in the ETO Server Configurator that you want hosted by the Web application.
- The RemoteUIIntentServices.cs and Web config files have the rest of the code needed to communicate with the server.
- The index.html file and the *.js files under the Scripts folder contain the user interface code. The default UI may be suitable for your needs, but it can be customized. Two likely examples are JavaScript logging and error handling.
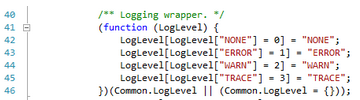
- For JavaScript logging, by default much information is logged to the browser's console. This can be changed in the EtoCommon.js file by changing the DefaultLogLevel:

The choices are defined in the same file:
In order to add more logging, you can follow examples in other files such as ModelUpdateDataProcessor.js.
First, create an instance of the logger:

Second, call a method on the logger such as warn():

-
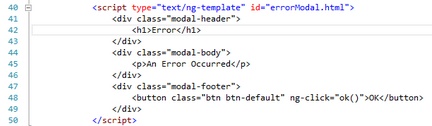
For error handling, the UI and any other additional actions desired can be customized. The index.html file has a default dialog that displays errors. The HTML and CSS can be modified:
The handler for the OK button is in the DialogControllers.js:
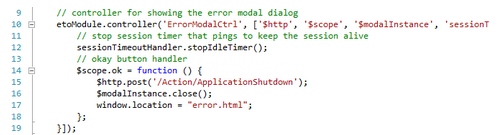
The default behavior ends the session and redirects to the error.html page. This page is basic and it is recommended that you either customize it or redirect it to another page.
- The project in the solution is a Web Application project. The project comes with code that helps manage the connection from the ASP.NET session to the session on ETO Server. This code works out of the box with only one requirement. The IntentClientFactory class requires that you enter the name of the application defined in the ETO Server Configurator that you want hosted by the Web application.