Connect to data files representing the city boundaries and roads.
Note: This exercise uses the map you created in the
previous exercise.
- If the map you created is not open in AutoCAD Map 3D toolset, reopen it.
- Add the city boundary data to your map.
- Switch the Task Pane to Display Manager.
- Click Data and choose Connect To Data.
- In the Data Connect window, under Data Connections By Provider (on the left), select Add SDF Connection.
- Under Source File (on the right), click the browse button and navigate to the sample
City_Boundary.sdf file. Click Connect.
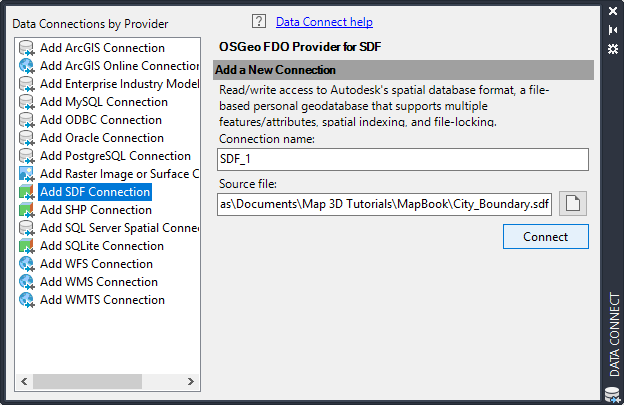
- Under Schema, click Add To Map.
- Add the road data to your map.
- In the Data Connect window, under Data Connections By Provider (on the left), select Add SHP Connection.
- Under Source File (on the right), click the browse button and navigate to the sample Roads.shp file. Click Connect.
- Click Add To Map.
- Close the Data Connect window.
- Save the map using the name MyMap.dwg.
Where you are now
You created a map and connected to feature sources for the city boundaries and the roads of Redding, California.
To continue this tutorial, go to Lesson 2: Customize a Map Book Template.