Base each new object class on an existing object. Start by opening a map that contains objects that are typical of the object class you are defining (“model objects”). In this example, you open a map of roads to define the Roads object class.
When you define an object class, you can choose any existing properties of the model object to include as part of the object class definition. You can also add properties. For each property you include, you can specify a default value and an allowable range.
To define an object class
- In AutoCAD Map 3D toolset, open Classify_Roads.dwg. Click

 OpenDrawing.
 - On the Map Explorer tab of the Task Pane, right-click Object Classes and click Attach Definition File.
- Specify the MyDefinition.xml definition file you created.
-
Click . Find. Find
Define an object class by selecting a model object.
- Select any road as the model object for this class.
- In the Define Object Classification dialog box, specify Roads as the name for this object class. Select the topmost box in the Object Types list (AcDbEntity).
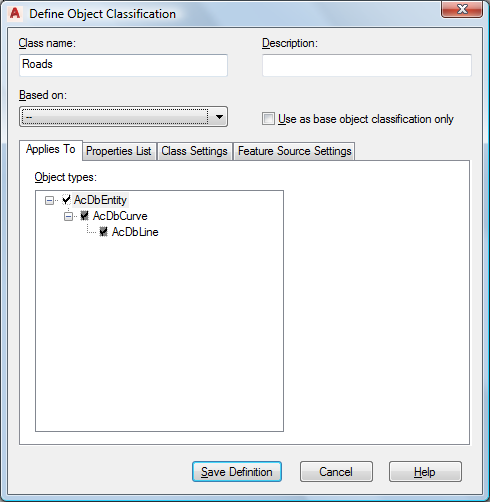
Specify the object creation method that existing objects must use to belong to this object class.
All existing objects you add to this class must use the object type you check here. Unless you know for certain that all existing road objects were created using the AcDbLine or AcDbCurve method, it is safer to check only AcDbEntity .
- Click the Properties List tab and check the properties to include in this object class.
Objects you include in this class always retain their own properties. The properties you specify here are the properties of the class as a whole. Choose properties to set their default values or allowable ranges, or to make them editable for all members of the class.
For example, to be able to change the layer, linetype, or color for all members of the Roads class as a group, select those properties. You can set default values, where appropriate. For example, you can assign all members of the Roads class to a Roads layer.
You can include the following property types:
- General properties, such as color and layer
- Miscellaneous properties, such as linetype generation
- Object properties, such as street name (ST_NAME).
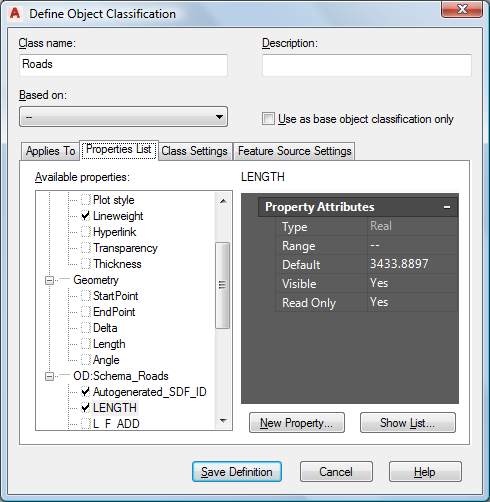
Specify the properties for objects in this object class, and any default values for those properties.
The following table shows a suggested set of General properties and values for the Roads class.
Property Value General Properties Color Red Layer Schema_Roads Linetype No value Lineweight 0.13 - Specify the object data (OD) fields and their values.
For object data fields, clear the values that are specific to the model object you chose. For example, include the NAME and ST_NAME properties to ensure that all new roads you create contain those properties. Delete the values that appear there, because each new road name will differ from the name of the model object.
For example, click the ST_NAME property and look at its values. The default value for the street name is the name of the model object. This value is incorrect for almost any new road you create. Select that value and delete it.
Objects assigned to this class have a ST_NAME property, but the value will be the name for that road (as stored in its object properties). If no value exists, the property is blank. The following table shows a suggested set of OD:Schema_Roads properties and values for the Roads class.
Property Value Autogenerated_SDF_ID No value LENGTH No value NAME No value PREFIX No value SEG_ID No value ST_NAME No value ST_TYPE No value SUFFIX No value TYPE No Value - To add a new property that specifies the number of lanes for a road, do the following:
- Click New Property.
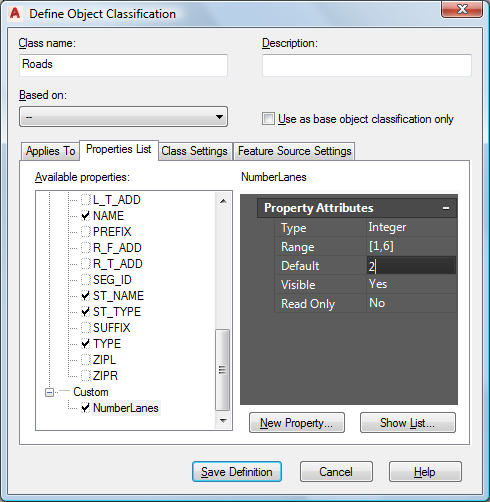
Define any custom properties for the object class.
- For Property Name, type NumberLanes and click OK.
NumberLanes is checked and selected.
- Click New Property.
- Specify that NumberLanes is a whole number from 1 through 6, with 2 being the default:
- For Type, select Integer.
- For Range, type [1,6].
- For Default, type 2.
- Click the Class Settings tab. For Create Method, select Polyline.
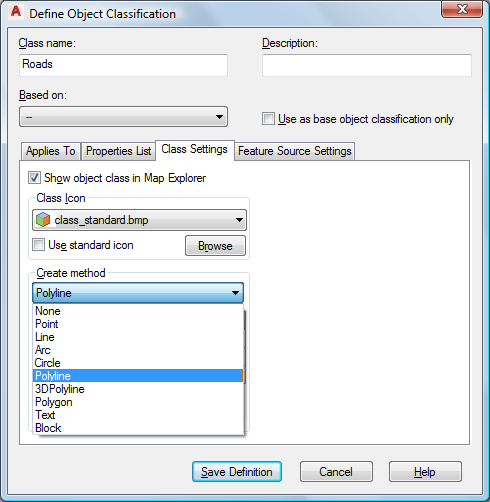
Choose the Create Method for new objects you create within this object class.
When you use this class to create a road, use a Polyline to create it. Existing objects you add to this class do not have to be polylines.
- Click Save Definition.
- Leave Classify_Roads.dwg open.
To continue this tutorial, go to Exercise 3: Add object classes to the definition file.