You can display clip ghosts that represent the clip animation in 3D space, letting you preview the trajectory of the clip and helping you manually match poses from clip to clip.
To display clip ghosts
- Select an object to display as the clip ghost, then select
Edit > Set Clip Ghost Root in the
Trax Editor menu bar.
In most cases, the root node of your character hierarchy is a good object to use, since this displays the character's skeleton as the clip ghost.
- Right-click a clip and select
Show Clip Ghost.
The Show Clip Ghost option changes to Hide Clip Ghost if the ghost is already displayed.
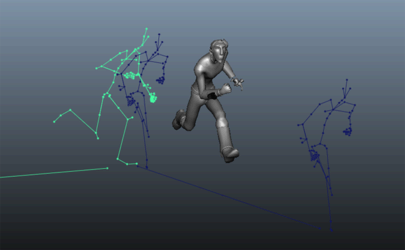
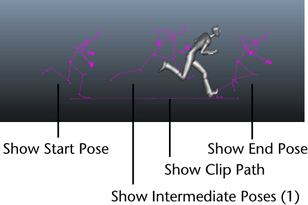
By default, clip ghosts display in the scene as 3D wireframes that represents the first and last poses in the clip, with a line drawn between them to indicate the trajectory of the animation. You can change the display of clip ghosts, for example to add more poses between the first and last frame.
To change the display of clip ghosts
- In the
Outliner, select the
clipGhostShape node for the clip whose ghost you want to modify.
Note: Clip ghost node names are based on the name of the clip in the Trax Editor. If you display ghosts for a clip named FunnyWalk, for example, the node is named FunnyWalkClipGhostShape in the Outliner.
- In the
Attribute Editor
clipGhostShape tab, change any of the
Clip Ghost Shape Attributes as follows:
- To turn off the display of the first and last pose ghosts, turn off Show Start Pose and Show End Pose.
- To display additional clip poses (besides the default first and last frames), turn on Show Intermediate Poses. Set the number of poses to display in the Intermediate Poses field.
- To turn off the line that displays between poses to indicate the clip trajectory, turn off Show Clip Path.