HumanIK character rigs require a few special considerations when you use them in the Time Editor. This is because HumanIK rigs have special keying modes such as Full Body and Body Part that control different combinations of HumanIK controllers. Because of these HumanIK-specific modes, you must make sure the appropriate controllers are selected as well.
When you work with HIK rigs and Layer Clips in the Time Editor, you must include all the controllers related to the body part you are keying in the Layer Clip and key them simultaneously. For example, to key the rotation Attributes of a shoulder controller, you need to select all the children of the shoulder controller. Otherwise, your keying will affect only the selected controller, giving the impression that nothing is animated.
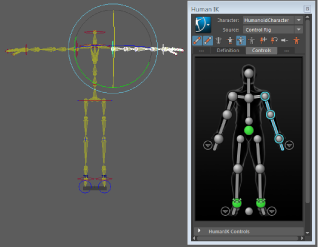
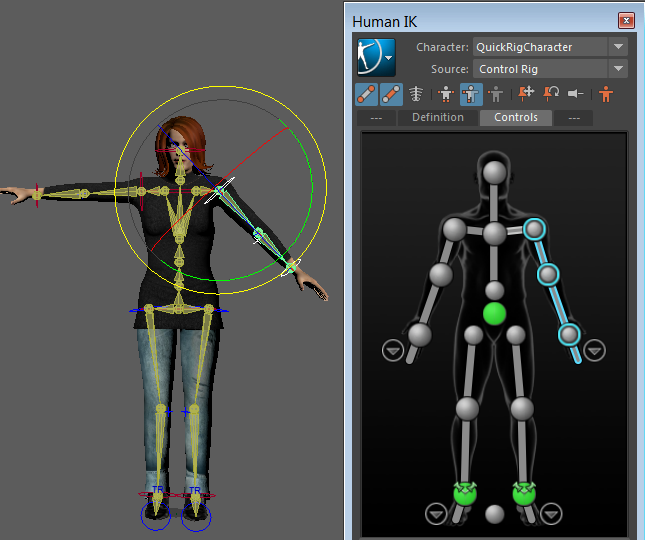
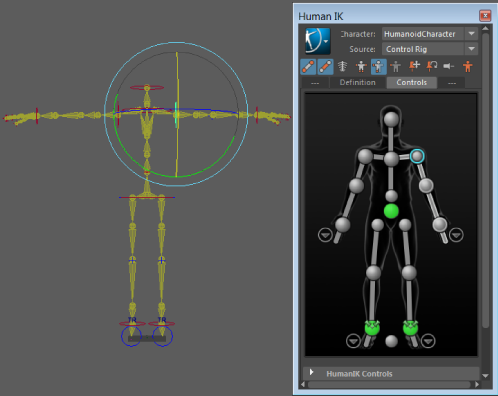
The image below shows the appropriate way to create a shoulder rotation for an HIK Character rig in the Time Editor:
Creating Pose Clip Animation clips with HumanIK character rigs
If you want to creat a Pose Clip from a HumanIK character rig, be sure to include all of the child controllers of the controller you want to create a pose clip for. For example, to create a pose clip for a shoulder controller, you would have to select all the children of the shoulder. If you set rotation on the shoulder alone, it rotates, but it would not automatically include the controllers linked to it so the effect would appear static (even though the rotation values for the controller show in the Channel Box) because none of the child controllers had been included in the animation.
Creating Layer Clips on HumanIK rigs in the Time Editor
Layer Clips in the Time Editor are affected by HumanIK's special keying modes so it is important to add all necessary attributes into a Time Editor animation layer. You can do this if you select them all in the Outliner.
When you add an Override Layer to an HIK rig, the Time Editor takes a snapshot of the current attribute values of the selected objects. This action creates static keys based on current Viewport values, which, in effect, pins the rig. (Additive layers, on the other hand, set the default values of the selected objects to 0, so there is no change after creating a layer.)
Be careful to use only the attributes you want an Override layer to drive, otherwise objects on your rig may be unintentionally pinned. Whenever you select a part of a character rig to create an Override layer, you create new animation based on the current pose; any inadvertently-selected nodes included with the layer will appear pinned at the current frame.
To create a Time Editor Animation Layer for a HumanIK rig
- Right-click on the clip and choose Select driven Objects from the Time Editor Clip contextual menu.
- Add a layer to the clip based on this selection. See Add Layer Clips to the Time Editor.
Keying into Clips and Clip Layers on HumanIK rigs in the Time Editor
Keying HumanIK rigs is also affected by the presence of HIK special keying modes, so once more, you need to make sure the appropriate controllers are selected. Normally, when you key a HumanIK controller, it keys related controllers, based on the keying modes (such as Full Body and Body Part) that are defined by the HumanIK window.
To key into a Time Editor clip driving a HumanIK rig
- Make sure a clip contains all controllers with the procedure described in Creating Animation Clips from HumanIK character rigs, above.
- Pose your rig.
- Select the clip to be keyed in the Time Editor.
- Deselect all controllers.
- Set a key (s or the key button) to key all objects inside the clip.
To key into a Time Editor Clip Layer driving a HumanIK rig
- Make sure a clip contains all controllers with the procedure described in Creating Animation Clips from HumanIK character rigs, above.
- Pose your rig.
- Select the clip layer to be keyed in the Time Editor.
- Deselect all controllers.
- Set a key (s or the key button) to key all objects inside the clip.