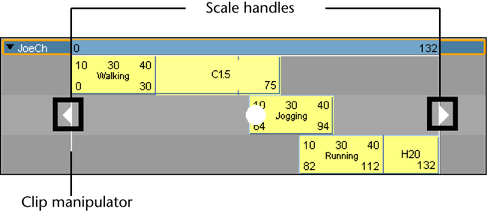
To scale a clip from the Trax Editor
- Drag the lower corner clip hotspots to scale clips.
The Scale mouse pointer
![]() appears when you are scaling clips.
appears when you are scaling clips.
When you reduce (<100% of the original clip length) or scale down a clip, you are actually compressing the animation on the clip, so that the resulting animation appears faster or sped up.
When you scale (>100% original clip length) up a clip, you are actually extending the animation on the clip, so that the resulting animation appears to be slower.
When you move or scale clips in the Trax Editor, the edges of the clips snap to the edges of neighboring clips. This is useful when working with clips that begin or end with a value that is not a whole number or if you are viewing many frames and require accuracy.
To scale multiple clips at a time
- You can select multiple clips (Shift-click) in one or more characters and scale them all at once using the scale handles of the clip manipulator.

To scale a clip from the Channel Box
- In the Trax Editor, select the clip you want to scale.
- In the Maya main menu, select
The Channel Box appears, displaying the selected clip’s channels.
- In the
Channel Box, set the
Scale channel value.
See Scale.