Use these options to set the attributes of primitives such as spheres or cubes that you create from the menu. See also Create NURBS primitives .
Sphere
You can create a sphere as the starting point for an assortment of rounded objects, for instance, eyeballs, planets, and human heads.
- Pivot
-
By default, the Pivot is set to Object, and the primitive is created at the origin. Specifically, its rotate and scale pivots are at the origin.
If you set Pivot to User Defined, you can enter values in the Pivot Point X, Y, and Z boxes to position the pivots (and the primitive).
- Axis
-
Select X, Y, or Z to specify a preset axis direction of the object.
Select Free to enable the X, Y and Z Axis Definition boxes. Enter new values to select your own axis direction.
Select Active View to create the object perpendicular to the current orthographic view. The Active View option has no effect when the current modeling view is a camera or perspective view.
- Start and End Sweep Angles
-
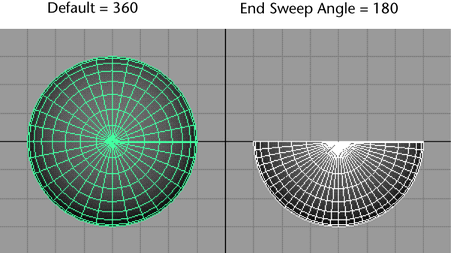
These options let you create a partial sphere by specifying a degree of rotation. Degree values can range from 0 to 360 degrees. The following example shows the top view of a sphere with an End Sweep Angle of 180 degrees.
- Radius
-
Sets the width and depth of the primitive.
- Surface Degree
-
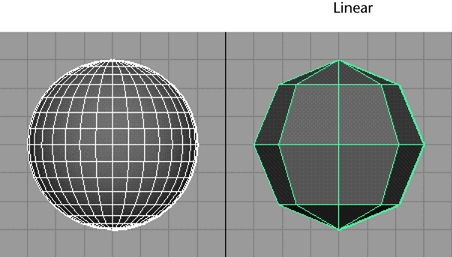
A Linear surface has a faceted appearance; a Cubic surface is rounded. For details on surface degree, see Degree.
- Use Tolerance
-
You can use this option to improve the precision of the primitive’s shape. If set to Global tolerance, the Positional tolerance value in the Settings part of the Preferences window is used (Windows > Settings/Preferences > Preferences). Lower values increase surface precision.
If set to Local, you can enter a value in the options window to override the Positional tolerance value in the Preferences window.
If set to None, tolerance is ignored and the sphere is created with the specified number of sections and spans (see below).
- Number of Sections
-
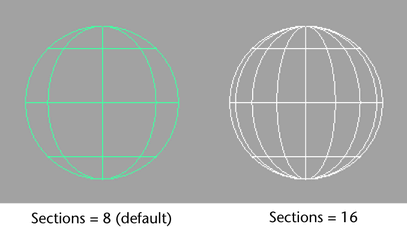
Sets the number of surface curves created on the sphere in one direction. Surface curves, also called isoparms, show the outline of the surface shape. The more sections (and spans) a surface has, the more precisely it shows surface deformations.
The following figure shows two spheres, the left with 8 sections and the right with 16 sections. A value less than 4 gives a crude sphere.
Subsequent chapters explain how to use isoparms to create new surfaces.
- Number of Spans
-
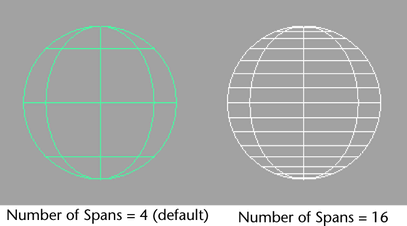
Sets the number of surface curves created on the sphere in the direction that crosses the Section direction. A value less than 4 gives a crude sphere.
Cube
A cube has six sides, each selectable. You can select a side of the cube in the view, or click its heading in the Outliner. For example, if you select leftnurbsCube in the Outliner, you select a single side of the cube. To select the whole cube, marquee-select the cube and press the keyboard’s up arrow.
Options unique to cubes follow:
- Width, Length, Height
-
Sets the cube dimensions.
- U/V patches
-
Sets the number of U and V Patches between the edges that make up the cube. This value changes the number of spans and sections.
Cylinder
You can create a cylinder with or without end caps. The options unique to cylinders pertain to end caps. You can create caps for either, both, or no ends of the cylinder. You can also create caps as separate transform nodes so you can manipulate them independently of the cylinder.
Cone
You can create a cone with or without a cap on its base. Its other options are similar to those of other NURBS primitives.
Plane
A plane is a flat surface made up of a specified number of patches. Its options are similar to other NURBS primitives.
Torus
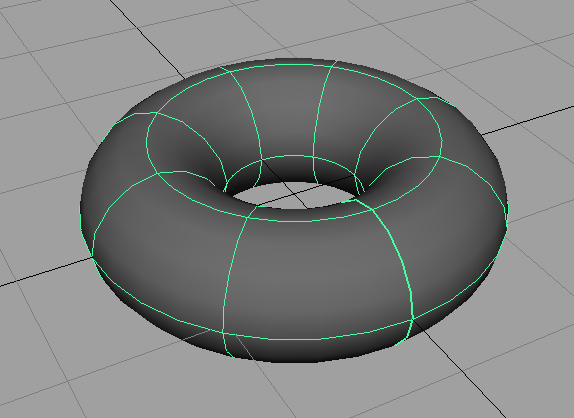
A torus is a 3D ring. It has options similar to other NURBS primitives.
Circle
A circle is a curve, not a surface. Its options are similar to a sphere.
Square
A square is a group of four curves, not a surface. A square is useful in various modeling operations, for instance, trimming window shapes from buildings. Its options are similar to other NURBS primitives.
Interactive Creation
When Interactive Creation is turned on and you select a primitive option box, a subset of primitive options appear in a tool window. There are no pivot options in the tool settings. In addition, the Radius/Width/Height/Depth options refer only to single-click creation, not to interactive creation.
When the view is set to High Quality Rendering mode, primitives created using the Interactive Creation option do not appear shaded until the primitive creation steps are complete.
You can position and scale primitives as you create them using your mouse, without having to use transformation tools. This option stays on until you turn it off. For more information, see Create NURBS primitives.
Exit on Completion
This option interacts with Interactive Creation. When Exit on Completion is turned on, you must select a primitive type again in order to create another primitive. When this option is turned off, you can interactively create multiple primitives of the same type, until you select another tool.