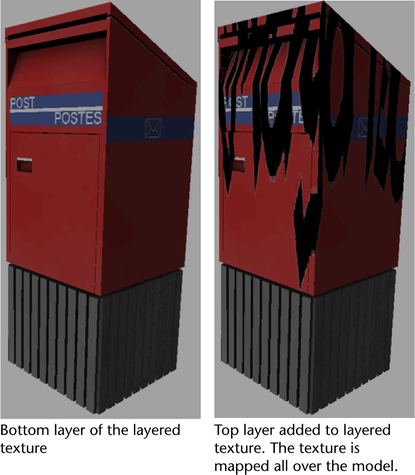
You can display a layered texture in the hardware renderer and create multiple UV sets for each different texture. This allows you to position the texture in the scene as you wish.
Displaying layered textures in the hardware renderer
This feature can be used in conjunction with the Blinn, Lambert, Phong and Phong E shaders, and can be used with up to two layers when the layered texture is connected to the Color attribute on the shader.
In each layer of the layered texture, you can choose to apply any of the 2D textures, or the Env Ball texture or the Env cube texture. This feature only supports the 2D Normal mapping method. The projection mapping and Stencil mapping methods are not supported.
To display the layered texture, you can choose between several blend modes, for example, Over, Add, or Multiply. All blend modes in the drop down list are supported. For more information regarding blend modes, please see Blend modes.
Use the Alpha attribute to tweak the alpha blending between the two layers.
Alpha is Luminance is supported for this feature. Enable this attribute so that Alpha is the luminance of the Out Color.


Support multiple UV sets for different textures
You can now use multiple UV sets for different textures in your scene. This allows for a different placement for each texture. You can move the texture using various UV editing tools as well as the present texture nodes.
Configuration
The Maya Hardware Renderer uses a different configuration of the Env Cube/Env Ball map from that of the Maya Software Renderer. You can select the configuration that you like from the Hardware Environment Lookup Attribute in the Render Settings: Maya Hardware tab.
In addition, the interpretation of the Env Cube/Env Ball map is also different depending on whether the Env Cube/Env Ball is mapped to the Color attribute or to the Reflected Color attribute. In most cases, map to Reflected Color to create a glossy surface and map to Color to look up information, for example, light maps.