The General options work with many different elements in the Motion Blend window.
Show All Ghosts
Displays all of the ghosts for the selected edit in the Viewer window. All ghosts are visible when the Show All Ghosts option is active; all ghosts are hidden when this option is disabled.
You can still select the ghosts of individual tracks that you want to display or hide by activating and disabling the Ghost options in their respective Take boxes. For more about viewing ghosts, see Ghost Root selector and Ghost option.
Snap On Frames
Forces the start and end times of all cuts and poses to snap to the nearest frame.
Force Time
Snaps the Timeline indicator in place so that it cannot be moved by dragging.
When you activate Force Time, you must navigate in the Motion Blend window by Shift-dragging (translating) and Ctrl-dragging (scaling).
Keep Edit Active
Allows the result of an edit to be shown while you are working on other edits. This is helpful when you want to see the animation of one edit while working on another.
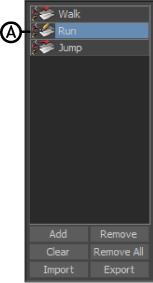
When Keep Edit Active is enabled, a white icon displays in the Edits pane to show that it is active.

Edit pane A. Keep Edit Active applied
Keep Edit Active does not show its effects outside of the Motion Blend window, and you can only have one active edit at a time.
Adjust Take Start & End
Adjusts the start and end times of the take to match the beginning time of the first cut and the end time of the last cut in the Result track.