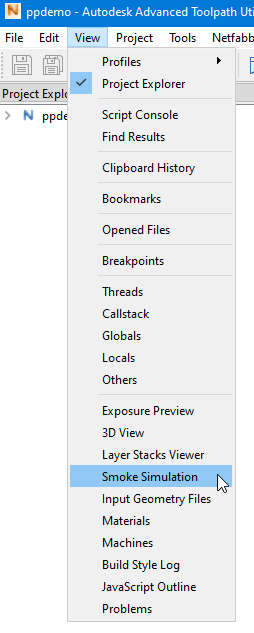
Choose to show or hide the smoke simulation window.
Smoke simulation window
When there is suitable data available, then the smoke simulation window shows the result of the smoke simulation. It is empty when smoke simulation is disabled (in the smoke simulation settings of the project properties), when there is no suitable data available in the exposure preview, or when the timeline is too short.
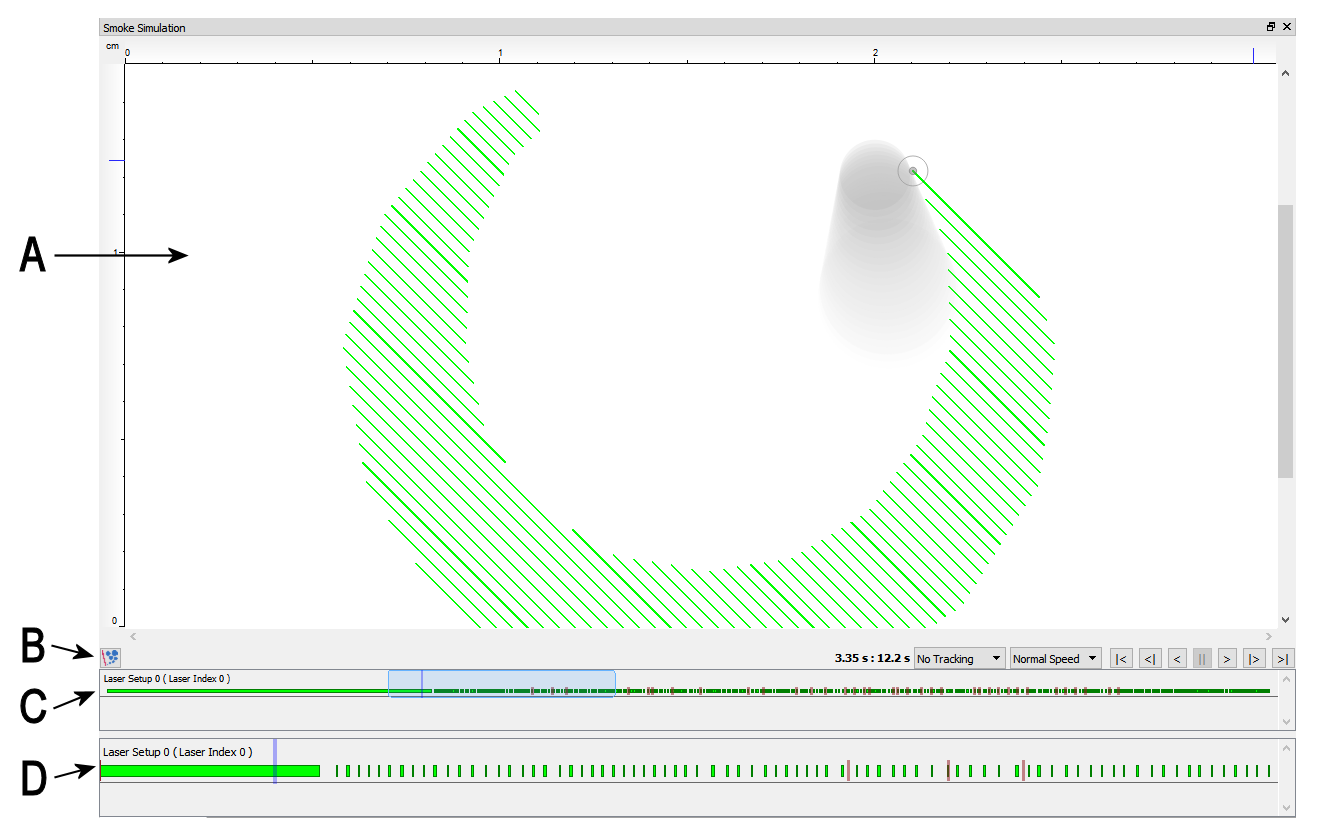
- 2D visualization
2D visualization of the toolpath, smoke and lasers according the state of the smoke simulation at the current position on the timeline. Smoke is visualized as filled fading circles.
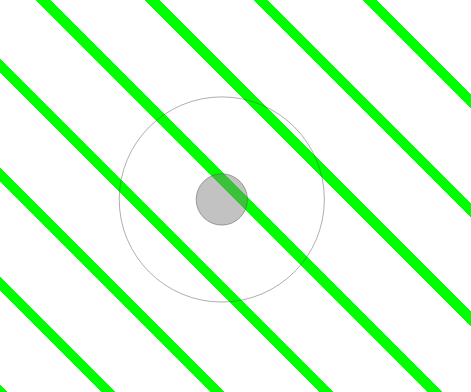
Gray circle: laser is off 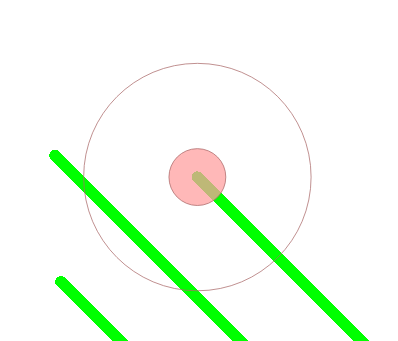
Red circle: Laser is on 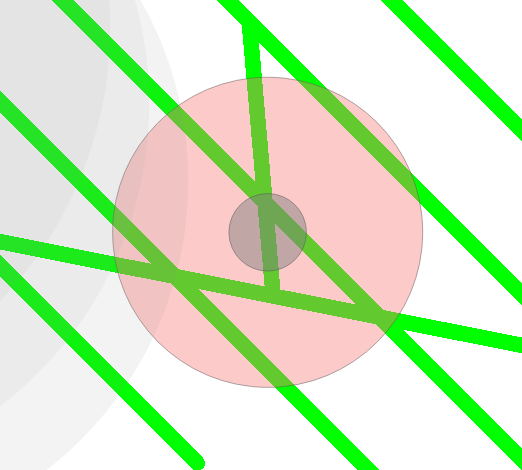
Large red circle: Smoke-Laser-Collision detected in the time interval - Smoke simulation toolbar
The smoke simulation toolbar gives access to commands related to the smoke simulation.
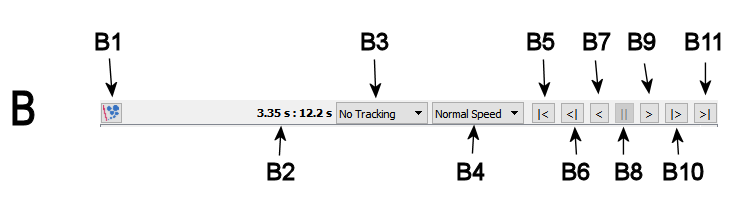
- B1: Run the smoke simulation again. Use when the smoke simulation settings were changed, for example. (Smoke simulation settings are part of the project properties).
- B2: Displays the current time on the timeline and the total length of the timeline.
- B3: Allows tracking of a laser. If a laser is selected for tracking, then the 2D visualization attempts to keep the laser spot centered during replay.
- B4: Set the play speed of the simulation.
- B5: Jump to the start position on the timeline (go to left end). If playing, then stop play.
- B6: Single step/interval backward on the timeline (go one step to the left). If playing, then stop play.
- B7: Play backward according to speed set by B4. If already backward playing, then stop play.
- B8: Stop play.
- B9: Play forward according to speed set by B4. If already forward playing, then stop play.
- B10: Single step/interval forward on the timeline (go one step to the left). If playing, then stop play.
- B11: Jump to the end position on the timeline (go to right end). If playing, then stop play.
- Smoke simulation 2D timeline (global)
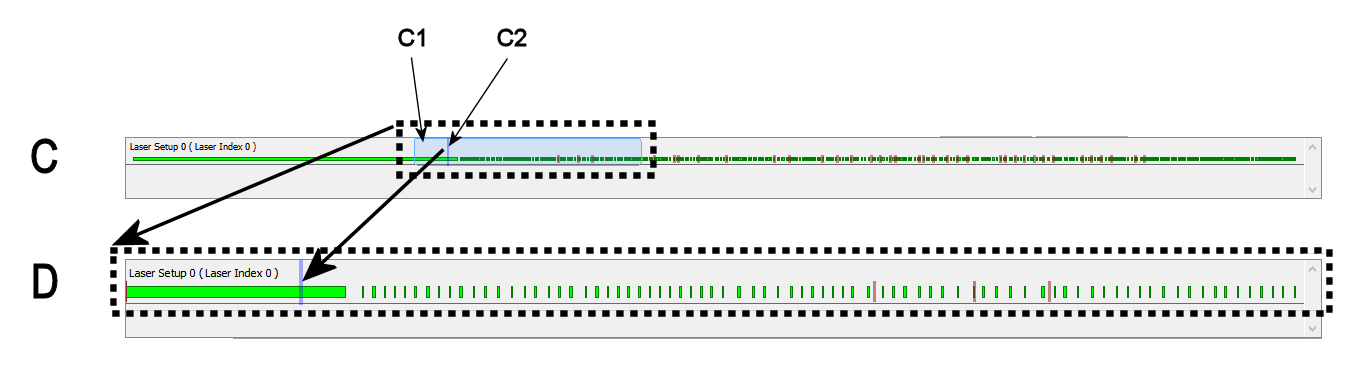
The upper area C displays an overview of the complete timeline for all the lasers.
- Smoke simulation 2D timeline (section)
The lower area D displays the part of the timeline highlighted by the focus rectangle (C1, in highlight color) in the upper area C.
Move the focus rectangle C1 in the upper area C by dragging it left and right. This also moves the timeline. Adjust the size of the focus rectangle using the mouse wheel. Any change of size and/or position of the focus rectangle is reflected immediately in the lower area D.
In area C and D, the activity periods for each laser are drawn. Also, the current position on the timeline is indicated by a semi-transparent vertical line (in darker highlight color, e.g. C2 in area C). When a laser-smoke collision is detected, then a semi-transparent red line is drawn at the end of the related time interval (the collision is also indicated in the 2D visualization A).
Change the current position on the timeline by clicking on the timeline in area C or D.