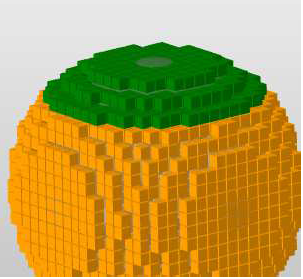
Cutting a fragment is the process of dividing it in two. Selected fragments can be cut using two different methods:
- Cut Box
- Free Cut
All selected fragments are cut with the same specifications.
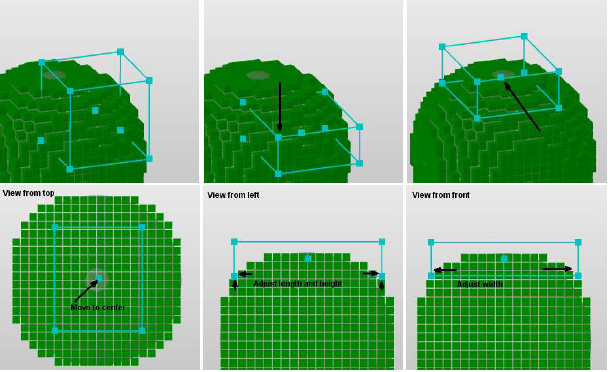
Cut Box
If you click
 Cut Box, a box is displayed in the screen in bright blue. The corner points and center are always visible, while the edges are only visible when they are in the foreground. All grid cells within or touching this box will eventually be cut out of the fragment and assigned to a new fragment.
You can change the shape of the box by clicking and dragging on a corner of the box. The whole box can be moved, if you click on the central point and move the mouse. For the exact positioning and shaping of the box, it is often necessary to change the perspective during the process. This makes it easier to adjust the edges along the three axes. When the box is positioned correctly, click Cut in the tabsheet.
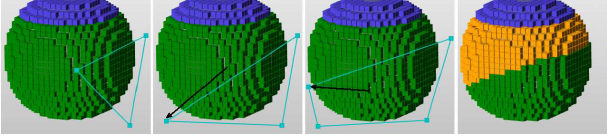
Free Cut
If you click
Free Cut
 , you can click on the display to insert cutting lines. Each click inserts a point and a cutting line connected to the last point you added. As soon as you have three points, you will automatically get a triangle of cutting lines. The next point will always be connected to the first and last point you added. If you click exactly on a cutting line, a point will be added on that line. If you right-click on a point, that point is removed. Click and drag a point to change the shape of the cutting line.
When you perform the cut, the cutting line is projected through the raster from the current viewing perspective and selected fragments are cut along that line. When you change the perspective, the cutting lines are not changed. Consequently, the performed cut depends on the perspective. When the cutting lines are positioned correctly, click Cut in the tabsheet.