This section describes how to create a profile group for the facing operation.
- Click the
New Profile Group button to display the
Profile Group Parameters, Turn dialog.

- Complete the
Profile Group Parameters, Turn dialog as shown, then click
Close.
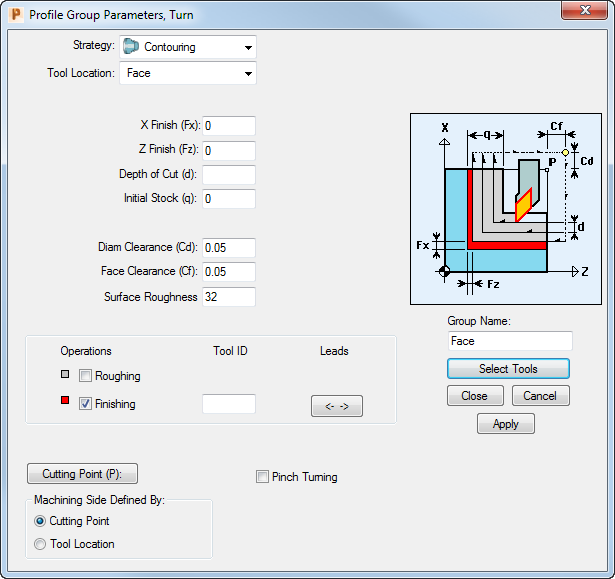
To complete the Finishing Tool ID field, click Select Tools and select T001 on the Select Tool dialog. Clicking Select closes the Select Tool dialog and returns you to the Profile Group Parameters, Turn dialog.
Because you selected a Tool Location of Face, PartMaker automatically completes the profile by applying the facing toolpath to the part geometry and the 3D model:
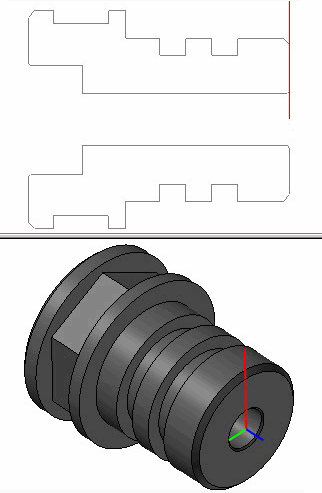
In the toolpath, the circle indicates the start point; the arrow indicates the direction of travel; and the square represents the next ‘point’ to be cut (which, in this case, is also the last point).
- To check the accuracy of the cut you have defined, click the
Verify Work Group Toolpath button to display the
Face Window Verification Options dialog.

- In the
Face Window Verification Options dialog, enter a
Verification Delay of
3, then click
OK.
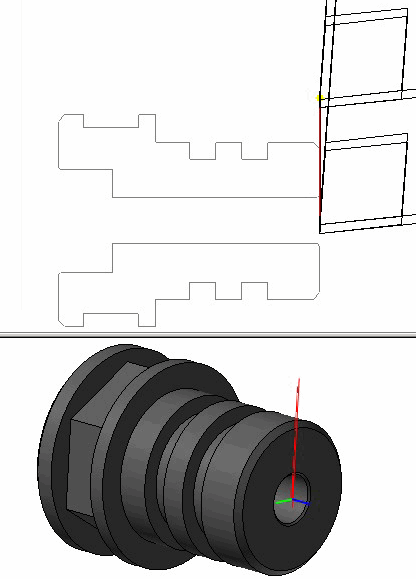
PartMaker displays a 2D representation of the tool moving across the face of the part.
- Click the
Hide Every Toolpath button to remove the verification details from the display.
