Use the Insert tab to define the geometry of the cutting portion of the turning tool. The options available vary depending on the type of turning tool:
Profile turning tool
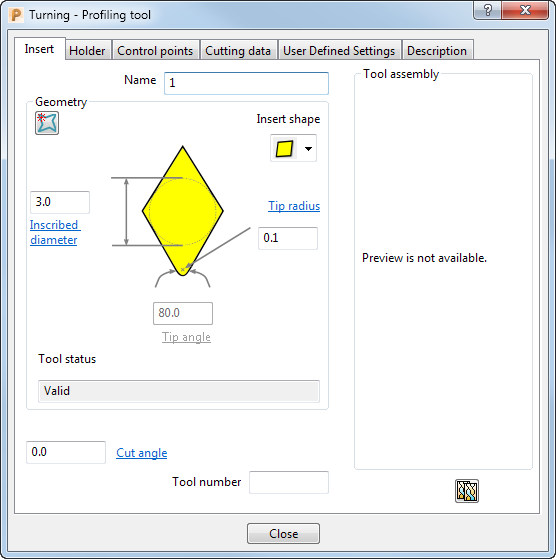
Name — Enter a name for the tool.
 — Click to create a pattern of the insert.
Insert shape — Select a shape for the insert from the list.
Inscribed diameter — Specifies the diameter of the circle that inscribes the insert. This controls the size of the insert.
Tip radius — Specifies the radius of the cutting tip.
Tip angle — Specifies the angle of the tip. This value is automatically determined depending on which Insert shape you choose. You can specify your own Tip angle if you choose  from the Insert shape list.
Tool Status — Check the field to make sure you are creating a valid tool. When you change the tool geometry the status is automatically updated.
Cut angle — Specifies the angle of the insert relative to the holder.
Tool Number — Enter the tool number. This is allocated to the tool and added to the cut file.
 Copy Tool — Click to create a new tool entity based on the current tool. It has the same name as the previous tool with the addition of _1. You can then change any parameters you want without changing the original tool, but you need to bear in mind that, where the original tool is used in an active toolpath, the new tool assembly replaces the original tool assembly. Use this to create a shank and/or holder for an existing tool definition and is useful when collision checking.
Grooving turning tool
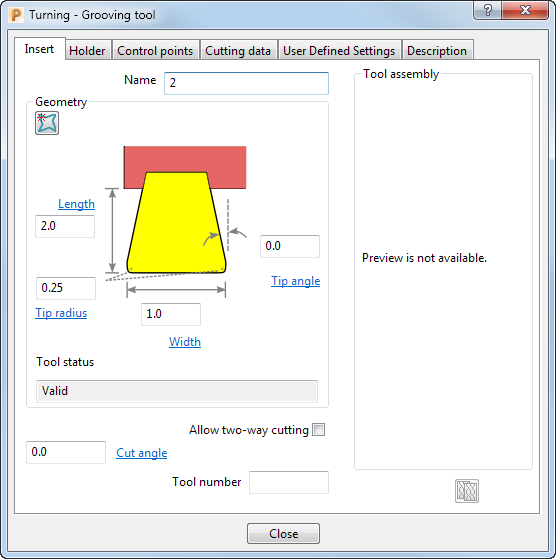
Name — Enter a name for the tool.
— Click to create a pattern of the insert.
Length — Specifies the length of the insert.
Tip radius — Specifies the radius of the insert tips.
Width — Specifies the width of the insert.
Tip angle — Specifies the angle of the insert tips.
Tool Status — Check the field to make sure you are creating a valid tool. When you change the tool geometry the status is automatically updated.
Allow two-way cutting — Roughing is bi-directional. Finishing is performed using a unique strategy that is enabled by having a grooving tool that cuts in both directions.
Cut angle — Specifies the angle of the insert relative to the holder.
Tool Number — Enter the tool number. This is allocated to the tool and added to the cut file.
Copy Tool — Click to create a new tool entity based on the current tool. It has the same name as the previous tool with the addition of _1. You can then change any parameters you want without changing the original tool, but you need to bear in mind that, where the original tool is used in an active toolpath, the new tool assembly replaces the original tool assembly. Use this to create a shank and/or holder for an existing tool definition and is useful when collision checking.
To display a Tool dialog:
- Click Home tab > Tool panel > Create Tool; or
- From the Tools context menu, select Create Tool.