By default, all boundaries are created as private boundaries. A private boundary uses the tolerance, thickness, and tool of its associated toolpath. The private boundary controls all other properties (such as limits, collision checking, and block).
When you create a boundary you can indicate if you want to allow it to become private. It is not private at this stage but becomes private when it is used by either a toolpath or stock model.
When creating a toolpath using a private boundary, the toolpath takes ownership of the boundary and the boundary is removed from the boundaries branch of the Explorer. However, it is still accessible from the individual toolpath branch of the Explorer and from the Limits page of the toolpath dialog.

A private boundary icon is a different colour to an ordinary boundary. For a selected surface boundary, an ordinary boundary is represented by  and a private boundary by
  .
.
When you delete a toolpath using a private boundary, the boundary is deleted along with the toolpath.
If you change the private boundary associated with a toolpath, the toolpath releases the boundary and it re-appears in the boundaries branch of the Explorer.
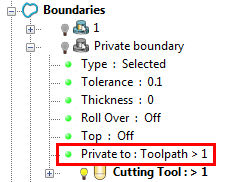
To display private boundaries in the Boundaries branch of the Explorer, click File tab > Options > Application Options to display the Options dialog, then click Boundaries > Private boundaries > Display private boundaries in the explorer. If you display private boundaries in the Boundaries branch of the Explorer, you can see the toolpath that uses it.

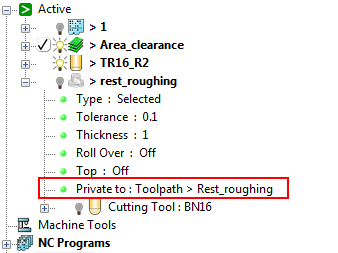
You can also use the Active branch to see which toolpath the active private boundary is associated with.
