To add a menu option to an entity context menu
- Create an XML file and name it as the entity type it represents.
The names allowed are: Boundary, Featureset, Group, Level, MachineTool, Macro, Model, NCProgram, Pattern, StockModel, Tool, Toolpath, and Workplane. The name is not case sensitive.
- Place the <entity_type>.xml file in the PowerMill Home\pmill4 folder.
Format of the custom entity menu option
The format of the custom addition to the PowerMill entity menu is:
<?xml version="1.0" ?>
	<menupage>
		<button label= "The name of the menu option"
		command= 'SOME POWERMILL COMMAND/>'
	</menupage>
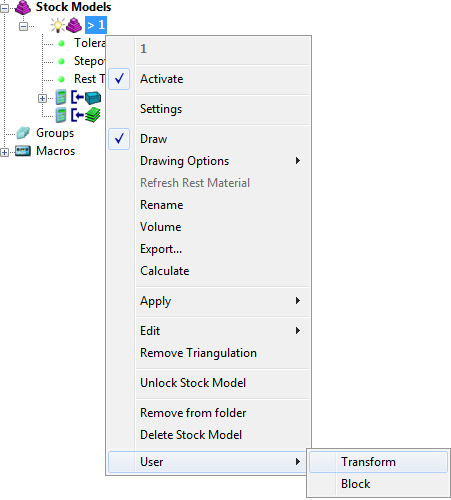
For example, to create this sample submenu for an individual stock model entity:

The code in the stockmodel.xml file is:
<?xml version="1.0" ?>
	<menupage>
		<button label= "Transform" command= 'FORM MODELTRANS EDIT MODEL "%s" INTERACTIVE'/>
		<button label="Block" command='FORM BLOCK'/>
	</menupage>
label — The name of the menu item.
command —The PowerMill command.
% —The wildcard character which represents the individual entity name.
Adding spaces and submenus to the menu option
To add spaces to the menu, add the <spacer/> tag to the XML code. To add submenus, include the submenu name in a <menupage> tag.
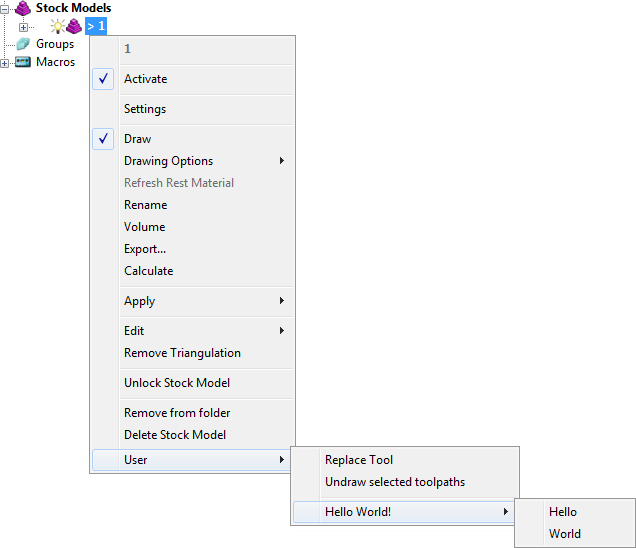
For example, to create this User menu and submenu called "Hello World!" with relevant spaces:

The code in the stockmodel.xml file is:
<?xml version="1.0" ?>
	<menupage>
		<button label="Replace Tool"
		command='EDIT TOOLPATH "%s" REPLACE_TOOL ;'
		multiple_selection="allowed"/>
		<button label="Undraw selected toolpaths"
		command='MACRO d:/temp/test.mac "%s"'
		multiple_selection="allowed"/>
	<spacer/>
	<menupage label="Hello World!">
		<button command='PRINT "HELLO"' label="Hello"/>
		<button command='PRINT "WORLD"' label="World"/>
	</menupage>
</menupage>
Enabling multiple selections for a menu option
To enable custom menus on multiple selected entities, add the keywords multiple_selection="allowed" for each <button /> tag.
For example:
		<button label= "Transform"
		command= 'FORM MODELTRANS EDIT MODEL "%s" INTERACTIVE'
		multiple_selection="allowed"/>