This example shows you how to draw lines with Intelligent Cursor constructor line and label guidance:
- Click Pattern tab > Create panel > Pattern to create a new pattern.
- Click Pattern tab > Edit panel > Curve Editor to display the Curve Editor tab.
- Click Curve Editor tab > Create panel > Lines > Continuous. This displays the
Continuous Line toolbar and the mouse pointer changes to a cross-hair
 .
.
- Click in the project area to start a continuous line and drag to create a line.
Intelligent Cursor displays a constructor line and the length of the line from the last point selected as guidance.

- Click once to define an endpoint for the line. The cross-hair changes to
 .
.
- Draw a line perpendicular to the first line.

Intelligent Cursor displays the construction lines and two labels.
 indicates that the line drawn is perpendicular.
 displays the length of the line.
- Double-click to finish drawing the line.
Tip: The labels displayed by the
Intelligent Cursor help you judge the angle, direction, length, and key points of the drawn objects.
Intelligent Cursor context-sensitive labels:
When you hover your cursor over curves during construction the cursor changes to indentify important relationships:
-
 — The constructor line is parallel to either of the axes of the principle editing plane.
-
— The constructor line is perpendicular to a tangent.
-
 — The constructor line is tangential to the curve.
-
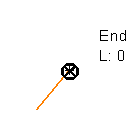
— Double-clicking at this point completes a curve or line.
-
 — Intelligent Cursor is snapped on a curve but not to a specific point.
-
 — A special point on the curve that has geometric significance, for example, the mid-point.
-
 — The point where two curves cross.
-
 — The mid-point of the curve.
-
— The length of the constructor line.
-
 — The angle of an arc.
-
 — The radius of an arc.
-
 — The origin of the workplane or transform.
-
 — Centre point of an arc.
-
 — The start or the end point of a curve.

 - Created lines, arcs, circles - coloured orange
 - Key points
 - Constructor lines - coloured grey
 - Cursor cross-hair
 - Constructor labels and line lengths