Stitching is a method of closing small gaps between surfaces and curves. It moves the points on a selected source surface curve, onto a target object, which can be a surface, surface curve or wireframe curve.
To stitch a surface:
- Click Surface Tools tab > Modify panel > Edit Curves > Stitch to display the
Stitch dialog:
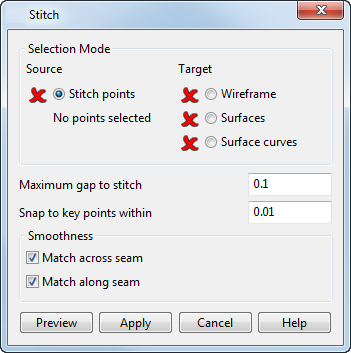
- Use the options on the dialog as follows:
Selection Mode
- Source — Select the Stitch points option, and then click the points on the source item that you want to stitch.
- Target — Select the type of target object you want to stitch the points onto, then click the target in the graphics window.
Note: If you want to stitch a selection of points on the source curve, left-click those points while holding the Ctrl or Shift keys to add or remove points to the selection. The selected points are highlighted. If no points are selected, then all points on the curve are stitched.Note: You cannot use targets that contain a mixture of surfaces and curves, as each uses different stitch options.Tip: When stitching onto a surface, you can edit the tangent angles along the curve of the source surface, to smoothly match those of the target surface.- Maximum gap to stitch — Specify the size of the largest gap to stitch. If the stitch point must move a distance greater than this value, then this point is not moved onto the target.
-
Snap to key points within — Specify the radius within which a stitch point snaps onto a key point of the target.
If the target is a surface curve, the stitch point may snap to a key point that does not necessarily lie on the target surface curve.
Smoothness — Use these options to join the source surface smoothly onto the target surface or surface curve, using the seam; where the selected curve of the source surface meets the target.
- Match across seam — Smooths the selected curve onto the target, in the opposite direction to the selected curve on the target.
-
Match along seam — Smooths the selected curve onto the target, in the same direction as the selected curve on the target.
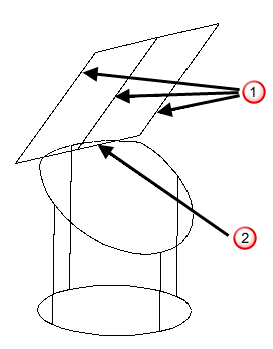
For example, the curves across
 and along
 the stitch surface are shown below:
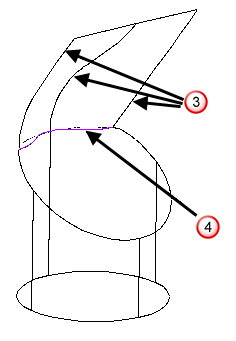
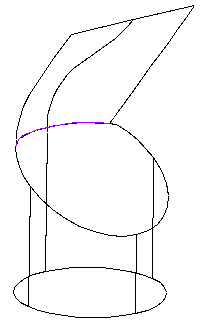
If Match across seam is selected, the curves across the surface join the cylindrical surface smoothly
 , but the curve along the surface does not join smoothly
 :
:
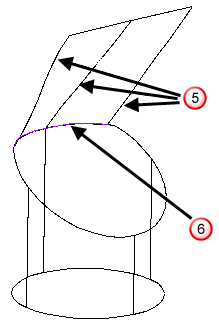
If Match along seam is selected, the curves across the surface do not join the cylindrical surface smoothly
 , but the curve along the surface does join smoothly
 :
:
If both of these options are selected, the curves along and across the surface join smoothly:
- Preview — Displays the stitched surface as defined by the settings on the dialog. Continue to change the settings until you are satisfied with the previewed stitched surface.
- Click Apply to save the changes. Each stitch point is moved onto the nearest position on the target surface or curve.
- Click Cancel to close the dialog. Any unapplied changes are lost.