Use the Cloud/Mesh option to morph a surface or solid model, relative to a separate cloud or mesh.
|
Before morph
|
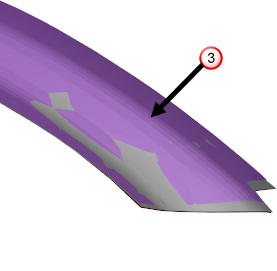
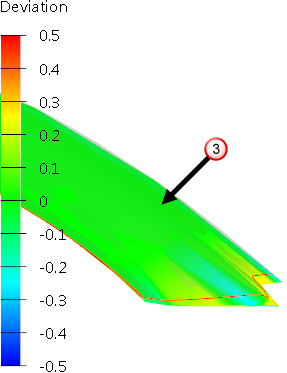
After morph
|
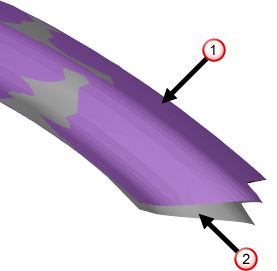
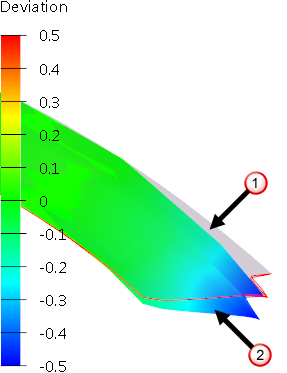
 — Mesh measurement data.
 — Solid model.
 — Model morphed towards data.
To morph to a cloud or mesh:
- Ensure you have a solid or surface visible.
- Click Edit tab > Morph panel > Cloud/Mesh to display the Morph to Cloud/Mesh dialog.
- Use the
Morph to Cloud/Mesh dialog to morph the object:
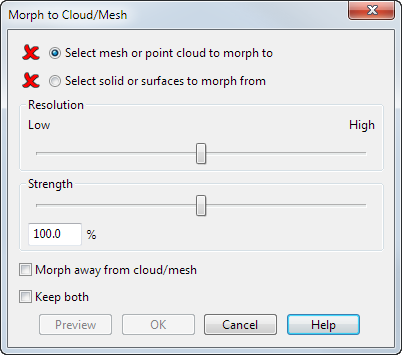
-
Select mesh or point cloud to morph to — Select this option and then select the reference cloud or mesh to morph to. When an appropriate cloud or mesh is selected the
 changes to a
 .
.
-
Select solid or surfaces to morph from — Select this option and then select the solid or surface model that you want to perform the morph on. When an appropriate solid or surface is selected the
changes to a
.
- Resolution — Use the slider to control the accuracy of the morph.
- At a low resolution, the morph is faster, however small details are smoothed out. At a high resolution, the morph is slower, but small details are captured.
- Strength — Use the slider, or enter a value to control the morph movement.
- At 100% the morph moves the solid or surface up to the mesh or cloud. If desirable, you can move the solid or surface by a smaller or larger amount. For example, at 50% the CAD geometry is morphed half way to the measurement data.
- Morph away from cloud/mesh — Select this option to apply an inverse morph, and move the CAD geometry in the opposite direction to the measurement data. This allows you to compensate for artifacts in the manufacturing process, such as spring back.
- Keep both — Select this option to keep both CAD models, before and after the morph.
- Preview — Click this to display a preview of the morph.
-
Select mesh or point cloud to morph to — Select this option and then select the reference cloud or mesh to morph to. When an appropriate cloud or mesh is selected the