You can change a segment of a curve or a composite curve to contain a certain number of points, which lie equidistant from each other.
For a surface curve, you can only redistribute its points between two points, but not insert new ones.
To repoint a curve:
- Select one or more curves. For example:
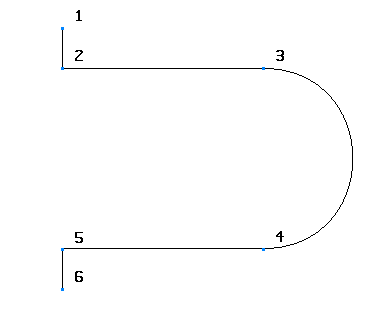 Note: You can only repoint multiple curves on a single surface, and all the curves must lie in the same direction.
 - Click Curve Tools tab > Fit panel > Repoint.
- Use the
Repoint curve dialog to redistribute the points along the curve:
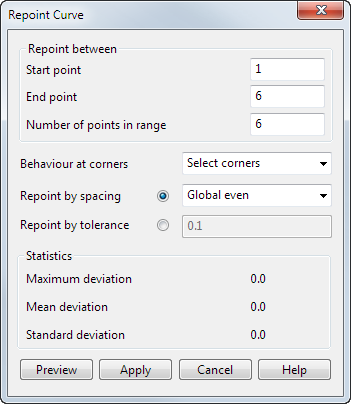
Repoint between — The options in this section are used to specify the points you want to repoint:
-
Start point
and
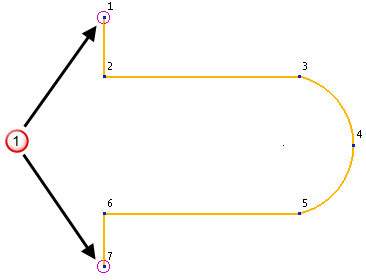
End point — You can select the start and end points of the segment of the curve where you want to repoint. By default, the start and the end points of the curve are given
 . Markers are placed at the named points.
-
Number of points in range — (Wireframe curves and composite curves only.) This is the number of new points added to the curve and evenly distributed between the start and end points.
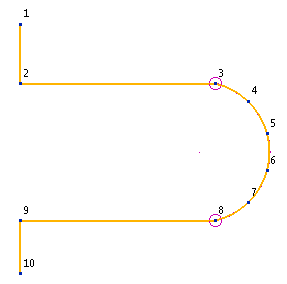
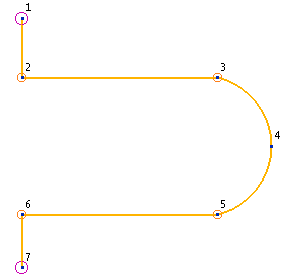
In this example, point 3 is selected as the Start point and point 5 as the End point:
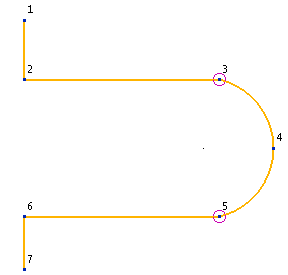
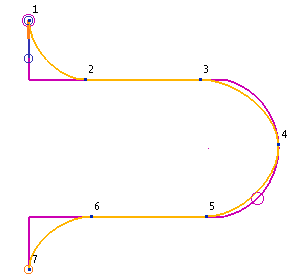
If you enter 6 as the Number of points in range value, the following curve is produced:
Behaviour at corners — (Wireframe curves and composite curves only.) You can select points you do not want to remove. These points are marked as corners.
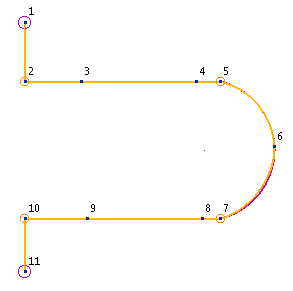
If we have no corners selected and use the default settings (that is, Start Point = 1, End Point = 7 and Number of points in range = 7), we get the following curve.
- New points are added equidistant from each other.
- All original points are removed from the curve.
- The tangent magnitudes of the new points are freed.
When corners are added, the same thing happens except the corner points remain fixed in the curve.
Note: Corner points are not included in the points in the Number of points in range.Behaviour at corners list has three options:
-
Selected corners — Select this option and click points to select corners.
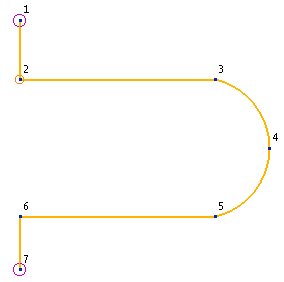
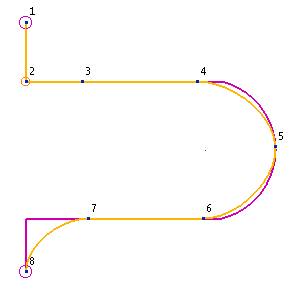
In this example, point 2 is selected. A corner marker is added to the curve.
This creates the following curve.
You cannot select corners on multiple wireframe curves using the Select corners option, but you can choose the Keep all discontinuities option to add corner points.
- Remove all corners — This removes all corners from the curve.
-
Keep all discontinuities — This adds corner markers at all discontinuities along the curve. Any other corners already marked, remain marked.
In this example, points 2 and 6 are discontinuous and are therefore marked as corners.
This gives the following curve.
To remove a corner marker, click the corner.
Repoint by spacing — Select this option to repoint a curve using a spacing defined method:
- Global even — This option repoints the curve by spacing the points evenly along the curve, depending on the curve length and the number of points. A larger number of points provides a more accurate repoint.
- Regular — This option repoints the curve by taking the smallest distance between two points and uses this spacing along the whole curve, between the currently existing points.
- Linear — This option repoints the curve by taking the smallest distance between two points and uses this spacing along the whole curve, between the currently existing points. The spacing is stretched and compressed slightly between the existing points to provide a linear blend.
Repoint by tolerance — Select this option to repoint the curve to fit a specific tolerance. When this option is selected the number of points is automatically calculated by PowerShape.
Statistics — The fit accuracy of a repointed curve to the original curve is represented by the following values:
- Maximum deviation — the maximum value that the repointed curve varies from the original curve.
- Mean deviation — the average value that the repointed curve varies from the original curve.
- Standard deviation — a representation of the amount of variation from the mean.
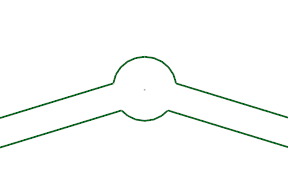
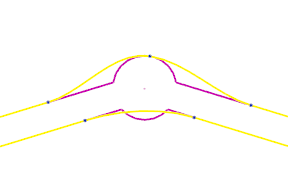
Preview — Updates the Statistics area with the repointed curve data. The original and repointed curves are also displayed.
-
Start point
and
End point — You can select the start and end points of the segment of the curve where you want to repoint. By default, the start and the end points of the curve are given
- Click OK to save your changes and close the dialog.