Lights illuminate a shaded image to produce real-life lighting conditions, making the shading and the shadows look more realistic. You can add lights to focus on the main object in a scene to emphasize its importance.
To configure the lights in the shaded view:
- Select Visualisation tab > Format panel > Lights to display the
Light Studio Selector dialog:
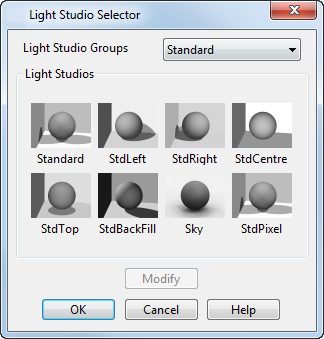
- Select an option from the Light Studio Groups list:
- Standard — These are the default lights used in the modelling views. Standard lights are located at infinity and their directions are specified relative to the camera.
- SingleSpot — Displays a selection of 8 single spotlight options.
- TwinSpots — Displays a selection of 8 twin spotlight options.
- Observer — Spotlights are positioned in the model relative to the current view. When spotlights are positioned and you rotate the view, the spotlights move.
-
Custom — Displays customizable
Light Studios as thumbnails. A desk lamp thumbnail indicates an unused light studio.
To create a custom light studio:
- Select a desk lamp thumbnail.
- Click
Modify to display the
Modify Lights dialog.
Use this dialog to customize the selected Light Studio.
- Click OK to save the customized light studio and close the dialog.
- Select the direction of the lights from the Light Studios
area. Each
Light Studio Group option has associated
Light Studios options. The default light studio group is
Standard; it contains the following light sets:
- Standard
- StdLeft
- StdRight
- StdCentre
- StdTop
- Sky
- StdPixel
- Click OK to accept the changes and close the dialog. The changes are displayed on the object in the graphical window.