To specify advanced creation options when creating a surface using the From triangles option, click Advanced on the Smart Surfacer to display the Surface from triangles dialog:
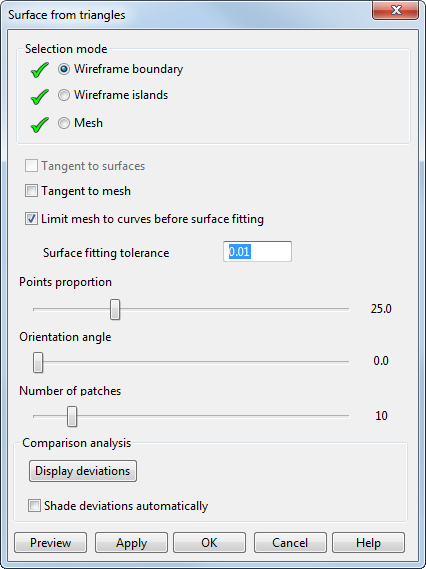
Use the options on the dialog as shown in this example:
- Select the following on your model:
 Wireframe boundary
 Wireframe islands
 Mesh
Mesh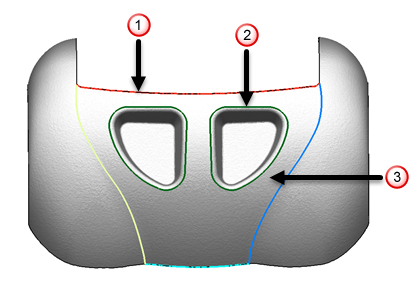
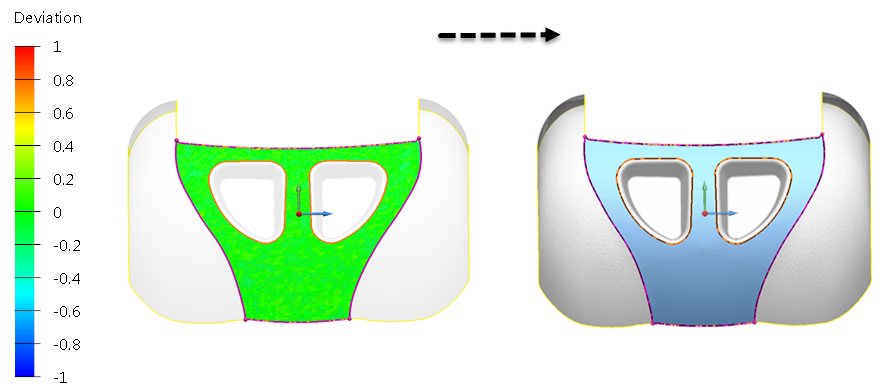
When the mesh is selected, click Display deviations to display the Comparison analysis colour map and deviation on the preview of the surface:
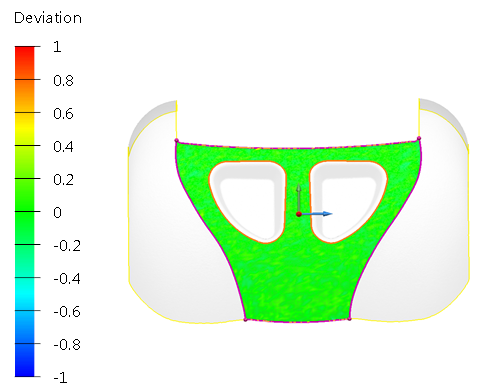 Note: Select Shade deviations automatically to set these options to be displayed as default.
 - Select the following options as appropriate:
- Tangent to surfaces to create the surface tangent to the surrounding surfaces on which the selected curves are dependent.
- Tangent to mesh to create the surface tangent to the mesh.
- Limit mesh to curves before surface fitting to create a surface from a mesh that has been limited. This is the default setting and will create a surface that ignores any triangles that are outside the limiting curve. If this option is deselected, the surface that is created is fitted to the whole mesh.
- Enter the Surface fitting tolerance to indicate the allowable discrepancy between the mesh and the created surface. A large tolerance will produce a surface that does not closely match the underlying mesh.
- Move the slider to change the Points proportion. This sets the percentage of points inside the boundaries that are used to fit the surface.
- Move the slider, or left-click and drag the graphical handles, to change the Orientation angle that defines the direction of the surface laterals and longitudinals. The new orientation is automatically previewed. In the following example, shade deviations and the colour map have been deselected so that the surface laterals and longitudinals are visible.
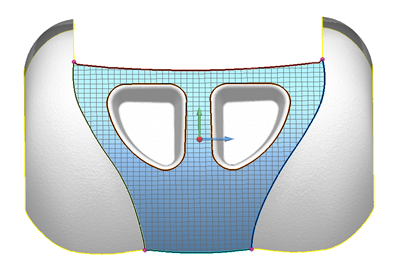
The default angle is 0.0; changing the angle may produce a surface that is a better fit for the triangles. In the example below, the Orientation angle has been changed to 45
 .
.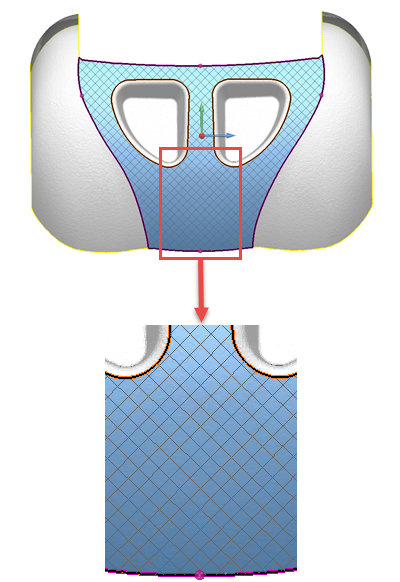
- Move the Number of patches slider to adjust the number of patches. Increasing the number of patches will improve the fit of the surface to the triangles.
- Click Hide deviations to display the model without the colour map.
If the colour map is not displayed, click Display deviations to show the deviations and the colour map.
- Shade deviations automatically is deselected by default. Select this option to change the default setting when the dialog is next displayed.
- Click Preview to see the results. If necessary, make changes and click Preview.
- Click Apply to create the surface. The dialog continues to be displayed. Create additional surfaces as required.
- When all the surfaces have been created, click OK. To cancel the creation of all the surfaces, click Cancel.