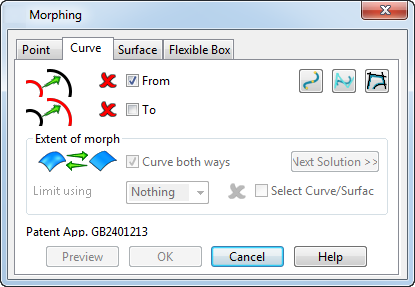
This page allows you to select two curves and then use them to define a morph. It also allows you to limit the morph using a decay curve of a surface. You should bear the following important points in mind when creating the two curves:
- Both the reference (From) and control (To) curve must have the same number of points.
- Both the reference (From) and control (To) curve must be open or both closed.
- Keep the reference (From) and control (To) curves simple.
- If the curves are open, it is recommended that the start and end points of the curves coincide.
- If open curves are also tangential at the start and end, smoother results are produced in cases where the model to be morphed extends beyond the ends of the curve.
- Limit curves and surfaces should not cross the reference (From) curve.
You should bear the following important points in mind when creating the limit curve or surface:
- Keep the limit curve or surface simple.
- As you move over the model, it is important that there is always a unique closest point on the curve or surface and that the closest point does not jump from one place to another. Otherwise, the morphed model may contain kinks.
In contrast, the model being morphed may be as complicated as you like.
The Advanced options let you separately select the two curves to be used in morphing. In addition, it allows you to use a curve or surface to limit the region that is affected by the morph.

From — With this option selected, choose the reference curve.
To — With this option selected, choose the control curve.
 — Create a
Bézier curve to define the morph.
 — Create a
B-spline curve to define the morph.
 — Trace a curve to define the morph.
Extent of morph
Curve both ways — This option affects the extent the morph is limited. Select this option to curve the model in two directions relative to the curve. Deselect this option to keep the distortion constant along an axis controlled by the current principal plane. If the model has no workplanes, the World workplane is used.
Limit using — Select an option from the drop-down list to use a curve or surface to limit the extent of the morph. You can choose from:
- Nothing
- Distance
- Curve
- Surface
Select Curve/Surface — This option becomes active when you select
Curve or
Surface from the drop-down list. Select this option and then select the appropriate limiting curve or surface. If the selection is successful, the icon changes from
 to
to
 .
.
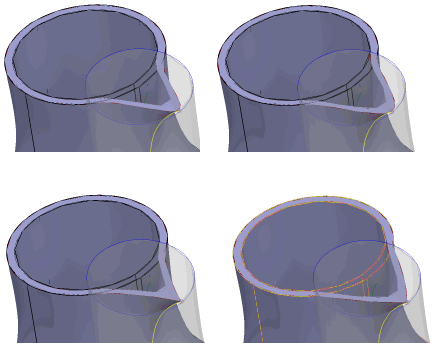
Next Solution — Cycle through the four possible solutions and select the one that is best for your needs.

Points are moved depending on the distance from their corresponding point on the From curve and the distance from the closest point on the selected limit curve or surface. The closer the point is to the limit curve or surface, the less the point moves. Beyond the selected curve or surface, the points are not moved at all.