You can create split surfaces using two methods:
- offsetting a single split line
- fitting an existing surface to split lines
Creating a split surface by offsetting a single split line
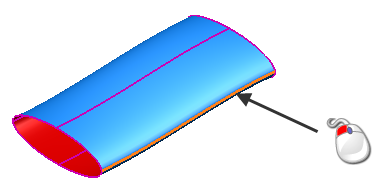
The split surface is created by selecting a composite curve as the split line. This split line is then offset by a specified distance and along a specified angle. One side of the split surface is the split line and the other side is the offset of the split line.
- Click Surface tab > Manufacture panel > Split.
- Select the
Composite curve option from the
Split Surface dialog:

- Select the composite curve which defines the split line:
- Complete the dialog.
Creating a split surface by fitting a surface to split lines
The split surface is created by modifying an existing surface to fit split lines. The split surfaces:
- preserve the outline of the surface and the tangency at the outline.
- fit the wireframe at directions parallel to the principal plane.
PowerShape also attempts to trim off the surface inside the wireframe.
- Click Surface tab > Manufacture panel > Split.
- Select the
Surface option from the
Split Surface dialog:
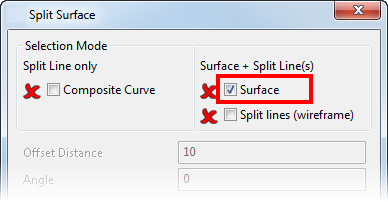
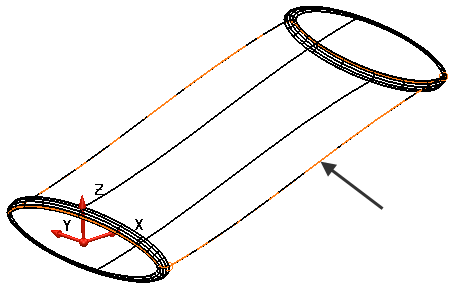
- Select the surface:
- Select the
Split lines option from the
Split Surface dialog:
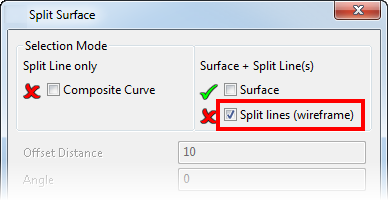
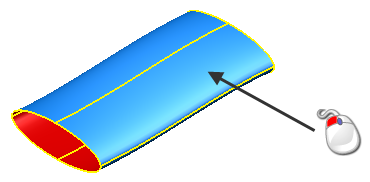
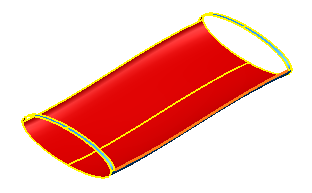
- Select the section of wireframe along which you want to split the surface:
- Click
Preview to see the result.
PowerShape generates the split surfaces and attempts to trim off the surface inside of the wireframe:
- Change the selection if necessary.
- Click OK when you have the required results.
- A split surface is a Power Surface and is edited accordingly. For further details, see Editing Power Surfaces.